In this article, we share our complete Astro VS Code Setup with you to ensure that you have the best possible experience when developing with the Astro JS Web Framework. All of the recommendations in this guide are officially supported by Astro.
Table of Contents
VS Code for Astro
We recommend using VS Code for Astro since it’s easy to use and beginner-friendly. Also, there is an official Astro VS Code extension that we can use to work with our Astro files and help with linting, formatting, and IntelliSense. To install VS Code, follow the steps for your respective operating system below.
Install VS Code on Windows
To install VS Code on Windows, follow these steps:
- Open a web browser and go to the VS Code website: https://code.visualstudio.com/
- Click the “Download for Windows” button to download the VS Code installer.
- Once the download is complete, double-click the installer file to begin the installation process.
- Follow the on-screen instructions to complete the installation.
- Once the installation is complete, click the “Launch” button to open VS Code.
Alternatively, you can also install VS Code by downloading the installer from the Microsoft Store. To do this, follow these steps:
- Open the Microsoft Store and search for “VS Code.”
- Click on the “VS Code” entry in the search results.
- Click the “Get” button to download and install VS Code.
- Once the installation is complete, click the “Launch” button to open VS Code.
Install VS Code on macOS
To install VS Code on macOS, follow these steps:
- Open a web browser and go to the VS Code website: https://code.visualstudio.com/
- Click the “Download for Mac” button to download the VS Code installer.
- Once the download is complete, double-click the installer file to begin the installation process.
- In the pop-up window, drag the VS Code icon into the “Applications” folder.
- Open the “Applications” folder and double-click the VS Code icon to launch the app.
Alternatively, you can also install VS Code by downloading the installer from the Mac App Store. To do this, follow these steps:
- Open the Mac App Store and search for “VS Code.”
- Click on the “VS Code” entry in the search results.
- Click the “Get” button to download and install VS Code.
- Once the installation is complete, click the “Launch” button to open VS Code.
Install VS Code on Ubuntu
To install VS Code on Ubuntu, follow these steps:
- Open a terminal and use the following command to add the VS Code repository to your system:
sudo apt-get install wget gpg
wget -qO- https://packages.microsoft.com/keys/microsoft.asc | gpg --dearmor > packages.microsoft.gpg
sudo install -D -o root -g root -m 644 packages.microsoft.gpg /etc/apt/keyrings/packages.microsoft.gpg
sudo sh -c 'echo "deb [arch=amd64,arm64,armhf signed-by=/etc/apt/keyrings/packages.microsoft.gpg] https://packages.microsoft.com/repos/code stable main" > /etc/apt/sources.list.d/vscode.list'
rm -f packages.microsoft.gpgCode language: PHP (php)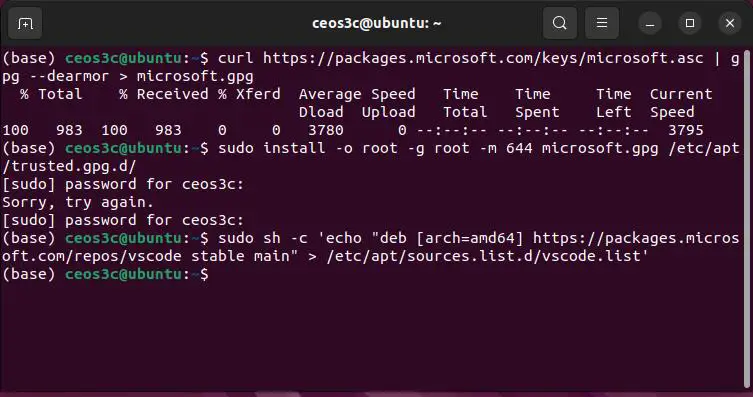
- Update the package list and install VS Code using the following commands:
sudo apt install apt-transport-https
sudo apt update
sudo apt install code- Once the installation is complete, you can launch VS Code by running the following command:
code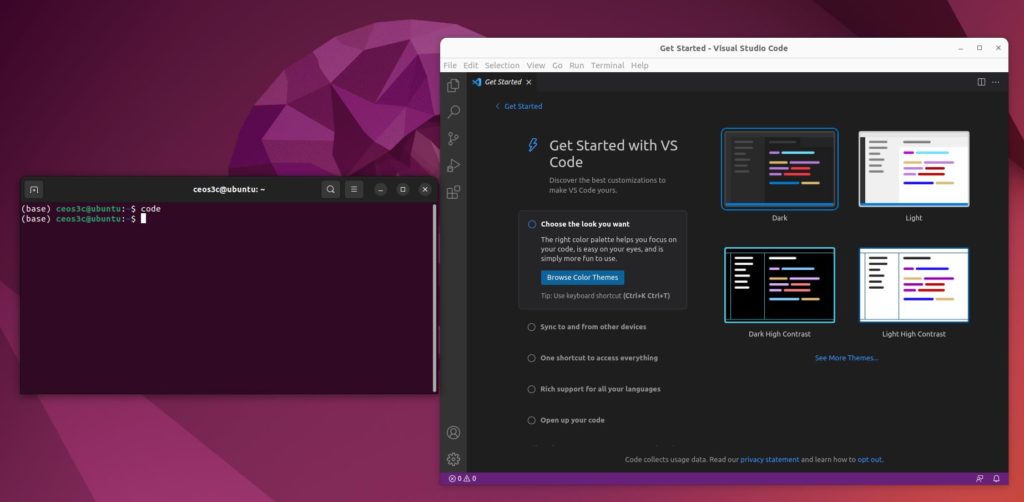
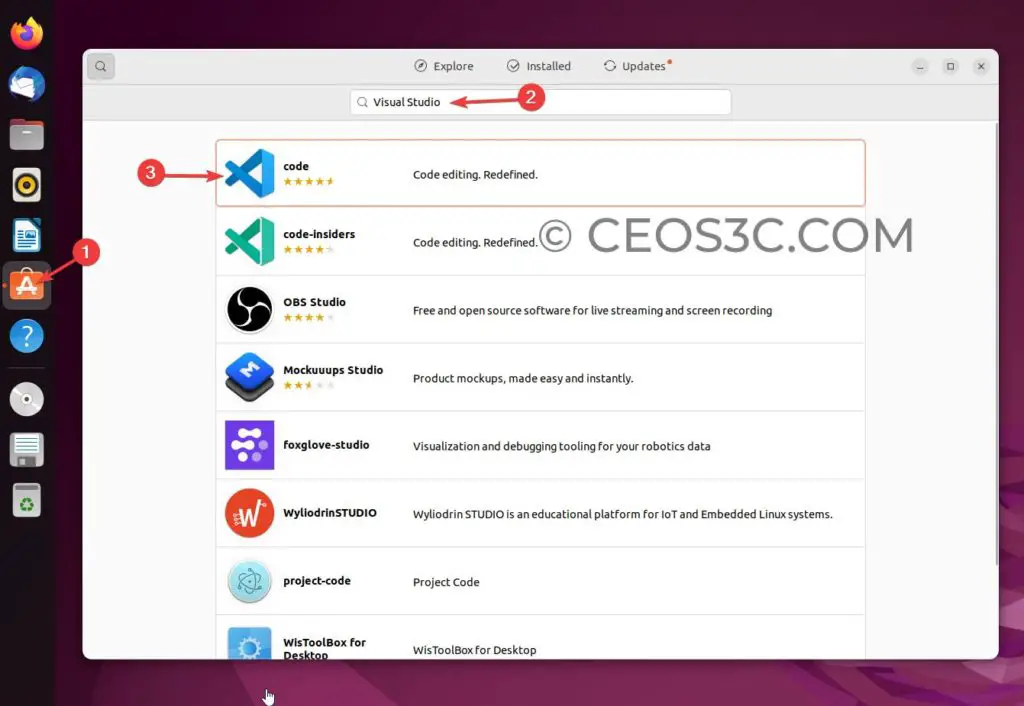
Another option is to use the Ubuntu Software Center to install VS Code on Ubuntu:
- Open the Ubuntu Software Center.
- Click on the search bar and search for “Visual Studio.”
- Click on code and click on install.
Install VS Code on WSL2
Installing VS Code on WSL2 is as easy as it gets. Make sure you have VS Code installed on Windows (follow the instructions above), and then just run the following command inside of WSL2:
codeYou will get asked if you want to install the VS Code x64 server extension. Answer with yes. VS Code is now installed in WSL 2.
Tip: You can open any folder inside of WSL 2 directly with VS Code by navigating to the folder you want to open and then just typing code .
Astro VS Code Extension
We recommend using the official Astro VS Code extension when developing with Astro.
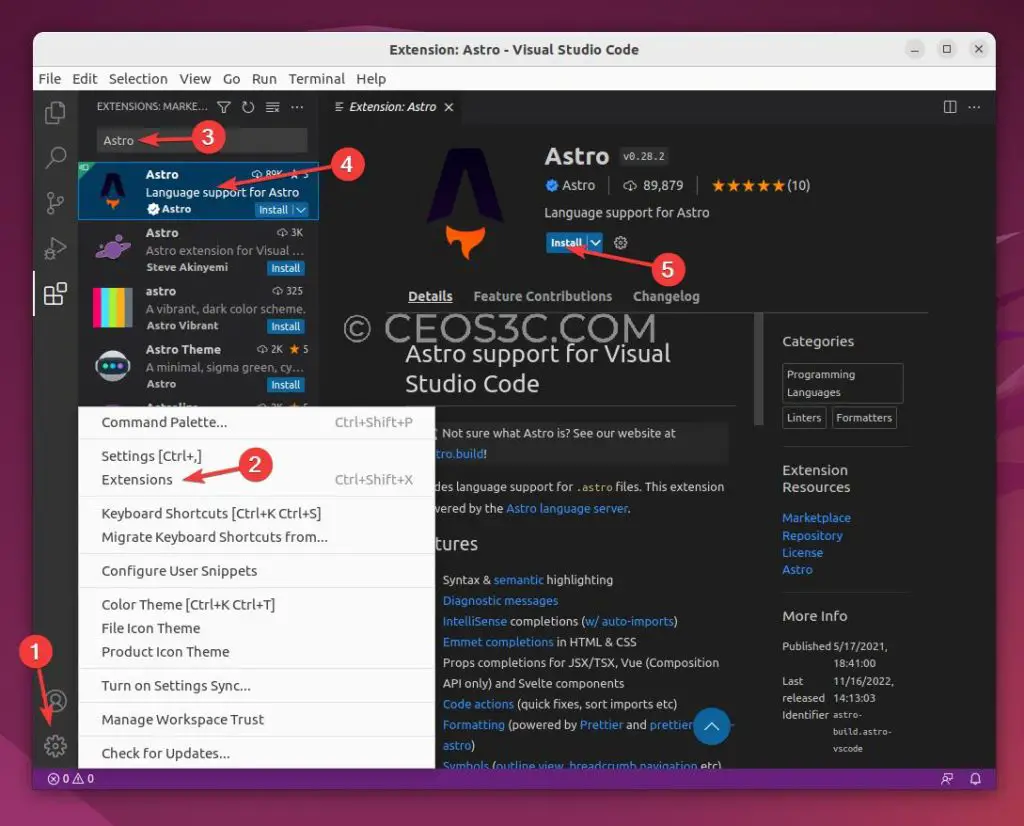
To install the Astro VS Code extension, follow these steps:
- Open VS Code and click the “Extensions” icon in the sidebar (it looks like a puzzle piece), or press CTRL+SHIFT+X on Windows or COMMAND+SHIFT+X on a Mac.
- In the search box at the top of the Extensions panel, search for “Astro” and choose the official Astro extension.
- Once you find the extension you want to install, click the “Install” button to the right of the extension’s name.
- VS Code will download and install the extension. You may be prompted to restart VS Code to complete the installation.
- Once the extension is installed, you can enable it by clicking the “Enable” button to the right of the extension’s name in the Extensions panel. Usually, new extensions are enabled by default.
Alternatively, you can also install extensions directly from the VS Code Marketplace. To do this, follow these steps:
- Open a web browser and go to the Astro extension marketplace page: https://marketplace.visualstudio.com/items?itemName=astro-build.astro-vscode
- Click the “Install” button to the right of the extension’s name.
- In the pop-up window, select the VS Code installation you want to install the extension to and click the “Install” button.
- Once the extension is installed, open VS Code and click the “Extensions” icon in the sidebar. The installed extension should appear in the list of installed extensions.
Summary
This Astro VS Code setup guide should help you to get everything you need up and running! If you want to learn more about Astro, we highly recommend checking out the Astro category as well as the first part of our Astro JS Tutorial Series.
If you want to configure VS Code and Astro with Tailwind CSS, follow this link.

