There are a ton of articles and videos out there that overcomplicate the process of creating a Rounded Camera in OBS Studio. If you have no desire to follow unnecessarily complicated things like creating masks with Photoshop, read on.
Table of Contents
How do you get a Rounded Camera in OBS Studio?
Creating a Rounded Camera in OBS Studio requires you to create a filter for your camera that will transform your squared camera input into a circle using an Image Mask/Blend filter, which is a built-in function of OBS Studio.
The only additional things you need are one (without shadow), or two (with shadow) rounded mask image files that we will provide you with in this article. You do not need to create your own.
Rounded Camera in OBS Studio
We go through this process step-by-step to make sure you get it right.
Step 1 – Download Rounded Masks
We provide you with two image files. One serves for the actual rounding of our camera. The other one serves as a background shadow effect. You can choose to leave the shadow effect out if you don’t want it.
Step 2 – OBS Studio Setup
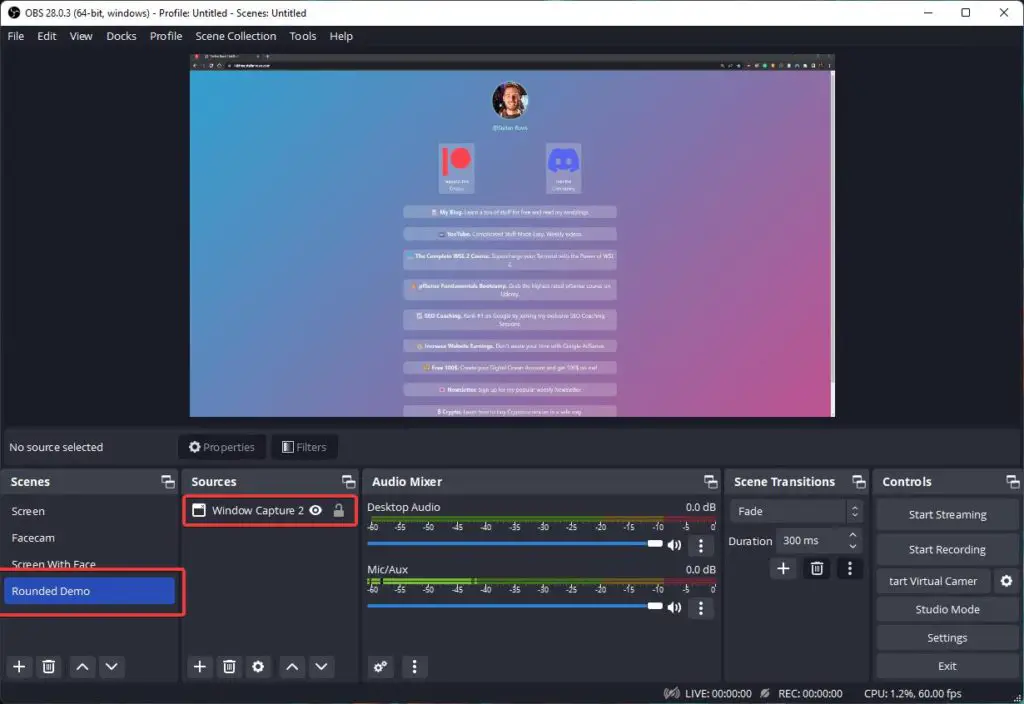
In OBS Studio, either create a new scene or use one that you have already set up. For the sake of this tutorial, we created a new scene called “Rounded Demo” and added a demo background to it:
Step 3 – Adding a Camera Source
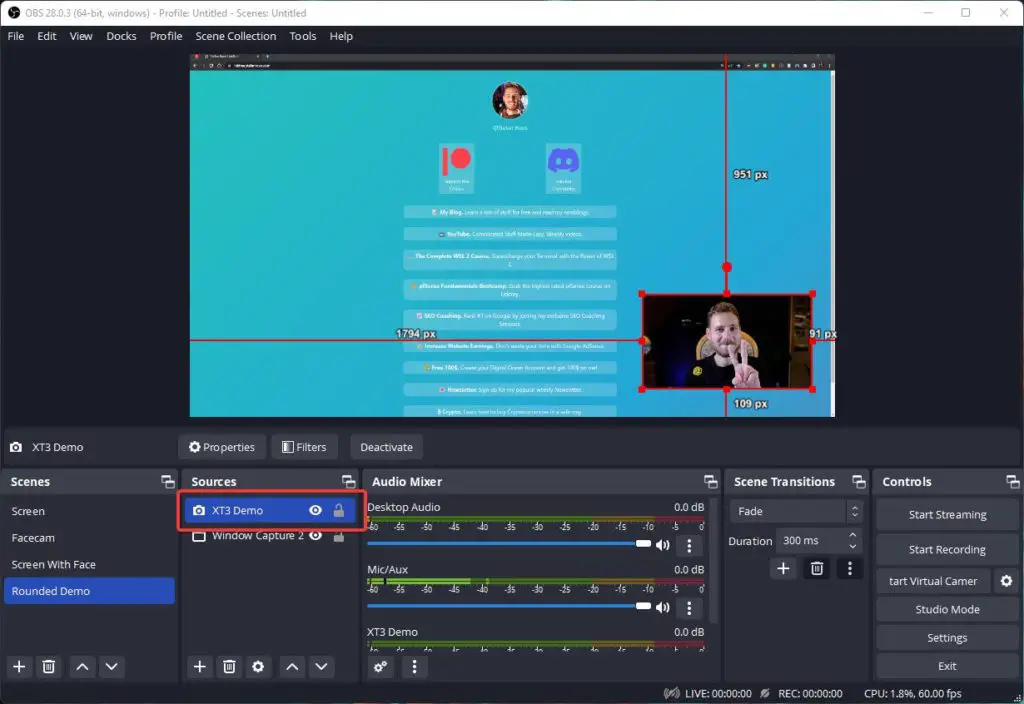
Now we need to add a Video Capture Device (your camera). Once you have added it, resize it to approximately the size you want your rounded camera image to be at the end:
Step 4 – Adding an Image Mask
Now we will use the Webcam Circle.png file you downloaded earlier to create an Image Mask:
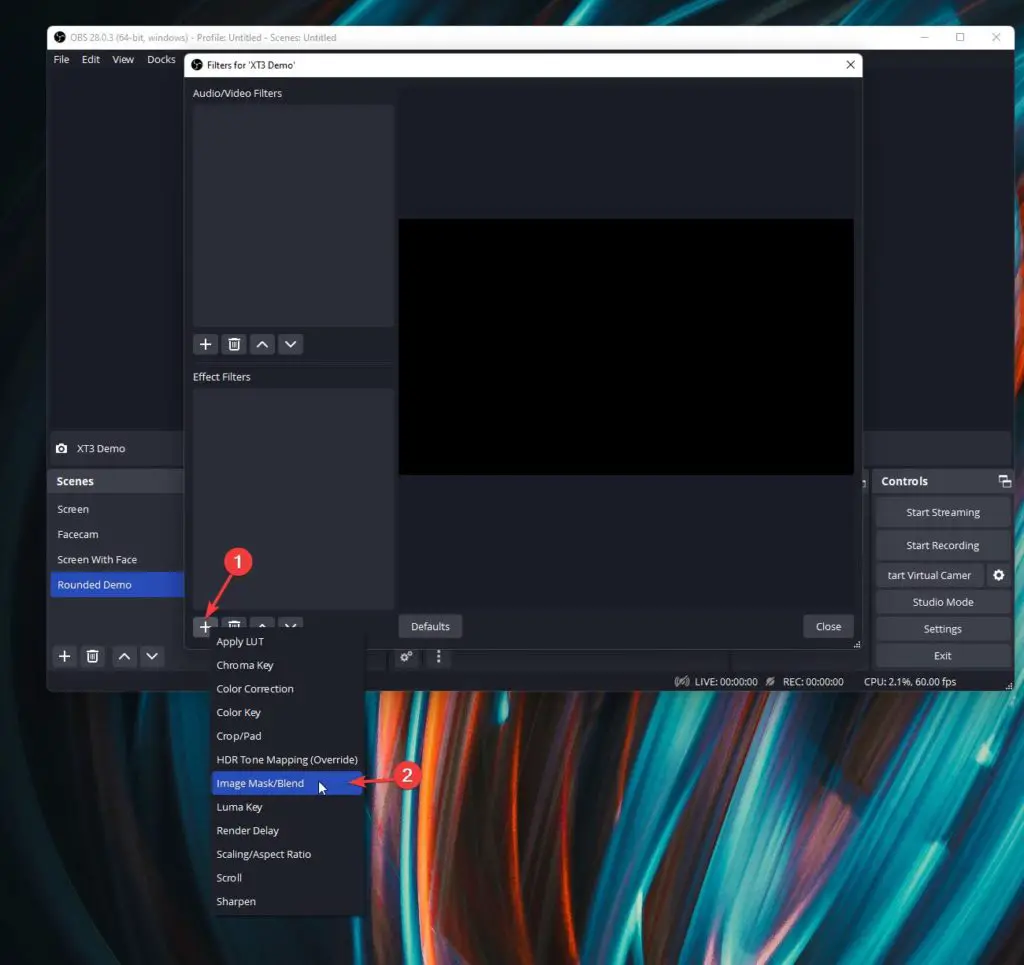
- Right-click on your Video Capture Device in OBS Studio and click on Filters.
- Click on the + button in the lower-left corner underneath Effect Filters.
- Select Image Mask/Blend.
- Click on OK.
Next, click on Browse next to Path and select the Webcam Circle.png file. Then, next to Type, select Alpha MAsk (Alpha Channel). You should already see a rounded webcam as a result:
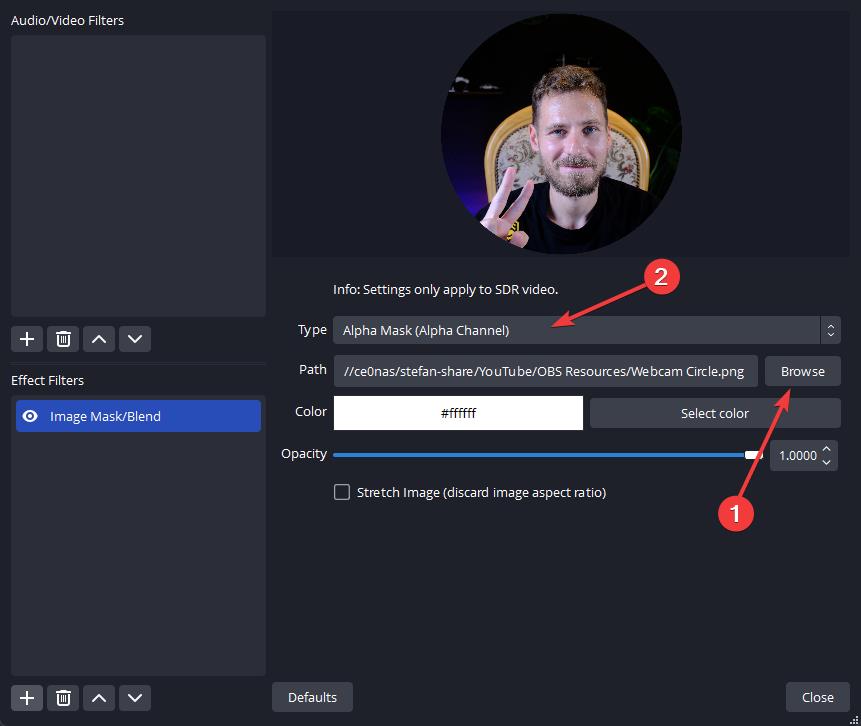
Click on close to finish the process. As a result, you should already see a rounded webcam. You can now go ahead and simply resize and move the camera symbol as you like.
Step 5 – Adding a Background Shadow (Optional)
This next step is optional. To add a background shadow to your rounded webcam, follow the steps below:
- Add a new source, choose Image as the type and call it Background Shadow.
- For the Image File, choose the Webcam Circle Shadow.png file you downloaded earlier.
- Click on OK.
You should now see a big black circle appearing in your scene. Make sure to drag the Background Shadow source below your Video Capture Device inside of the Sources panel:
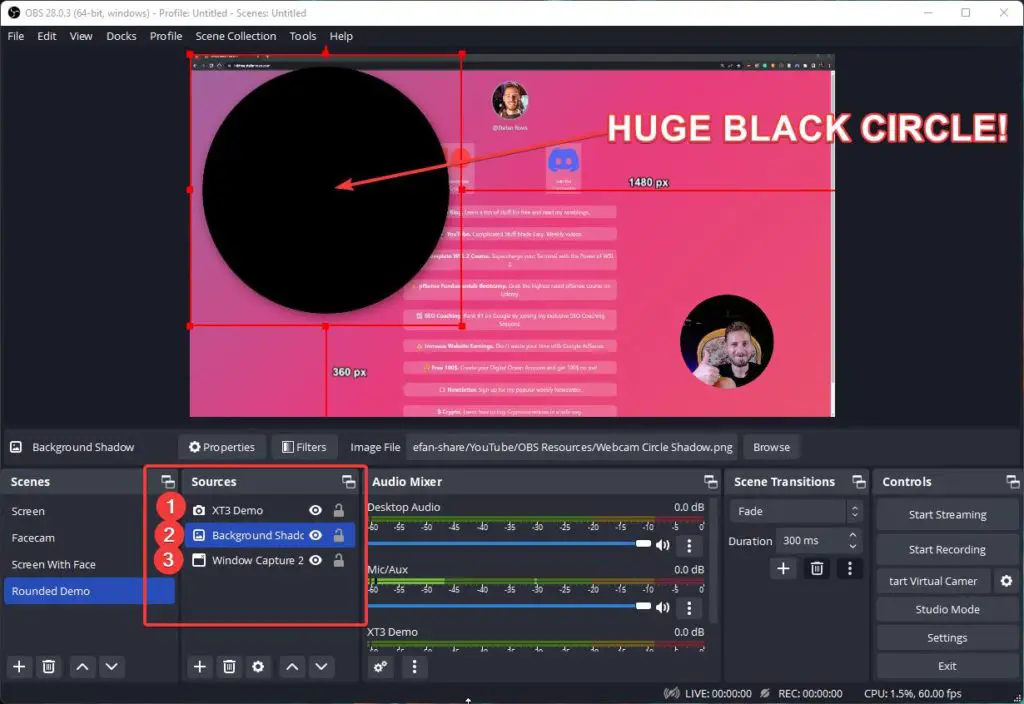
Next, we drag the circle behind your Rounded Camera and let the edges slightly stand out like so:
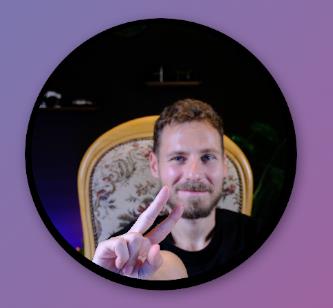
Next, right-click Background Shadow in your Sources and click on Filters once again. Click on the + button to add a filter and select Color Correction.
On the Opacity slider, reduce the opacity until you are satisfied with the shadow effect. You can also play around with the other sliders to create an even better effect. Once you are satisfied, click on Close.
Step 6 – Grouping Camera and Background
To be able to resize and drag around your Rounded Camera without having to adjust the background shadow again every time, we are going to group these two together.
Select both your Input Device and your Background Shadow by pressing the Shift key. Right-click on them and select Group Selected Items.
Finally, rename the Group to Rounded Webcam by right-clicking on Group and selecting Rename. The end result should look like this:
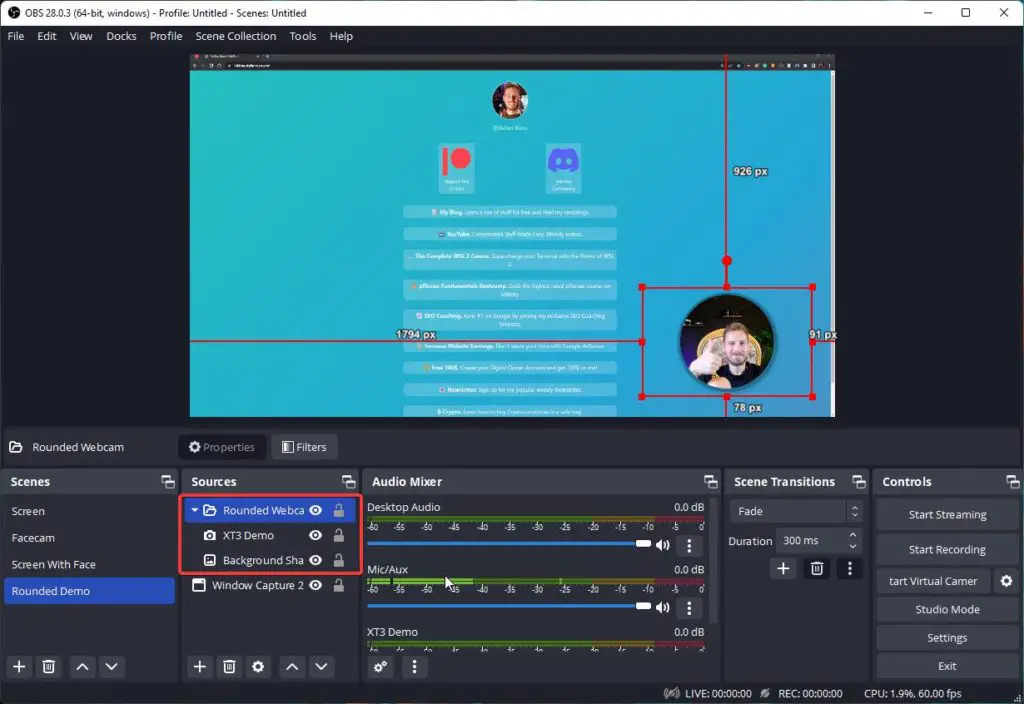
Every time you want to move or resize your camera from now on, make sure to always select the Group Rounded Webcam to adjust both the Shadow and the Camera at the same time!
Conclusion
This is it. No need to fiddle around with Photoshop or anything like that. This is how easily you can create rounded corners for your Camera in OBS Studio. If you want to check out the Best OBS Settings for streaming, make sure to read this article!

Great Share
Thanks!