Today we are going to create our first Windows share on FreeNAS. If you have followed the previous article on how to install FreeNAS, you should continue here. After successfully installing our FreeNAS box, we now need to go ahead and create our first dataset and our first share. I will guide you through each step that is necessary up until you can add the share to your Windows machine.
You can check out my NAS Build here.
Table of Contents
- Step 1 – Creating a User Account
- Step 2 – Creating a Dataset
- Step 3 – Creating a Windows Share
- Step 4 Adding the Share to Windows
- Conclusion
Step 1 – Creating a User Account
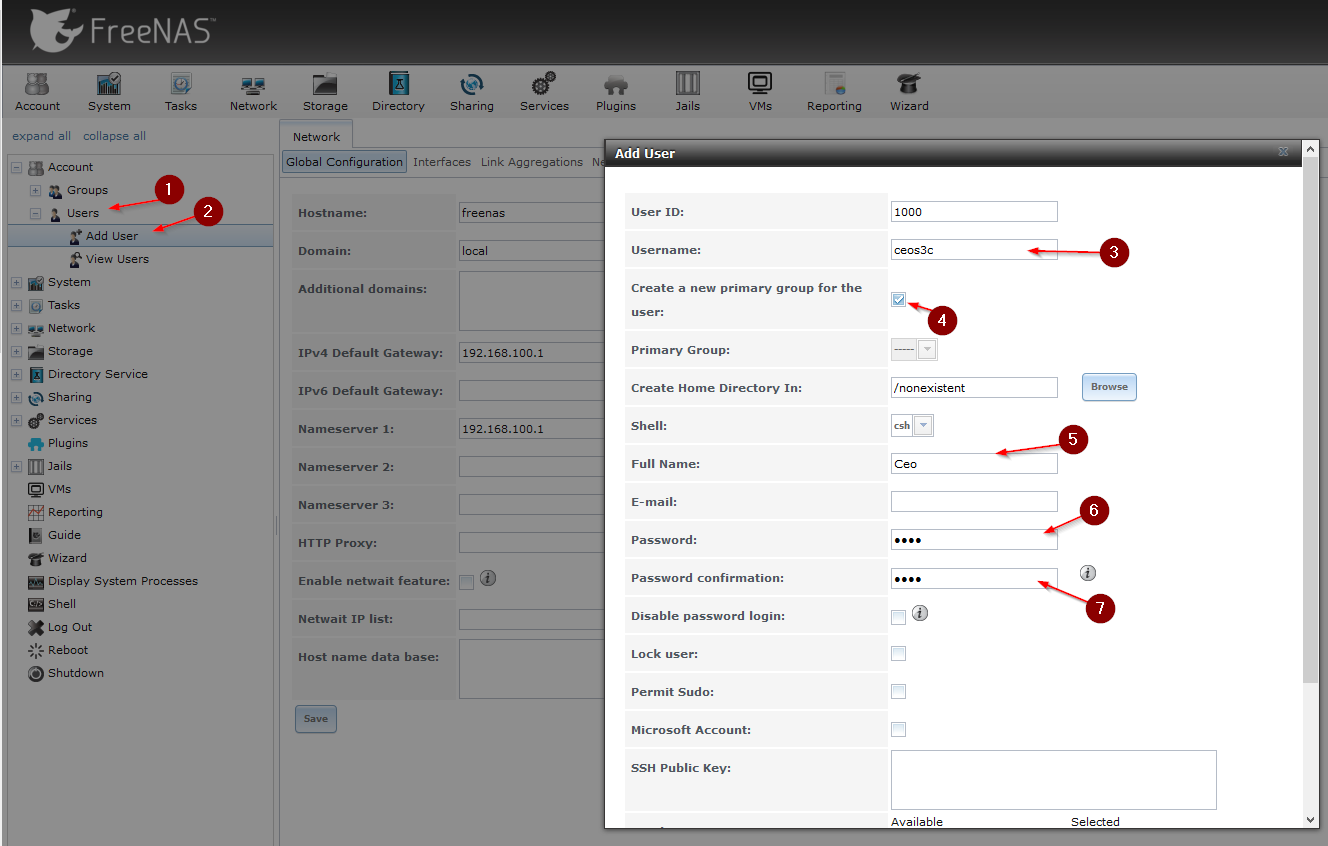
First things first – to share something, we first need to create an account. We will also create a group for the user. When creating a share with FreeNAS, you need to assign a User and a Group. Because I want this User to have the sole permission on this Share, I assign him the User and Group Permission.
Log in to your FreeNAS Web GUI and navigate to Account -> Users -> Add User.
Fill out everything accordingly, then scroll down to the bottom and click on OK.
As you can see, by ticking the box on number 4, we automatically created a group for the user with the same name.
Step 2 – Creating a Dataset
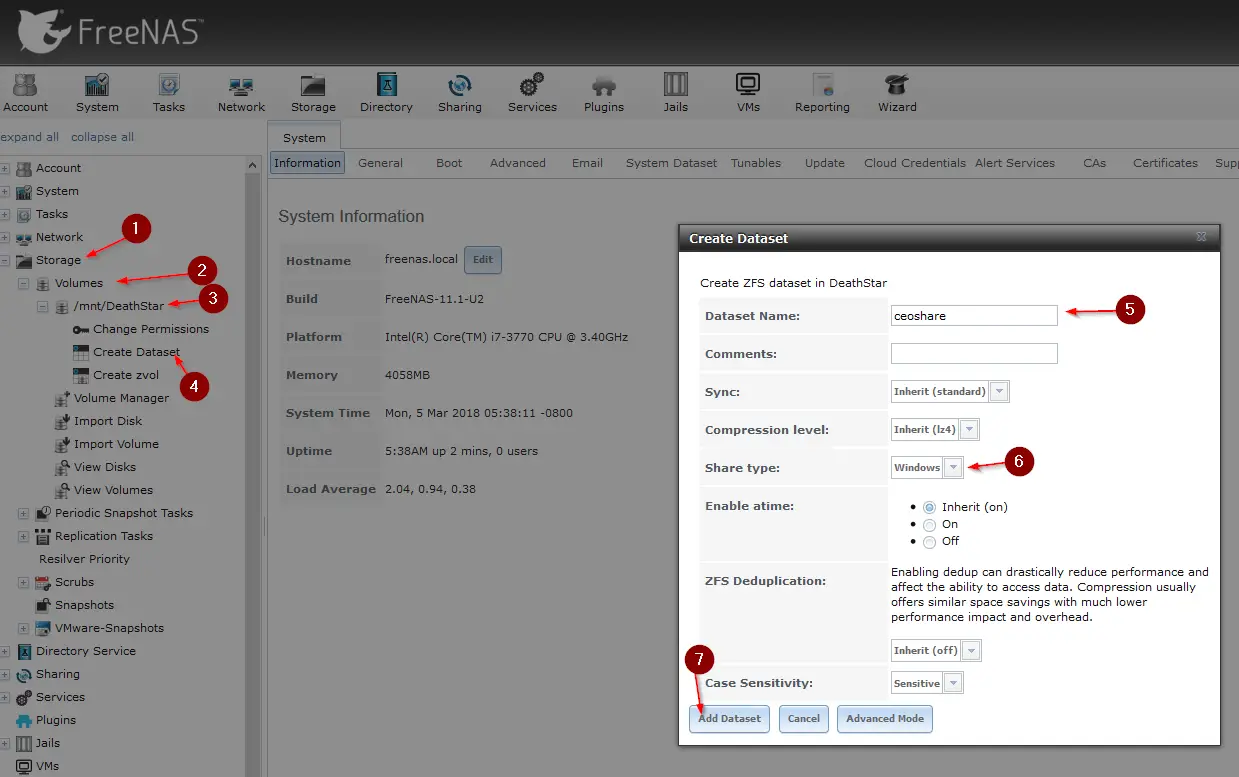
Navigate to Storage -> Volumes -> /mnt/NameOfYourVolume and click on Create Dataset. The Dataset is basically the “drive” where you will create your share on. Give the Dataset a name, select the Share Type (Windows) and click on Add Dataset.
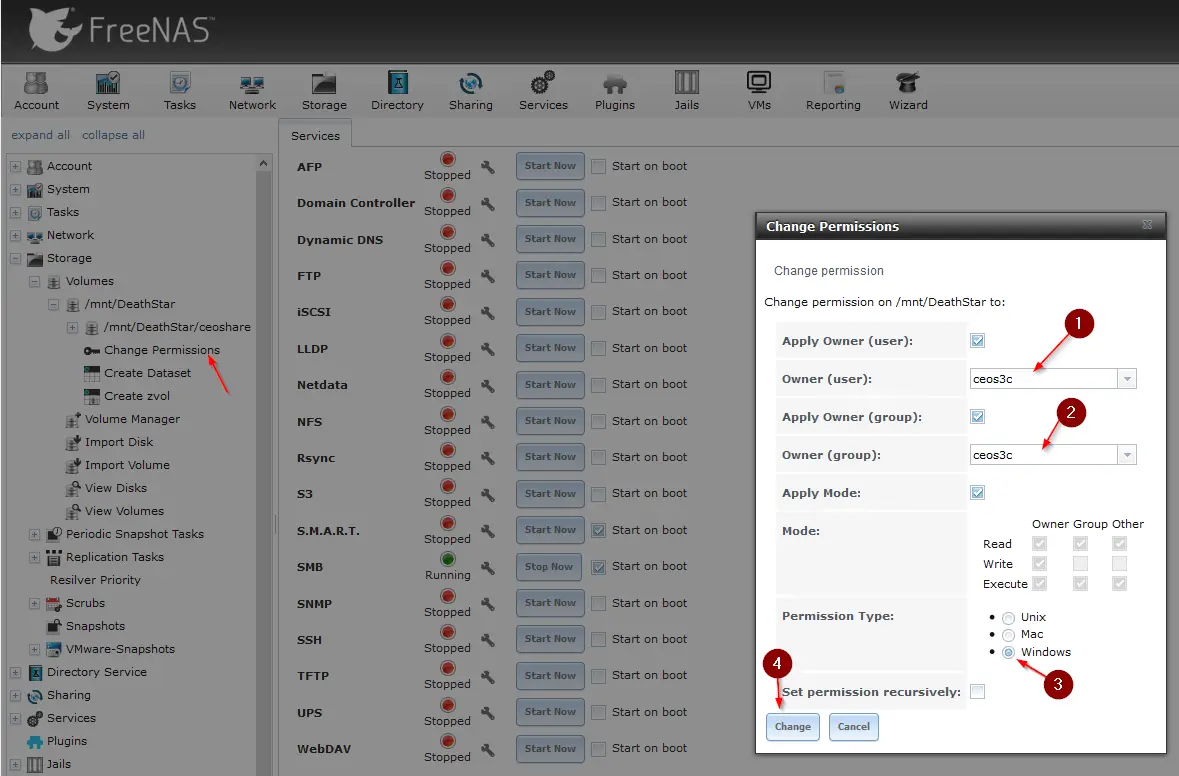
Now click on Change Permissions to give our user access to the Dataset.
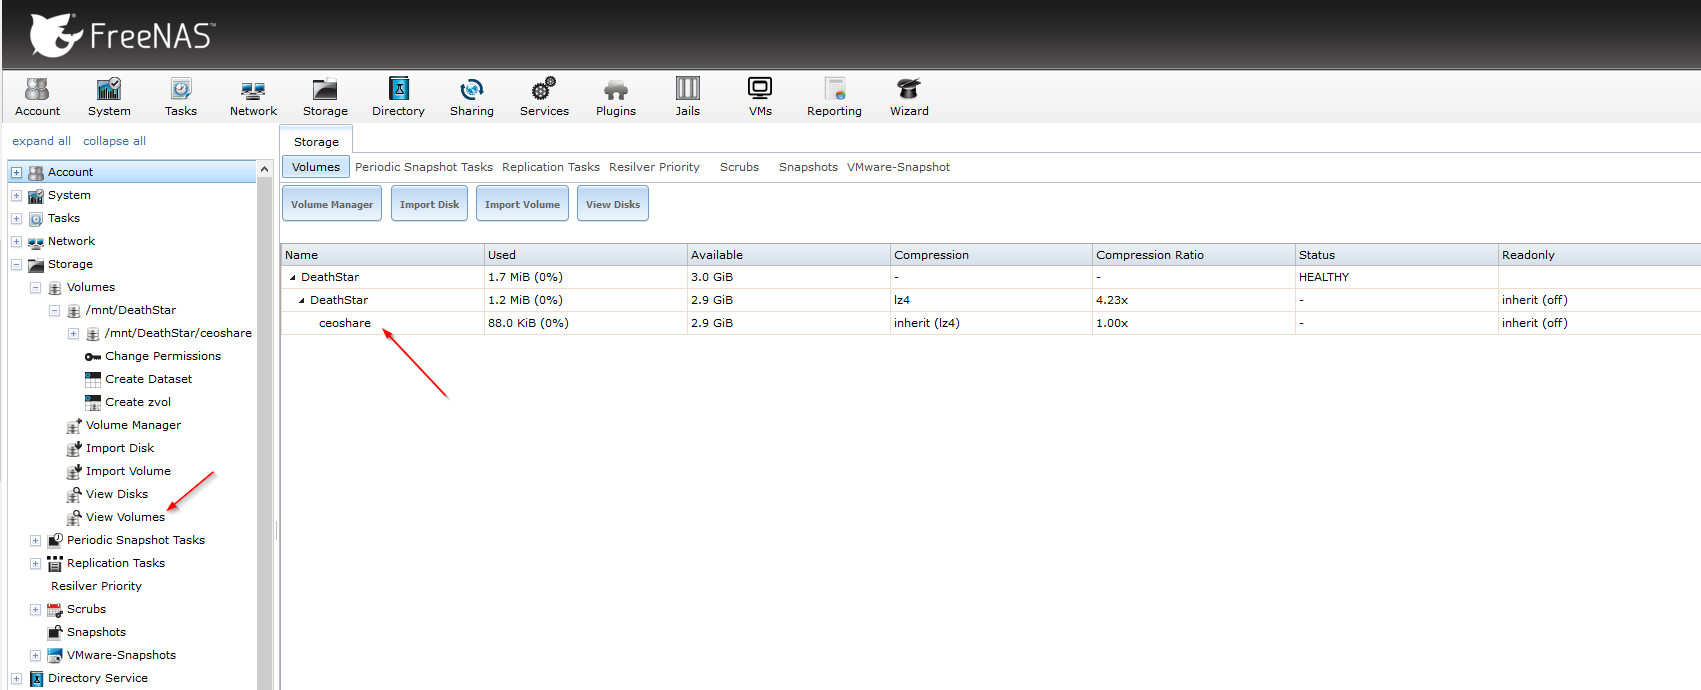
Click on View Volumes to see your Datasets and how much space is still free.
Step 3 – Creating a Windows Share
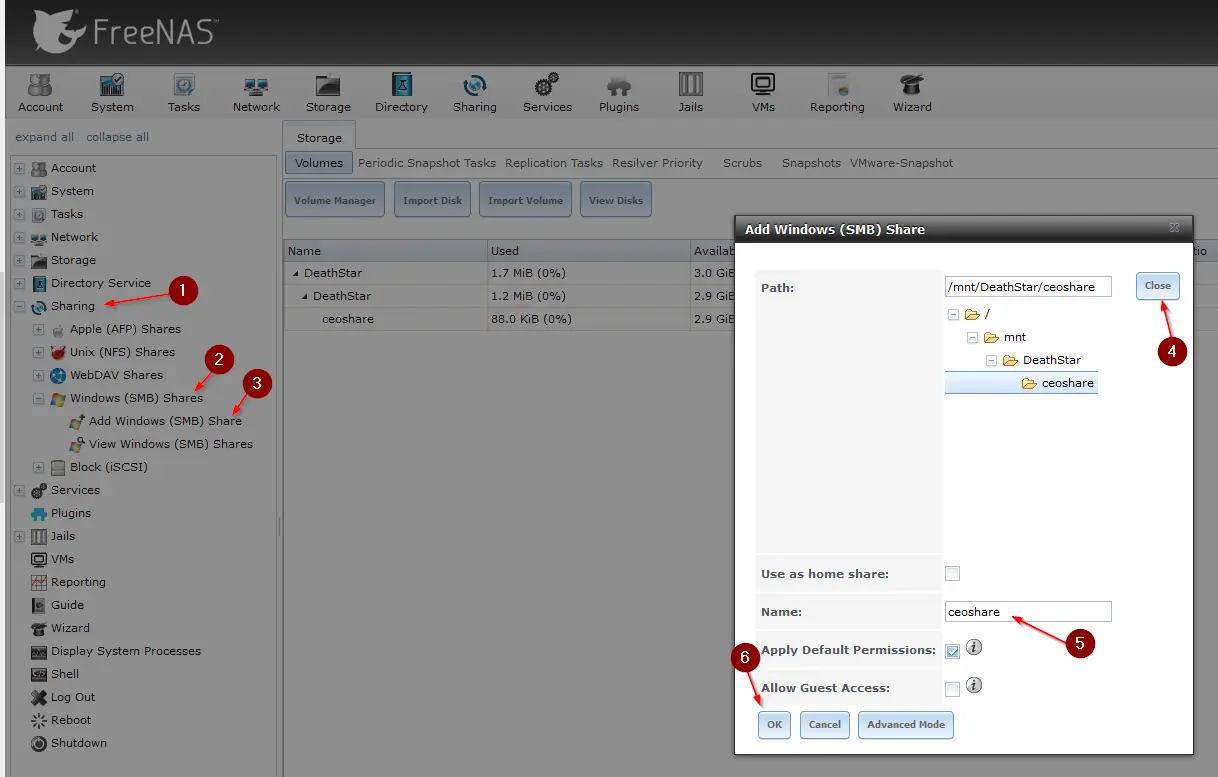
Time to create the share. Navigate to Sharing -> Windows (SMB) Shares -> Add Windows (SMB) Share.
Click on Browse and select the Dataset you created above. Give it a name and click on OK. It can be the same name as the Dataset.
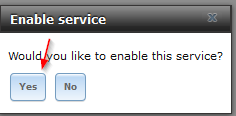
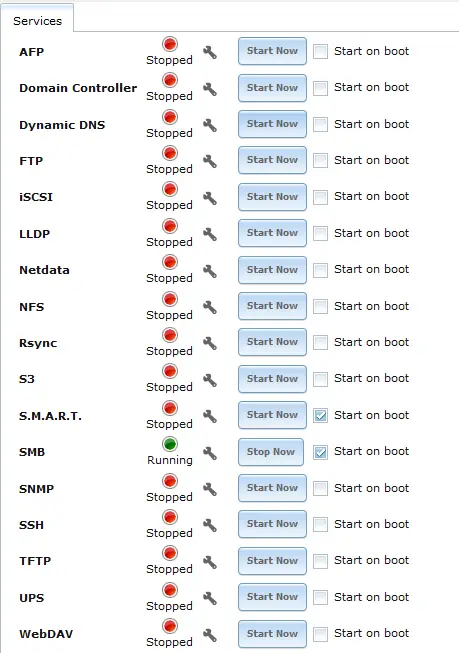
If this is your first share, you will get asked if you want to enable this service. You do want.
Now we have everything in place, and we can go ahead and add the share to our Windows Computer.
Step 4 Adding the Share to Windows
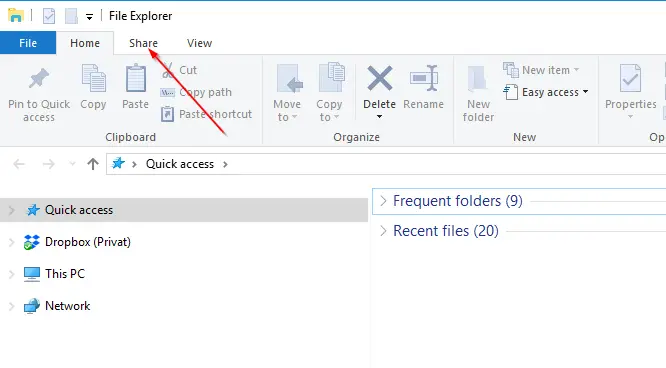
Bear with me. Almost done. Open a Windows Explorer by pressing Windows Key + E. Click on Share on the top.
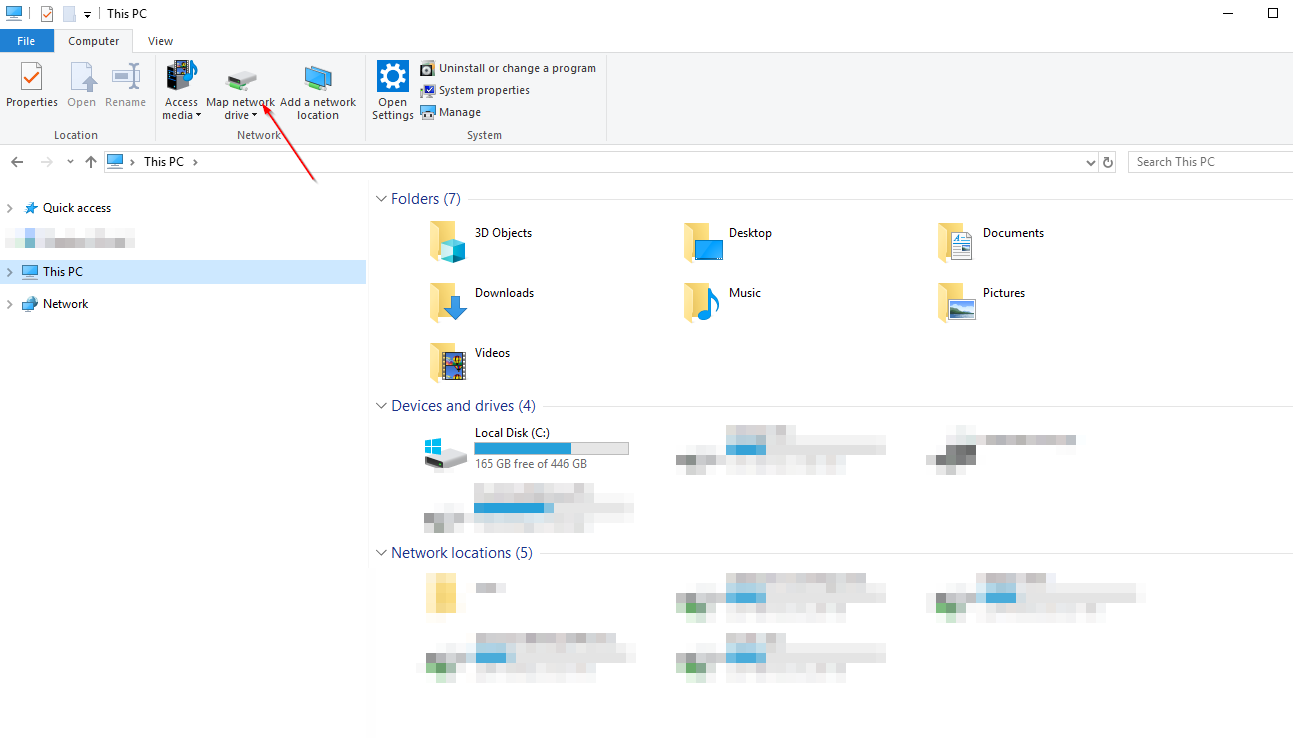
Now click on Map Network Drive.
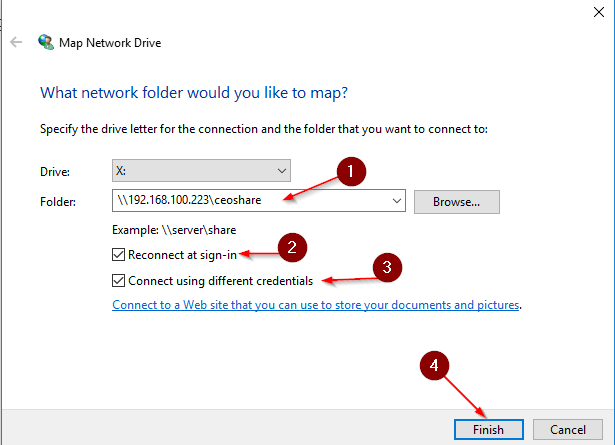
Select a Drive Letter, enter the path to your NAS and Share and tick Reconnect at sign-in and Connect using different credentials. Hit Finish.
And if you did follow every step religiously so far, you should now see your Network Drive showing up in your Windows Explorer.
Conclusion
Suppose you made it that far. Congratulations. You successfully installed FreeNAS and created your first share. Time to shovel some data on it! Don’t miss out on my YouTube Channel – if you liked this tutorial, you would like the content on YouTube too.
ℹ️ Related Articles
👉 My Popular DIY FreeNAS Build
👉 Use FreeNAS as an UniFi Controller
👉 FreeNAS Smart Tests & Scrubs
👉 How to install Plex Media Server on FreeNAS
👉 How to install FreeNAS
👉 How to create Windows Shares on FreeNAS
👉 Manually Update Plex Media Server on FreeNAS
👉 Upgrade FreeNAS to TrueNAS

Very helpful for a first time Freenas user. Thank you.
Thanks bro! This is very helpful! Post some more IT stuff! (y)
Thank you! It’s coming 🙂