Welcome back, fellow Hackers! Today we are talking about Vulnerability Scanning with Metasploit. You probably heard of OpenVAS before or even used it. It is the most popular, free Vulnerability Scanner out there and definitely worth a look on its own. We covered finding vulnerabilities with OpenVAS before on YouTube.
But did you know that you can run OpenVAS natively in Metasploit? I will show you how.
Before you can start using OpenVAS in Metasploit, you first have to install it if you haven’t already. Once you are done with the installation, we can start. Ignore all the Ruby Timeout Errors throughout the screenshots, they just appeared after upgrading my system, and I didn’t get to fix them yet.
Table of Contents
- Part 1 – Starting OpenVAS
- Part 2 – Loading OpenVAS in Metasploit
- Part 3 – Listing OpenVAS Commands
- Part 4 – Connecting OpenVAS to its service
- Part 5 – Creating a Target
- Part 6 – Checking available Scan Types & Target Lists
- Part 7 – Creating a Task
- Part 8 – Starting a Task
- Part 9 – Checking the Task Status
- Part 10 – Creating a Report
- Conclusion
Part 1 – Starting OpenVAS
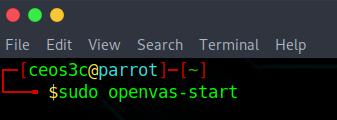
First, you need to make sure that the OpenVAS Service is actually running:
openvas-startPart 2 – Loading OpenVAS in Metasploit
After starting Metasploit with:
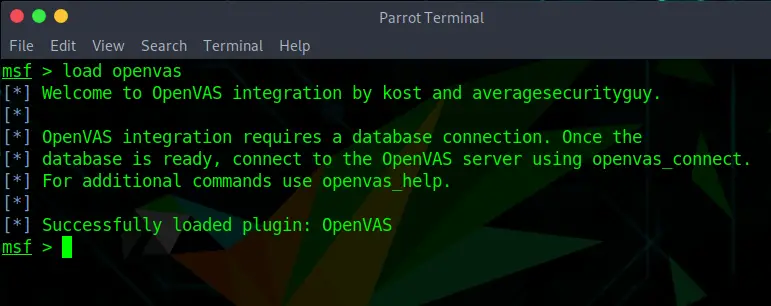
msfconsoleYou can load OpenVAS by running:
load openvasPart 3 – Listing OpenVAS Commands
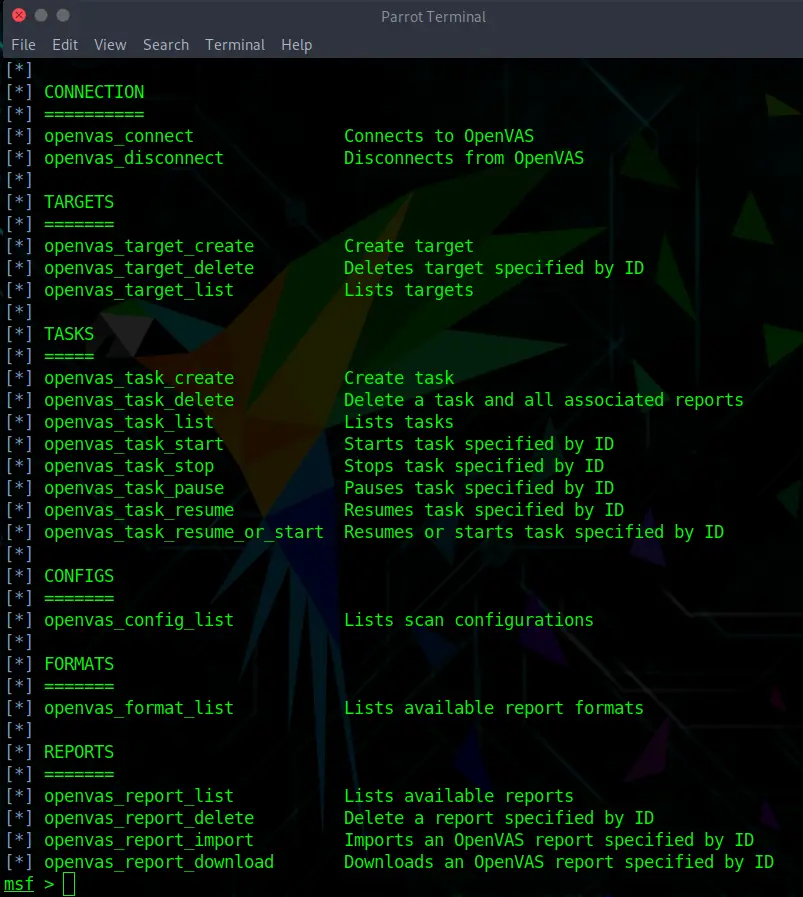
Now we can get a quick overview of all of the available OpenVAS commands:
openvas_helpAs you can already see, there are lots of fun commands to play with.
Part 4 – Connecting OpenVAS to its service
Next, we need to connect OpenVAS to its service using our credentials.
openvas_connect username password host portWe can see that the connection was successful.
Part 5 – Creating a Target
Now we are going to create a target for scanning. To do that run:
openvas_target_create "TargetName" IPOfTarget "NameOfScan"Code language: JavaScript (javascript)For this example, my target IP is the vulnerable VM Lampiao from Vulnhub with the IP of 192.168.56.101
Note that everything you do here will also be done in the OpenVAS Database itself. Hence you will be able to see the results in the Web GUI later. An example is the confirmation below, that is showing the Lampiao Initial Scan that we just created, plus all the other scans that I ran with OpenVAS before.
Also, take note of the long ID of our newly created scan. We will need that later.
Part 6 – Checking available Scan Types & Target Lists
To see what kind of Scan Types are available, run:
openvas_config_listThis shows us all of the available Scan Configurations. We need to specify this when creating a Task. Those are the same Scan Configs that are available through the Web GUI. At this point you might wonder, why would I prefer Vulnerability Scanning with Metasploit over just using the OpenVAS Web GUI? Well, some people like me who work a lot with Metasploit Workspaces, like to keep everything in one place.
This is why I prefer console over GUI in this context.
In case you forgot the Target ID of your Target, you can pull that information up again by typing:
openvas_target_listWe are going to need the IDs of the Target and of the Scan Config in the next step.
Part 7 – Creating a Task
Now we are going to create a new task. This is the same as creating a task in the Web GUI.
openvas_task_create [NameOfTask] [Comment] [ScanConfigID] [TargetID]Code language: CSS (css)When successful, you can see the task in your list with the Status: New.
You can run the following command to pull up your task list again; you’ll need your Task ID in the next step.
openvas_task_listPart 8 – Starting a Task
To start the task, simply run:
openvas_task_start [TaskID]Code language: CSS (css)Now depending on how many targets you scan or which intensity level you choose, this can take a long time.
Part 9 – Checking the Task Status
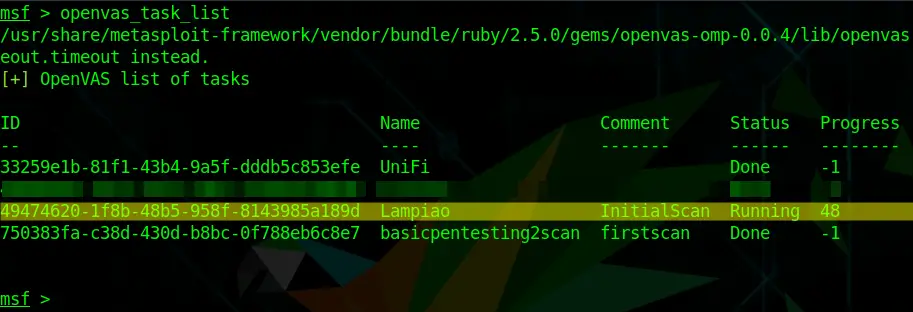
To check our Task Status, we can simply run:
openvas_task_listThe number under Progress (48 in this example) is the percentage of the scan… Once it’s at -1, the scan is done. Just repeat the command by pressing the up-arrow key a couple of times until it finishes.
Part 10 – Creating a Report
As soon as the scan finishes, there are a couple of ways how to create a report. Although it’s possible to create all kinds of reports this way, I actually prefer pulling up the report through the Web GUI.
You probably have guessed it by now, to show the Report List run:
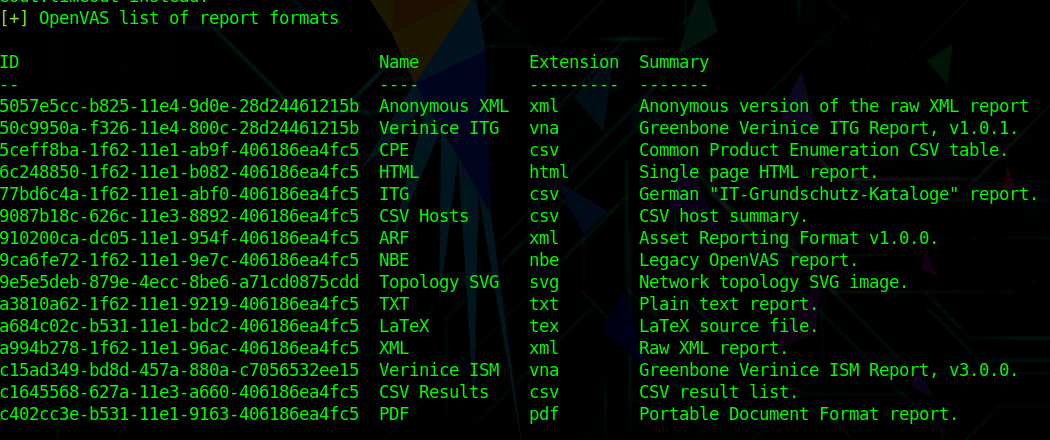
openvas_report_listNow you have a couple of options for which format you would like to export your report with:
openvas_format_listExporting a Report
To finally export a report, choose what format you want and run:
openvas_report_download [report id] [format id] [path for saving the report] [report name]Code language: CSS (css)But as I said. I don’t really like exporting via Terminal. The Web GUI works much better, for that matter. I recommend using this to pull your report.
Conclusion
Using OpenVAS natively in Metasploit can save you some time overusing the WebGUI once you are familiar with it. It also is able to post findings in Metasploit’s Database, although that doesn’t always work.
It definitely is a fun way to play with OpenVAS and learn more about how it works on a Command-Line Level.






running openvas_connect in metasploit-framework gives this error:
[-] Error while running command openvas_connect: uninitialized constant OpenVASOMP::OMPConnectionError
Any ideas?