In the previous Shutter Tutorial we learned how to fix the greyed out Edit button, now we will learn how to change the Keyboard Shortcuts so we can take a Screenshot by pressing F6 like we are used to from using Greenshot on Windows. Follow the steps below to Change Shutter Keyboard Shortcut for taking Screenshots.
How to Change Shutter Keyboard Shortcut
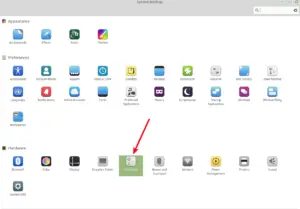
Open your System Settings and select Keyboard. Or simply press your Windows Key and enter Keyboard in the Search Field (If you are on Ubuntu or Mint).
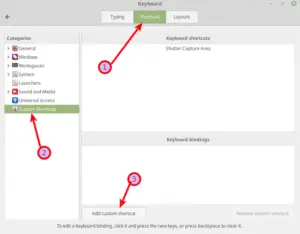
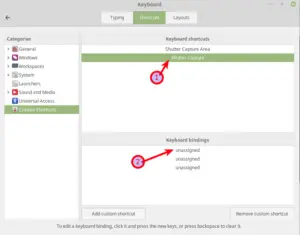
Next, click on the Shortcuts Tab, select Custom Shortcuts and click Add custom shortcut.
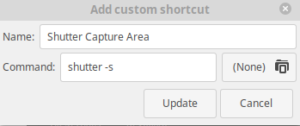
Give the Shortcut a Name. I name it Shutter Capture Area because I want to capture an Area when pressing the Shortcut. The command for this is shutter –s . Click on Apply to finish.
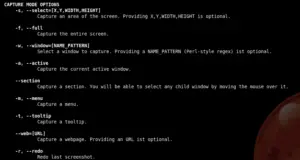
Other capture options can be found by running man shutter in a Terminal Window or look at the printout below.
Last, simply select your Shortcut and Double Click unassigned in the Keyboard Bindings window below. Now press the key you want to trigger Shutter, for example, F6.
After you are done with this, you should close Shutter and restart it. Eventually, you have to reboot your System. Then, the Select Area window should pop up as soon as you press your defined Shortcut Key.
Wrapping up
I really start to like Shutter. If you are like me and previously worked with Greenshot on Windows to write your Articles, Shutter basically is the equivalent on Linux. I recently changed from Windows to Linux and now try to get as close to my previous working environment as possible.
Fixing Shutter and making it basically the same as Greenshot was yet another step I had to take to get closer to that environment. Shutter is good, but not (yet) a 100% as good as Greenshot. But you can definitely work with it very well.

For windows users, take a look at ShareX. Its open source, Windows only.
Greenshot is indeed more streamlined. I wish there was a way to by-pass the “enter” key confirmation after making a selection.