When it comes to encryption, you have the choice, in most cases at least, to go for either Linux (LUKS) or Windows (BitLocker). But if you have a Drive you want to use on Linux AND Windows, you may run into some complications. In this Open Bitlocker Drive on Linux Tutorial, I show you exactly how to do that.
Table of Contents
- Step 1 – Install Dislocker to Open BitLocker Drive on Linux
- Step 2 – Create a Folder to Mount the Drive
- Step 3 – Finding our USB Drive
- Step 4 – Unlocking your USB Drive
- Step 5 – Mounting your Drive
- Step 6 – Creating a Script to automatically Mount the locked Drive
- Conclusion

We are going to use a Tool called Dislocker to do the job.
Step 1 – Install Dislocker to Open BitLocker Drive on Linux
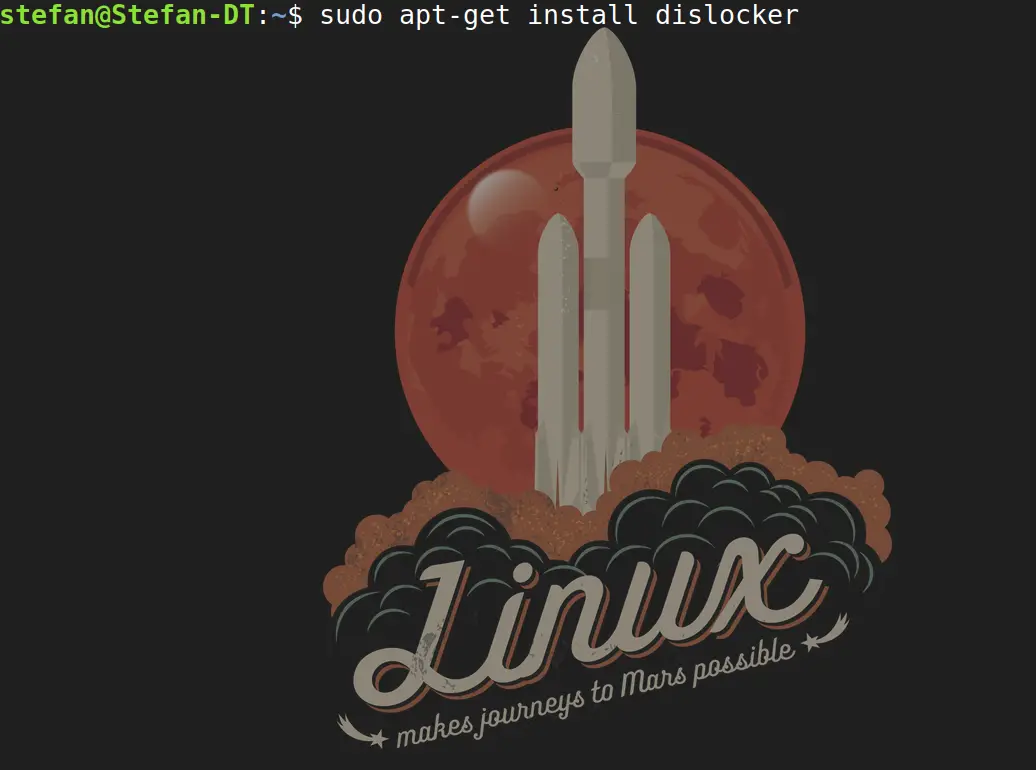
First, we need to install Dislocker. It doesn’t get any easier than that.
sudo apt-get install dislockerCode language: JavaScript (javascript)
Step 2 – Create a Folder to Mount the Drive
Next, we are going to create a Folder so we can mount the Drive.
sudo mkdir /media/bitlocker
sudo mkdir /media/mount
Step 3 – Finding our USB Drive
Now we need to figure out which drive description our USB Drive has. We can do that easily using fdisk.
sudo fdisk -lMost likely, you’ll have to scroll down to the bottom. You can easily identify your Drive by Size. Make sure to use the drive description under Device, in this example sde1 and not only sde.

Step 4 – Unlocking your USB Drive
Now we are going to use Dislocker to Decrypt the Drive. Make sure to replace –uYourPassword with your password and sde1 with your drive description! But leave the -u in front of it. So if your password is Horseradish the command should call: -uHorseradish . Alternatively, just leave it at -u and you will get prompted for the password.
sudo dislocker -r -V /dev/sde1 -uYourPassword -- /media/bitlockerCode language: JavaScript (javascript)
Step 5 – Mounting your Drive
Finally, we are going to Mount the now encrypted Drive.
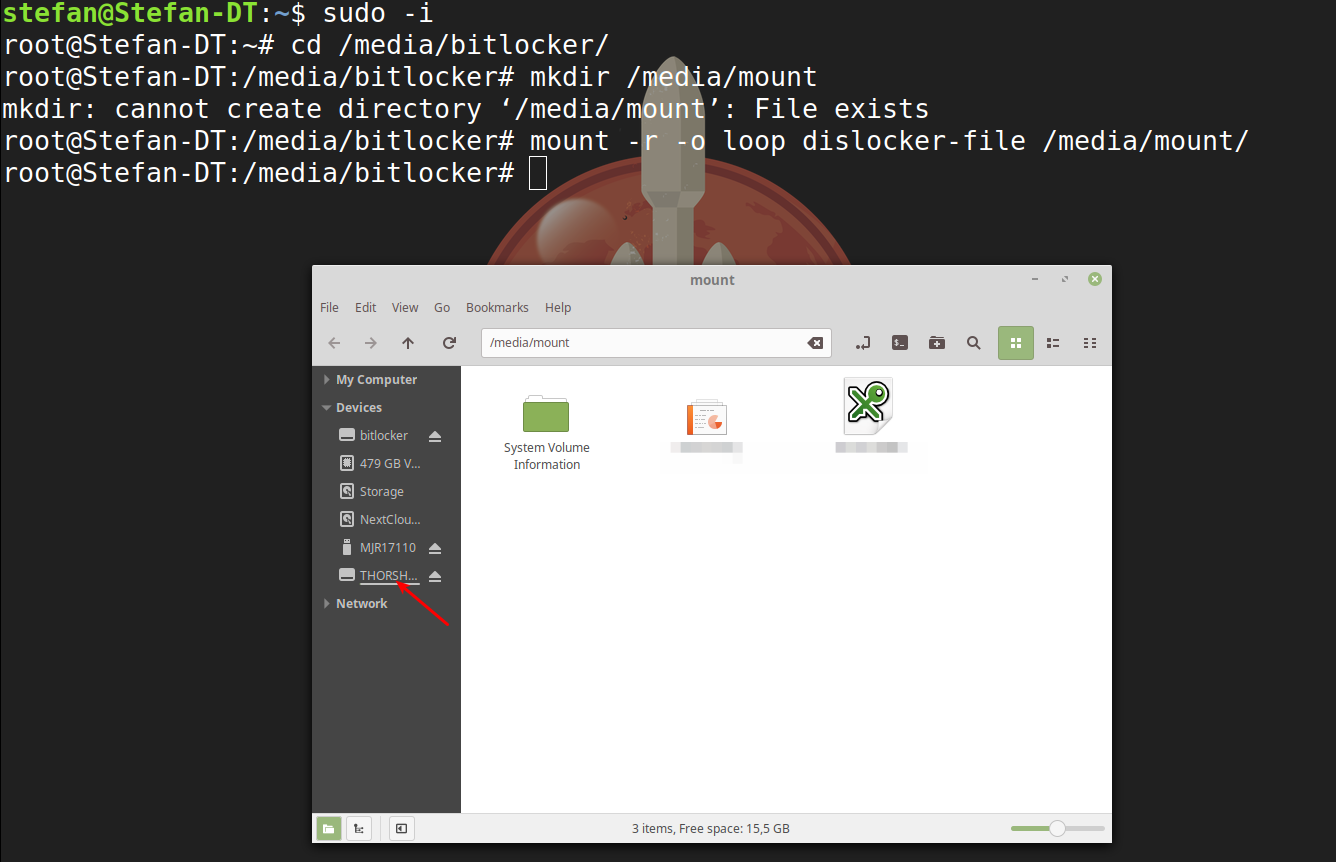
sudo mount -r -o loop /media/bitlocker/dislocker-file /media/mount
And voila, you can access the files on your previously encrypted Drive. You can use a Bitlocker Encrypted Drive to store your Passwords on, for example. If you work on Windows & Linux like me, this is a good way to utilize your USB Drive on both Systems.
Step 6 – Creating a Script to automatically Mount the locked Drive
Because we are all lazy (and so we should!), we don’t want to run those commands again every single time we plug in our Drive. I created a Bash script to do this for us. We need to create a new file in our /usr/local/bin Path, so we can access the script from everywhere.
sudo gedit /usr/local/bin/unlock.shGo ahead and paste my script into your Text File. Make sure you adjust it to your own Drive Letters etc.
#!/bin/bash
sudo dislocker -r -V /dev/sde1 -u -- /media/bitlocker
sudo mount -r -o loop /media/bitlocker/dislocker-file /media/mountCode language: JavaScript (javascript)
Save the File by hitting CTRL+S. Adjust the permission to make the File executable:
sudo chmod +x /usr/local/bin/unlock.shSo the next time you restart and need to access your USB Drive again, simply open a Terminal and type:
sudo unlock.shCode language: CSS (css)And you will need to enter your Sudo Password and your Bitlocker Password and your Drive will be unlocked and automatically mounted.
Conclusion
This is how easy you can open a Bitlocker Drive on Linux. Learn more about Linux and Open Source here.
🐧 There are some related articles!
👉 Top Things to do after installing Kali Linux
👉 Linux on Windows – The Complete WSL 2 Tutorial Series
👉 Create Generalized Windows Images with FOG Server
👉 Install FOG Server on Ubuntu
👉 Install Kali Linux on Windows – Complete Guide
👉 The Complete Kali Linux and Windows Dual Booting Guide
👉 Cronjob – The Complete Guide to Cronjobs
👉 Open Bitlocker Drive on Linux – Quick & Easy


In most recent version of Ubuntu LTS, you don’t need to do anything to unlock a Bitlocker encrypted drive. Ubuntu 22.04 has built-in support for it so just double click the drive as you would do in Windows, input the pass phrase or recovery key, the disk will be decrypted. It’s that simple.
Thanks a lot for taking the time to contribute. Fantastic post and very well explained!! Just a comment that might help others:
– as I read and appreciate from other commenters, I had to change -u by -p in order to use the Recovery key (48 digits and 7 hyphens, 55 in total)
Great things worked out for ya!
So what’s the solution if we don’t have the drive password ?
is there another way to open it ?
No. That’s the whole point of encryption.
On the first step “sudo dislocker -V /dev/sda2 -u — /media/bitlocker” it always failed for me with “[CRITICAL] None of the provided decryption mean is decrypting the keys. Abort” until I used -p instead. The -p vs. -u variant was something I found in another article.
After that, I was able to successfully mount the drive with the second command. Also note that I removed the “-r” so I wouldn’t get a read-only drive, as others have mentioned.
I am trying to unlock a 7TB USB with a GPT partition and exfat and bitlocker.
I get this error with fuse
sudo dislocker-fuse -v -V /dev/sdc1 -u12345678 — /media/bitlocker
Fri Jan 21 12:56:48 2022 [ERROR] Failed to read in #3: Input/output error
Fri Jan 21 12:56:48 2022 [CRITICAL] Error during reading the volume: not enough byte read.
and this one
storsimple@storsimple-desktop:~$ sudo dislocker -v -V /dev/sdc1 -u12345678 — /media/bitlocker
Fri Jan 21 13:00:15 2022 [ERROR] Failed to read in #3: Input/output error
Fri Jan 21 13:00:15 2022 [CRITICAL] Error during reading the volume: not enough byte read.
Any ideas on what it can be? I can mount the volume if I do not have bitlocker
TIA
Partition your main drive and install windows temporarily and use bitlocker to unlock the drive and potentially remove encryption if issues persist.
Thank you. It was very useful. But I faced a problem with other languages.
For example, I have some file names in Persian, and when I follow these procedures and open the mounted drive, I see that all file names are written in Persian and the contents are shown with question marks (like: ???? ????.txt, ?????? ???? ???.docx, …)
But when I copy these files to a USB that does not use BitLocker can be shown correctly in Ubuntu.
As so many “easy, do this” articles fail.. this didn’t work for me. Got to where I’m entering the sudo dislocker -r -V thing and keep getting an error message, “[CRITIAL] Cannot parse volume header. Abort.” Okay, don’t know what that even means but it was a relative new flash drive and had JUST formatted it. Did a trial file copy and delete before trying it so I know the flash drive was good. Oh well, another one in the dumper.
I was getting an error like that at first, but then realized I was passing in the wrong partition (I was using /dev/sda when it should have been /dev/sda2). I installed and ran gparted, which shows an obvious “bitlocker” label to the correct partition.
Then, I was stopped by another error when using “-u”, until I used “-p” instead.
Also, remove the -r to avoid having a read-only drive.
Good day, I a newbie in linux. I am using RHEL 8, I followed the steps as stipulated. If I create a new directory /media/bitlocker is gets created successfully and the /media/mount that also gets created. Now if I execute this command
“sudo dislocker -r -V /dev/sdb1 -u — /media/bitlocker
Enter the user password:
Sat Aug 28 13:13:11 2021 [CRITICAL] ‘/media/bitlocker’ already exists, can’t override. Abort.”
this is the error I am getting.
If I skip the step of creating the bitlocker and mount directories/folders then the command executes successfully. However it is not doing what I thought it was supposed to be doing, meaning it never opens the external drive instead it’s creating a copy of the entire external drive in the /media/bitlocker directory. Obviously I end up stopping this process because that disk is huge and besides I do not want to copy it.
Can anyone please assist if possible and tell me what it is I might be doing wrong or is dislocker not working properly on RHEL 8?
Thanking you in advance.
I had the same issue on Fedora, turns out you also need to install the fuse-dislocker package via: sudo dnf install fuse-dislocker
Thanksss. Very useful.
If you want write (not only read) in the encrypted disk, use:
#!/bin/bash
sudo dislocker -V /dev/sdb1 -u — media/bitlocker
sudo mount -o loop media/bitlocker/dislocker-file media/mount
realy ou have saved my full work tq so much for this post ceos3
I used this with great thanks on Ubuntu 18.04. I upgraded to 20.04 and this has broken this. All i get now when running the script is
dislocker: error while loading shared libraries: libmbedcrypto.so.1: cannot open shared object file: No such file or directory.
I am all out of ideas after fiddling with this for some time.
The steps on this page worked perfectly for Ubuntu 20.04. Thanks, ceos3c!
Does this work with Bitlocker encrypted disk partitions as well as USB flash drives?
thank you, very helpful!
I have a similar situation which is as follows:
My WD Elements 2TB external HDD is Bitlocker encrypted. I am able to access it and browse, copy edit contents on my Windows 10 home PC. But when I connect the disk to my Ubuntu Linux home PC, the system does not detect it as an external device. If I connect a non-encrypted USB HDD, the system auto mounts the device. I also tried to connect the encrypted drive to my enterprise managed work laptop, but that wont detect it either.
Would appreciate any help in this regard. I tried searching for answers on Google, but didn’t get any workable solution.
Thanks for the article.
Problem I am facing is while using this command
sudo dislocker -r -V /dev/sde1 -uYourPassword — /media/bitlocker
as I am having 2TB drive and it’s taking lot of time to do the process.
Question I am having here that It’s gonna be same all the time to take lot of time at following command mention above.
While commenting on this article process has already going on from last 30min and still WIP.
Thanks a lot,was very helpful,though had to use “fuse-dislocker” on Centos7 and yes its nice to be “lazy” grateful for the script++
Is there a way to mount multiple bitlocker encrypted drives at once? I tried modifying the script but it seems it only wants to mount 1 at a time.
No. Without the password or recovery key you external hard drive is useless. You have to buy a new one then
Hi, I have a question. Currently my External hard disk has been encrypted by itself . I think it is due to re-installation windows or whatever idk. Now it asks for the password or recovery key to open to external hard disk . I am searching for solutions for the past 48 hours. I am in this page now. My last option is to get the files from my external hdd using Linux OS. Can I get the files from Bitlocker Encrypted external hard disk without password or recovery using Linux ?? Will it work by performing the same steps as above in Linux ?? thanks in advance
Thanks a lot for this. I’d have loved to have a read AND write solution, as many others, probably, however, as I begin on Linux and use it as a backup solution for the moment, I am happy to be able at least to have a solution to ready my encrypted disks so I can at least copy data on another one.
Great that it was useful for you! 🙂
Hello Stefan, quick update on this : some distros such as Q4OS.org are prompting at login to ask Bitlocker password when they detect a Windows partition encrypted with Bitlocker. I don’t know what is the software behind, but it works in Read/write perfectly. Only drawback is that you have to login to the Bitlocker partition every time you login to linux (but it may be more secure, though). Regards, Brousse.
Wrong drive password
I am executing:
#!/bin/bash
sudo dislocker -r -V /dev/sda1 -uMyPassword — /media/bitlocker
sudo mount -r -o loop /media/bitlocker/dislocker-file /media/mount
And I obtain this error
Sat Apr 13 06:23:11 2019 [CRITICAL] None of the provided decryption mean is decrypting the keys. Abort.
Sat Apr 13 06:23:11 2019 [CRITICAL] Unable to grab VMK or FVEK. Abort.
You must use the dislocker command without -r and you must use the mount command with -rw instead of -r. Be sure, that the mount directory has the correct writing rights, 0777 is a good beginning.
Well, I can’t figure out why it failed to work on your disk. I am pretty sure that the help stated that -r parameter is for read-only access. It worked for me when I removed all the -r from my script. I will share the script in case it helps.
Thanks to you for sharing the post initially. Now I can use my bit locked disk on Linux without having to switch to windows.
unlock.sh
#!/bin/bash
sudo dislocker -V /dev/sd$1 -u — /media/bitlocker
sudo mount -o loop /media/bitlocker/dislocker-file /media/HD
If the drive is /dev/sda2, I simply call it with
unlock.sh a2
Yes I used it yesterday before making my comment.
Initially with the -r for mount and dislocker it was read only.
You should only use the -r parameter if you want it to be read only.
Check the help of both mount and dislocker.
Great! Gonna try it as soon as I get to it 🙂
Didn’t work for me unfortunately. Is still read-only.
You can remove the read only when you remove the ‚-r‘ from both the dislocker and the mount commands. That would make reading and writing possible on the mounted disk.
To automate it for any disk you can follow the suggestion by using placement variables of $1 in place of the disk within the unlock script as below.
“sudo dislocker -r -V /dev/sd$1 “
you call the script by the drive last two letters
unlock.sh e1
for example for drive /dev/sde1
Hi Ali, did you try if this works? I’m pretty sure I have tried it without the -r and it didn’t work.
So I tried this a couple nights ago, and failed miserably. I followed the directions from several websites to give my user account root privileges (editing my /ect/passwd file to change my UID & GID to 0), and the result was that I basically nuked my user account. (I know, I should have created a separate account just for this test, but I didn’t think of that….) When I tried to invoke any command afterward in the terminal (with or without sudo) it gave me a message that I did not exist. I couldn’t open any new programs, or any new tabs in my browser, and couldn’t install any new removable media. I double-checked my /etc/passwd file and the account was still there (with zeroes for the UID & GID), but somehow the OS read that as the account being unusable.
After stressing a bit about losing all the data on my machine I finally rebooted and hoped for a miracle. Fortunately during the reboot my OS asked me to create a new user account (since it didn’t find one that worked), and I was able to move all my data over to the new account, completely delete the old account (including its group), and rebuild it. Didn’t have to reinstall anything like starting fresh with the OS, but had to reset all my app settings and preferences, set up my email account again, etc. Joy.
So I’m giving up on Bitlocker for portable drive encryption. Think I’m going to try VeraCrypt, since it sounds like a solid, truly cross-platform encryption solution. I learned a fair bit about linux during this exercise, though (I’m pretty new to the system still). Thank you again, ceos3c, for the tutorial.
Thanks for your reply, ceos3c. I learned (thanks to Chris’s comment below) that removing the ‘-r’ option should make read/write possible. Unfortunately, though, even after making this change it’s still read-only for me. I’m thinking now it has to do with my user permissions (the fact that I haven’t granted myself root in my UID). Despite running these commands with sudo, when I go to actually access the directory I do it through the file manager GUI and am not a root user, and since the loop directory is located at the root level I can’t make changes. (It doesn’t seem to matter what folder you use to mount the drive – I tried mounting it in my home directory and it still didn’t work, since the loop directory still showed up at ‘/dev/loop.’)
I’ve been avoiding granting my user account blanket root permission for security purposes, but I’ll try this tonight and see if it works, and report back.
Thanks for this. After playing around with it a bit I wrote another little script to automatically reverse the effect of the script presented here, so you can essentially re-encrypt your drive, by un-mounting the de-encrypted instance (along with the extraneous ‘bitlocker’ drive mounted in the original script). Follow the directions above with regard to where to put it and how to run it. I call it “lock.sh” to parallel the “unlock.sh” in the post. Cleans things up nicely when you’re done using your encrypted drive:
#!/bin/bash
# A simple script to unmount a decrypted portable drive after previously unlocking with unlock.sh
# (Still have to unmount encrypted drive in GUI afterward to eject thumb drive)
sudo umount /dev/loop0
sudo umount /media/bitlocker
I too am curious, though, if there’s a way to remove the ‘read only’ restriction on the bitlocker drive?
Cool! Thanks for leaving this here Mark. Unfortunately I haven’t had time to search for a solution to the read only problem 🙁
In terminal, type ‘dislocker –help’ It will explain the ‘-r’, the ‘-V’ and many other options. Also, for every mount or operation on drive, one must make sure of its drive letters!
Thanks Ceos3c
Why dont you describe the parameter you use?
ex:
“sudo dislocker -r -V /dev/sde1 -uYourPassword — /media/bitlocker”
You only describe the obvious but not for what -r -V stands.
Also you script wont work often because “sde1” is not always the drive you want to unlock.
You should say ‘dislocker -r -V /dev/”$1″‘ or something like this.
And why do you write “sudo” in every single line? Pretty bad practis, just execute the script as sudo.
Also you should inform the people here that you don’t have write acces to that drive on linux.
Hello
Thank you for your advise
but i can not write on drive.
how can i write on disk?
Hi,
great advice, worked very well. However, i’m unable to write on the flash drive, how can i enable this?
first … thank you. this was EXACTLY what i was trying to do. secondly … well … how would you go about doing this for TWO NTFS drives?? any advices would certainly be appreciated … i’m a linux newbie 😉
Thanks! What exactly you mean with 2 NTFS drives? Automatically unlocking them?