In this article, you will learn how to Boost your WordPress Performance in a few simple steps – no coding needed, promise!
Recently I started my own research on how to boost my WordPress Performance, and I did a couple of courses on Udemy. In this article, you will find what I learned through my research, compressed as shortly as possible.
Now, Web Development is not my main field of expertise, but over the years hosting Ceos3c and a couple of other websites, I learned a lot about Website Administration, Design & Development through necessity. If you have ever hired a “Web Developer” on platforms like Upwork, you know what I’m talking about. Your Website will be far worse than it was before.
So, to not be dependent on those “professionals” anymore, I decided to learn it myself; what can be so hard about it when you already know some coding and hacking, right? (Which, by the way, was a great decision).
Table of Contents
- Why WordPress Performance is important
- Step 1 – Baseline Measurements
- Step 2 – Increasing your WordPress Performance
- Step 3 – Comparing your Results
- Step 4 – Fine Tuning WordPress Performance
- Conclusion and Final Words
Why WordPress Performance is important
WordPress is by far the most popular CMS out there. The amount of WordPress Websites on the Internet is mind-boggling. If you are writing a Blog or hosting a Website for your niche, you probably want to show up in Google’s search results as high as possible.
Well, a big factor in Google’s ranking is the performance of your Website. If your Website needs 20 Seconds to load, you naturally will get ranked much lower than someone who has an optimized Website that loads lightning fast. That makes sense, right?
This is why we want to have Class-A WordPress Performance.
Don’t be scared. It’s not going to hurt.
Don’t be scared to mess anything up. We will not change any code on your Website. Although, you should have Backups in place anyway. (You already do, right?)
We are only utilizing Plugins for this, so in the unlikely case anything breaks, just disable the Plugin again, and you are fine. We are only using well-known, highly-rated plugins from the official WordPress Repository.
And don’t be scared to get lost either; I will guide you through each and every step to help you increase your WordPress Performance.
A little proof that you see, I know what I’m talking about
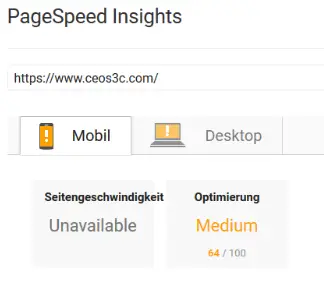
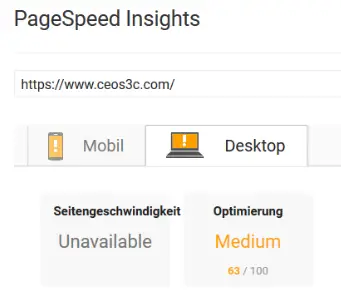
Before I started increasing Ceos3c’s WordPress Performance, my website performed quite badly.
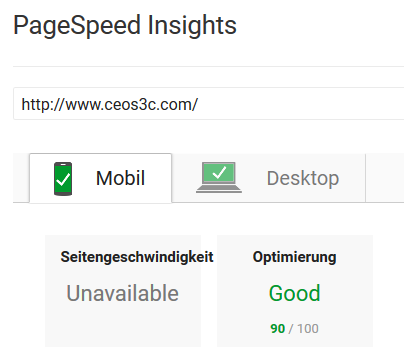
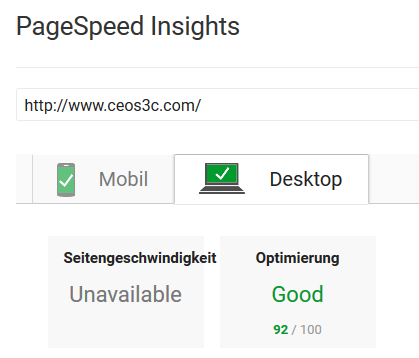
After I finished the optimization, I got great results.
This is where we want to be – and I help you to get there.
Alright, let’s get started.
Step 1 – Baseline Measurements
To have some proof that our changes are actually doing something, we have to measure our baseline first. We will also take measurements throughout each change we make to get a nice collection of Data that shows us our progress.
Either Download my Table (Excel Format) or, create your own.
WordPress Performance Table Download
Your Table should look something like this:
|
Change
|
Google Pagespeed Result
|
Pingdom Result
|
GTmetrix Result
|
Summary Web
|
Browser Speed 1
|
Browser Speed 2
|
Browser Speed 3
|
Summary Browser
|
|
Baseline Loading Time
|
|
|
|
|
|
|
|
|
|
Images Optimized
|
|
|
|
|
|
|
|
|
|
Css Minified
|
|
|
|
|
|
|
|
|
|
….
|
|
|
|
|
|
|
|
|
Here you enter the Loading Times, first from the Baseline without any changes, and then after every change we make.
We utilize different methods for measurements. We use 3 different Web Services, Google Pagespeed Insights, Pingdom, and GTmetrix. So we have a nice mix.
The Browser Speed Measurements are done with the same Web Browser, either Firefox or Chrome, directly from your own Computer. Confused? Don’t worry, I’ll guide you through.
Collecting our Baseline Data
Time to get started with the measuring. Open those 3 Websites in different Browser Tabs:
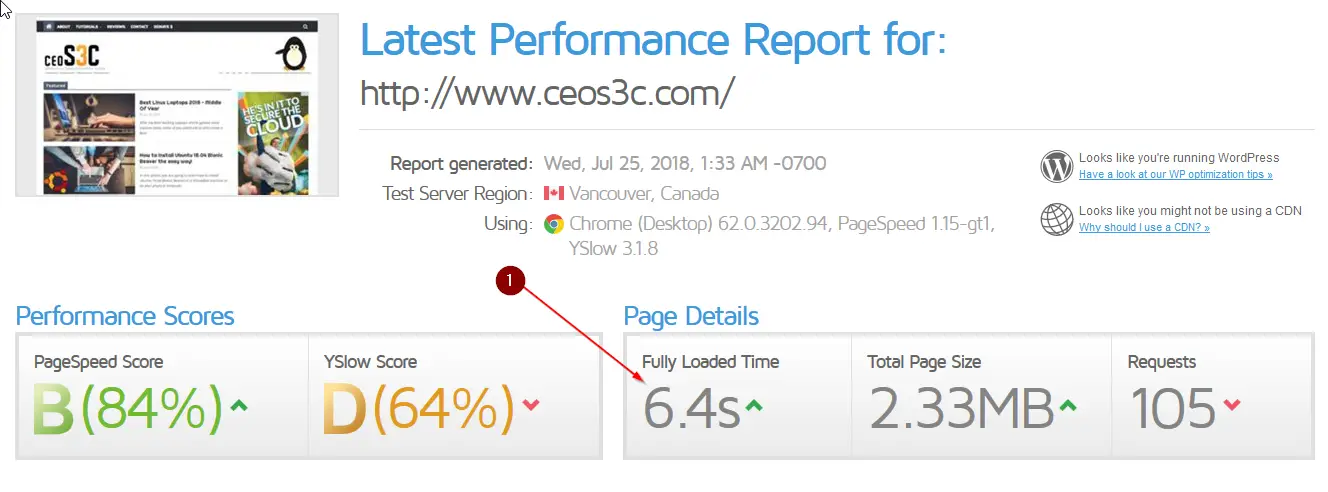
Next, to the actual page loading speeds, there will be a whole bunch of information on those Websites, including lots of useful tips on how to improve your WordPress Performance, but we will look into that later. Now just worry about Google Score / Page Loading Speeds.
Google Pagespeed Insights
Now, for Google Page Speed, Page Speed itself might be unavailable for you (as it is for me) due to a Bug from Google. Simply enter your Mobile / Desktop score in the Table instead. so let’s say (Mobile)63 / (Desktop 64).
Pingdom
For Pingdom, choose whatever Server is closest to you (Or your Target Audience), to get the most realistic measurements.
GTmetrix

Good, now we got our Web Based Baseline measurements in place. Your Table should now look like this:
|
Change
|
Google Pagespeed Result
|
Pingdom Result
|
GTmetrix Result
|
Summary Web
|
Browser Speed 1
|
Browser Speed 2
|
Browser Speed 3
|
Summary Browser
|
|
Baseline Loading Time
|
(Mobile) 90 / (Desktop) 92
|
2.15
|
6.40
|
|
|
|
|
|
Now we are going to do the Browser Speed Test.
Taking Browser Measurements
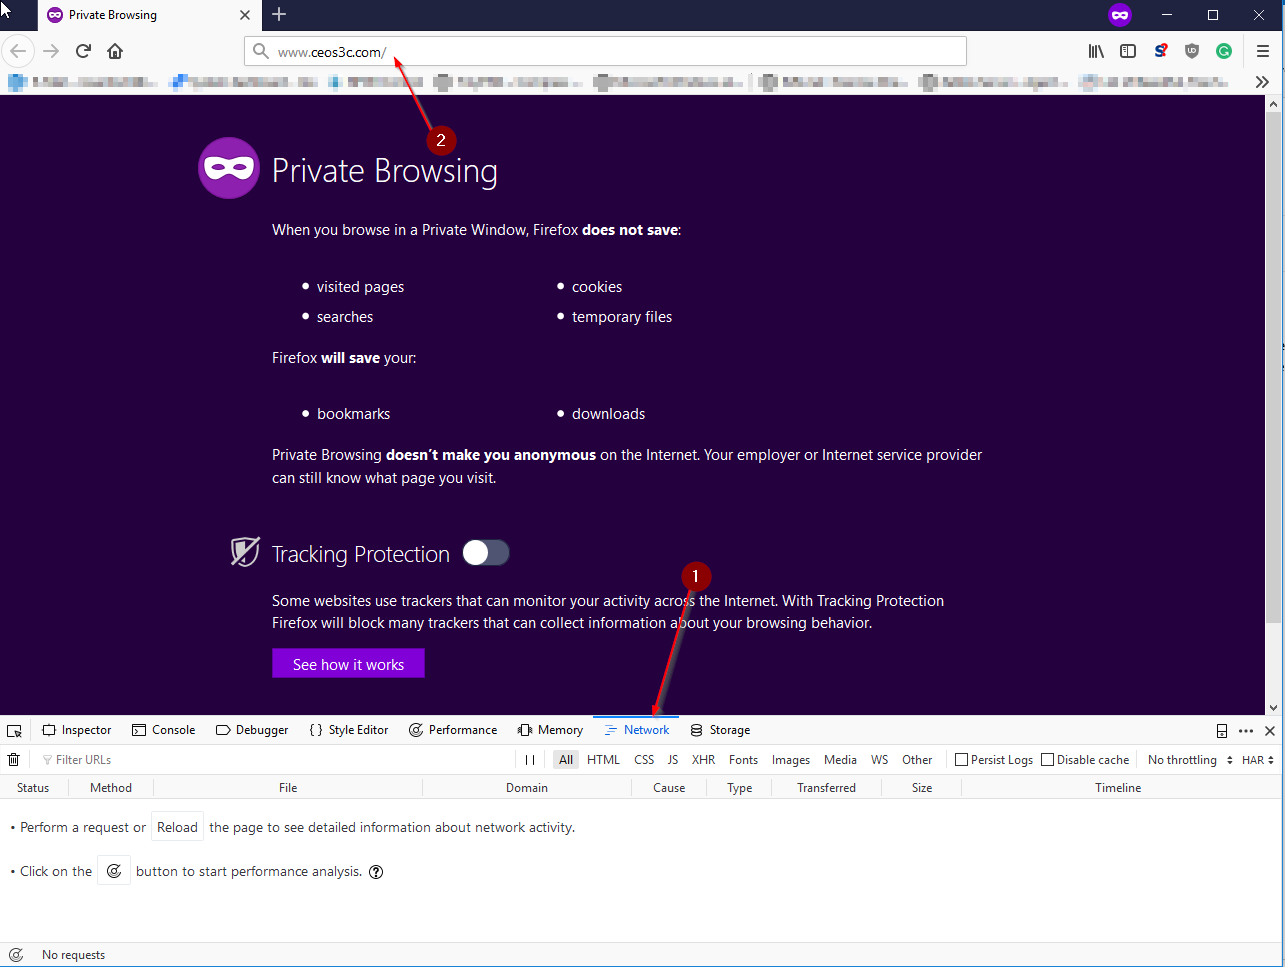
Open Firefox or Chrome and open an Incognito/Private Window Tab.
Press F12 to bring up the Developer Console. Navigate to the Network Tab (Same on Chrome & Firefox).
Enter your Website Address and hit Enter.
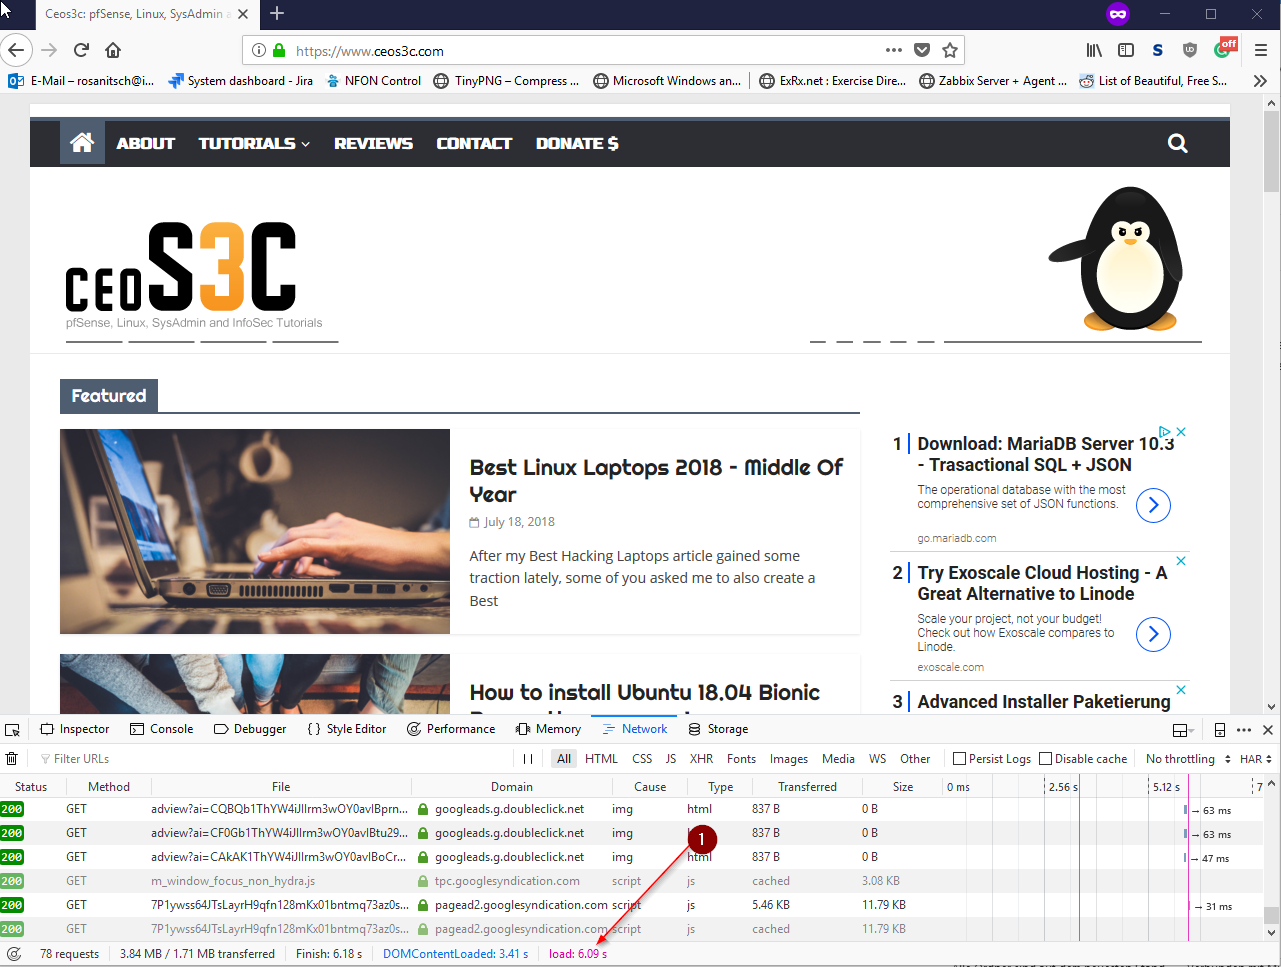
After your website loaded up, you will see your loading time at the bottom of the screen. Write this down in Browser Speed 1 in your Table.
Repeat this process two more times by pressing CTRL + F5. Write down the times again. We always do this measurement three times to get a good average! Your Table should now look something like this:
|
Change
|
Google Pagespeed Result
|
Pingdom Result
|
GTmetrix Result
|
Summary Web
|
Browser Speed 1
|
Browser Speed 2
|
Browser Speed 3
|
Summary Browser
|
|
Baseline Loading Time
|
(Mobile) 90 / (Desktop) 92
|
2.15
|
6.40
|
|
6.09
|
6.14
|
6.12
|
|
I didn’t fill out the summary; you can calculate this yourself or use Excel to do it for you. (I’m an Excel noob, and I don’t care).
Remember this whole procedure, Web Based Testing + Browser Testing. You will repeat this whole process after each change we make on your Website. Talking about making changes – We are now ready to get started with increasing your WordPress Performance!
Step 2 – Increasing your WordPress Performance
Alright, we are going to Install a couple of Plugins now; I’ll list them below but don’t install them just yet; we are going through a specific order.
- Smush
- WP Fastest Cache
- Autoptimize
- WP-Optimize
In case you don’t know how to install Plugins when you are logged into your WordPress Dashboard, Navigate to Plugins -> Add New and type the Name of the Plugin into the Search Field.
After installing it, just click on Activate to activate them. Let’s start with Smush. Remember to take a new measurement after finishing every plugin!
Smush
Smush is a Plugin that automatically compresses your Images. This is extremely important. The larger your images are, the slower your page will load, especially if you have a lot of images in your Articles.
Smush compresses images and saves you a ton of space without any noticeable loss in quality. You should also be aware of what images you upload. You should never upload full-sized images in the first place. Check out your Themes image size recommendations by simply googling: “NameOfYourTheme Image Sizes,” and you should find the documentation. Resize those images before uploading them using tools like Gimp.
Ok, go ahead and install Smush. Activate it afterward and leave everything as default. Smush will now automatically compress new images you upload. You can disable or modify this option in the Smush settings.
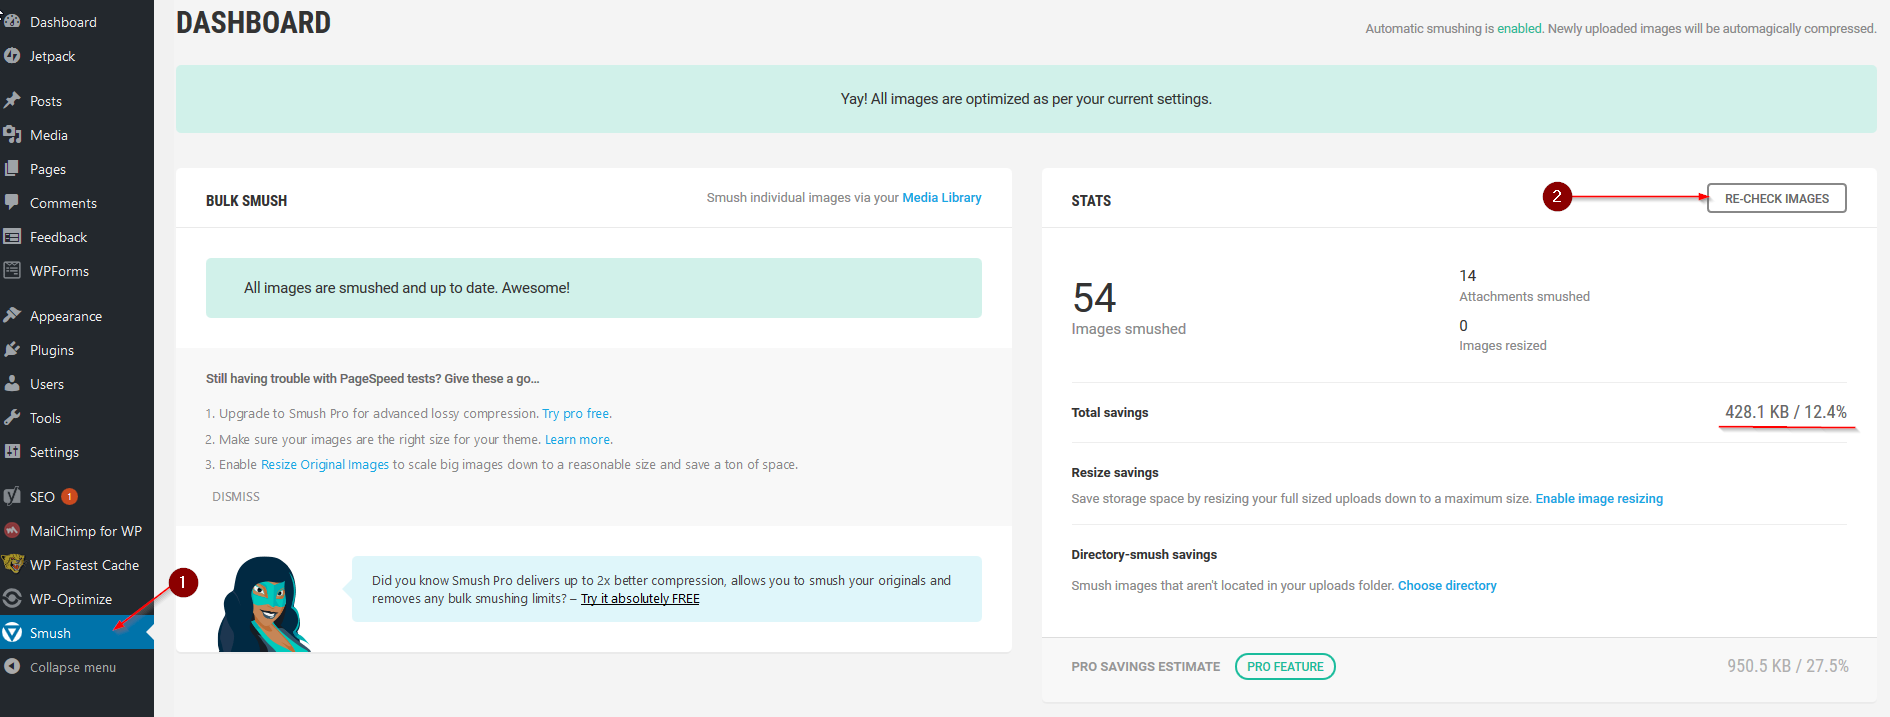
Choose Smush from your Dashboard and click Re-Check Images. Smush will now show you the images that need Smushing; you can click the Bulk Smush button to get started. Depending on how many images you have, you have to go through this process several times until all images are Smushed because the Free Version of Smush only lets you Smush 50 images or so at a time.
On the right side, you also see the amount of data Smush saved you and how much an Upgrade to Pro could save you. Your decision.
Take a new measurement NOW and write it down in the Table.
WP Fastest Cache
There are two very well-known Caching Plugins: WP Fastest Cache and WP Super Cache. I somehow achieved far superior results with WP Fastest Cache over WP Super Cache, so we are going to use this.
Go ahead and Install & Activate it.
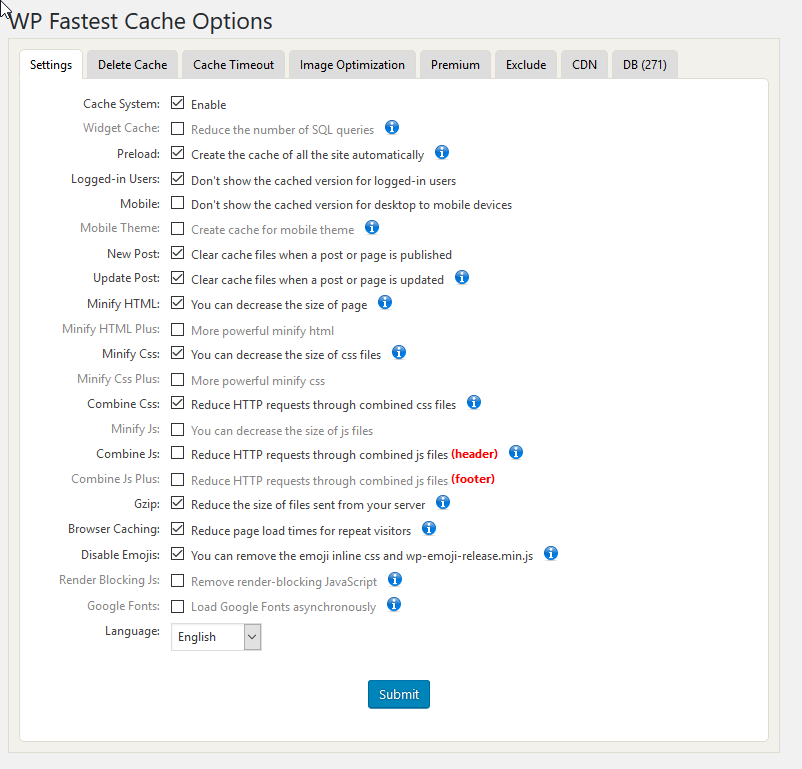
Navigate to WP Fastest Cache in the Dashboard. Adjust the options like in the Screenshot below and click Submit when you’re finished.
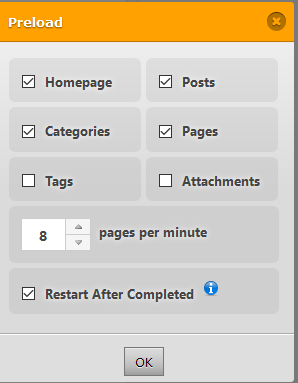
When you Enable Preload to adjust as follows:
When you Enable New Post, select: Clear All Cache
When you Enable Update Post, select: Clear Cache of Post / Post Categories / Post Tags / Homepage
When all is done, click Submit.
Take a new measurement NOW and write it down in the Table.
Autoptimize
Go ahead and Install & Activate Autoptimize. You might wonder why not use the Optimize JavaScript of the WP Fastest Cache Plugin. I tested it, and using this combination gives you a better result. In fact, quite a significant improvement in performance for me.
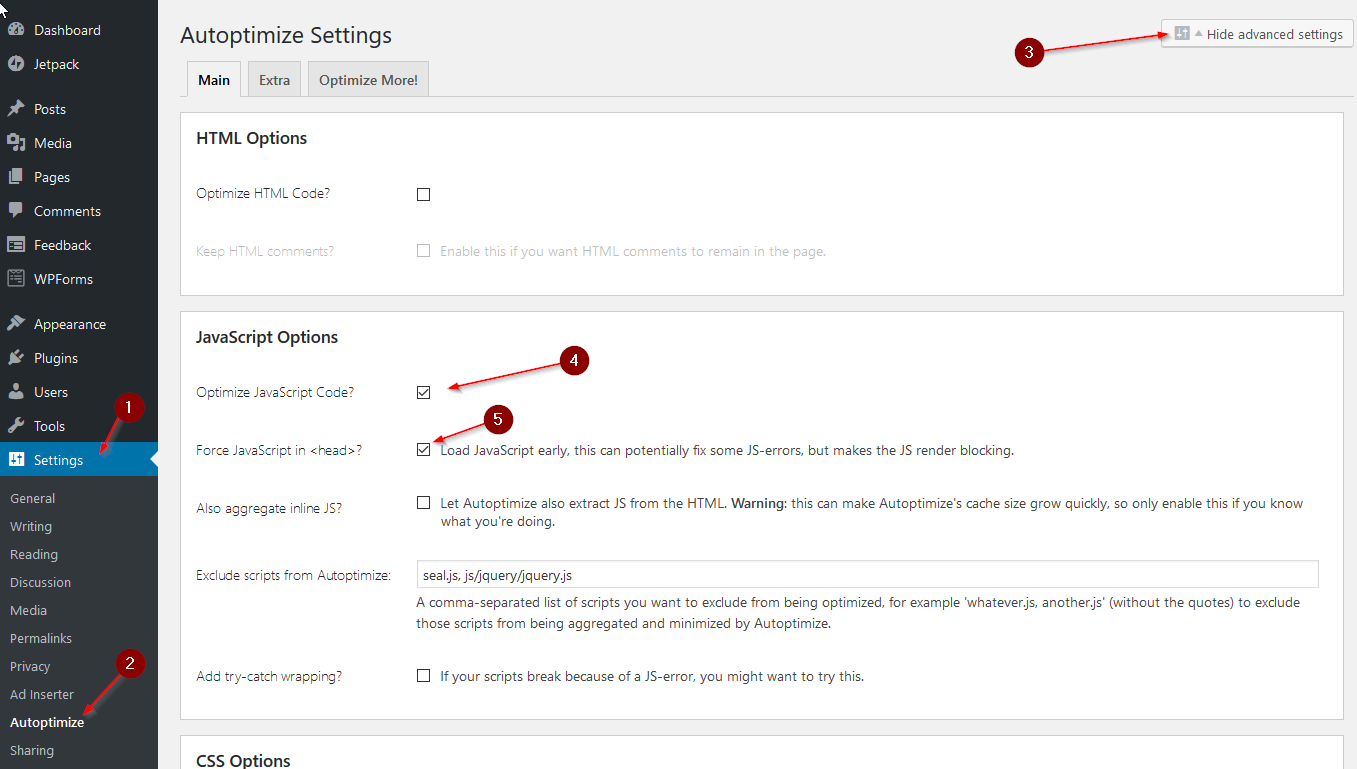
Navigate to Settings -> Autoptimize and first enable Advanced Options, then adjust as follows:
Scroll to the Bottom and select Save Changes and Empty Cache.
Take a new Measurement NOW and enter the results in the Table.
WP-Optimize
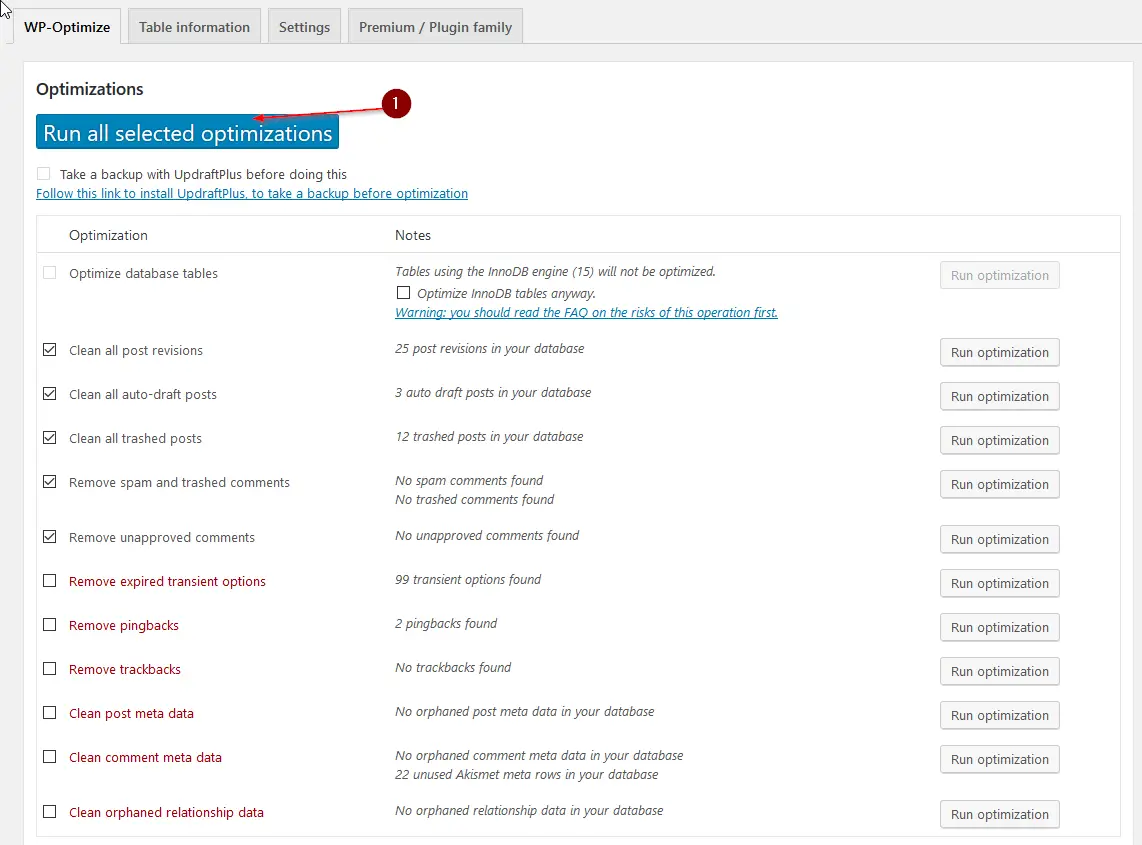
Alright, now that we have everything in place, it’s time to clean up our Database. This can result in minor performance improvements. Navigate to WP-Optimize from the Dashboard.
I never had any trouble with it, but just to be on the safe side, make a Backup of your Website before. You can use UpdraftPlus for it.
Take a final measurement after you are done.
Step 3 – Comparing your Results
If you have done everything in Order, you should see a significant speed improvement now. Your WordPress Performance should have increased by quite a bit. I used this method with several customers and on several of my own websites, and it always worked flawlessly.
I still work on refining my methods to get even better results and will keep this post updated.
Step 4 – Fine Tuning WordPress Performance
If you have followed all the previous steps, usually you should now be green on Google Page Speed Insights. This is more than enough for most users, but if the Perfectionist Gene is strong in you, you might want to take it a little further.
Disabling unnecessary Plugins
Plugins are a big factor in WordPress Performance. Generally, the more Plugins you have, the slower your page gets. Have a thorough look at all the Plugins you have installed, and uninstall everything you don’t really need!
Optimizing the MailChimp Plugin
If you are amongst those using MailChimp for their Mailing Lists, specifically the Subscriber Pop-Up, it can slow your Page down significantly. I worked around this by removing my Logo from the Pop-Up form and recommend you do the same.
Following Google Google PageSpeed / Pingdom / GTmetrix recommendations
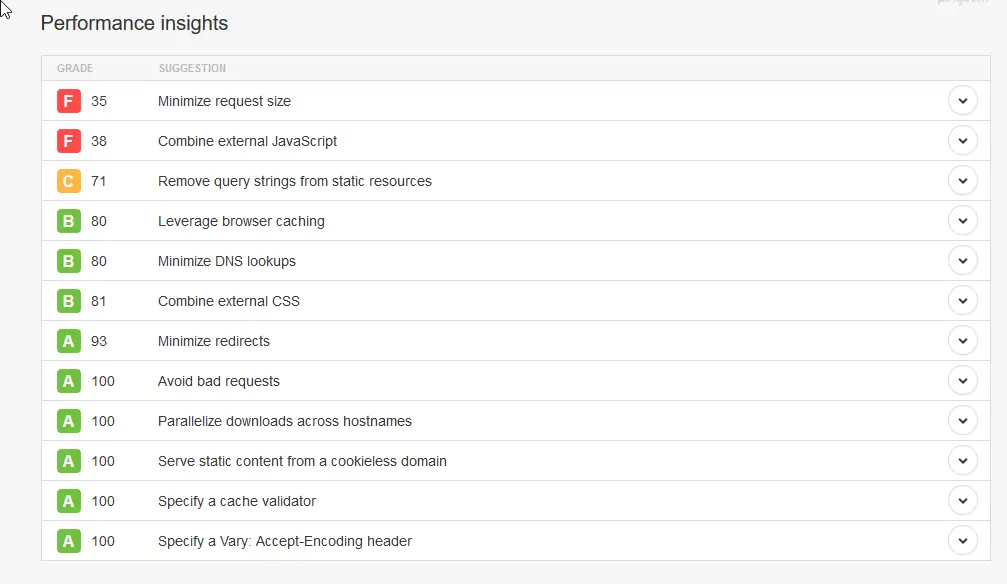
As mentioned above, now I will tell you what those other Stats from those Website Metrics are good for. Take Pingdom, for example. After your Test, scroll down a bit, and you will see Performance Grades:
All of those can be opened and will show you the Cause and a Solution to your Problem. The same goes for Google PageSpeed Insights and GTmetrix. GTmetrix has by far the most detailed (and overwhelming) stats.
I recommend working on this with Google and Pingdom. I was able to resolve quite a few issues using those analytics.
Ads – Your WordPress Performance’s worst enemy
Every one of us needs to earn money to keep our Children fed and our Blog hosting paid. Everybody understands that.
The only thing that prevents me from reaching a perfect Google 100/100 score is the Ads that I (need to ) display on my websites to keep me afloat. But this is simply what you have to deal with. You have two options: Use smaller Ad formats and fewer Ads or – Use no Ads at all.
Both are options most likely not worthy of a few Milliseconds of extra Page Loading Speed.
Conclusion and Final Words
Wow, this was a longer article than I intended it to be, but now you have got my Catalyst Knowledge of everything I spend Hours (and Years, really) learning by doing and by spending ungodly amounts of time Researching.
I found this to be the most convenient solution for all of my WordPress Websites. It works in most cases and always brings speed improvements. If you just want to do one thing, Image Compression is huge.
I plan to write a couple more WordPress Tutorials in the future because I spend so much time with it.
I would love to see your Speed Test Tables in the Comments below and hope to hear a couple of Success Stories! If you liked this, you might also want to check out my Open Source Tutorials to learn more about the Greatness that is Open Source.

