In this article, you are going to learn how to install FreeNAS.
On the weekend, I decided to back up all my data and did a complete re-install of my FreeNAS box. I was running FreeNAS 9.10-U2 and had a couple of errors I wanted to get rid of a long time. After reading a couple of articles about how Updates from 9.10 to 11.x failed miserably, so I decided to start from scratch. I anyway wanted to do some restructuring of the whole thing.
The installation of the physical box went through very fast and easily. I decided to document each step and share an up-to-date article with you. I also want to go a little deeper into FreeNAS this time, so there will be a couple of articles popping up in the near future, covering topics like Plex, VMs, and so on.
Also, check out my FreeNAS Build. Serving me reliably for almost 2 years.
I will guide you through the whole installation and initial configuration, including creating the first volume. Once you are done with this article, continue with this article on how to create your first Windows share.
So without further ado, let’s get right started.
Table of Contents
- Step 1 – Downloading FreeNAS and prepare a bootable USB-Drive
- Step 2 – Installing FreeNAS
- Step 3 – Initial Configuration
- Step 4 – Initial Configuration continued in the Web GUI
- Step 5 – Creating a Volume
- Conclusion
Step 1 – Downloading FreeNAS and prepare a bootable USB-Drive
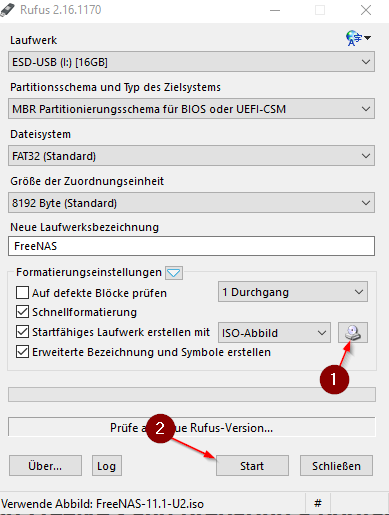
First things first – download the FreeNAS ISO file from their homepage. The file is around 600 Megabytes. Next, plug an empty USB-Drive into your computer and download Rufus. We will use Rufus to create a bootable USB-Drive. Please note that FreeNAS 11 recommends using no less than 8 Gigabytes of RAM.
Once you have downloaded both, start Rufus.
Click on the Symbol indicated by 1 and select the FreeNAS ISO from your download folder. Click Start to start the procedure. If you get asked that a newer version of the Grub Bootloader is available, agree to download it.
Also, be aware that everything on your USB Drive will get deleted!
Perfect. Now plug the USB-Drive into your NAS System. Plug it in the backside, directly into your Motherboard. Not in a USB slot in your case.
Step 2 – Installing FreeNAS
Boot up your NAS and hit whatever key you need to bring up the boot menu. Check your Motherboard’s manual to which key it is, usually F8, F11, or F12.
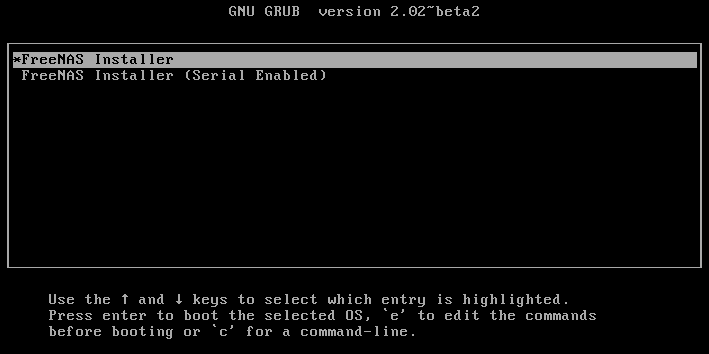
Choose the FreeNAS Installer from the first screen by pressing Enter.
On the next prompt, choose 1 to Install / Upgrade
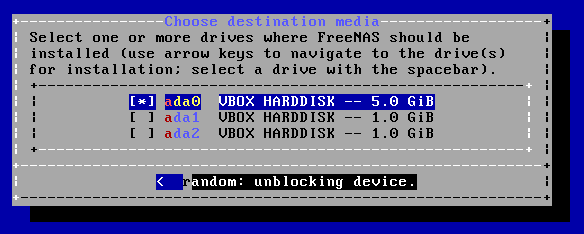
Now choose which Hard Drive you want to install FreeNAS on. You have to install FreeNAS on a separate Hard Disk. It can’t be included in your raid. For this demonstration, I am using VirtualBox, so I install the FreeNAS OS on ada0.
ada1 and ada2 will be used as our Raid later on.
Select the desired drive by pressing Space and continue with Enter.
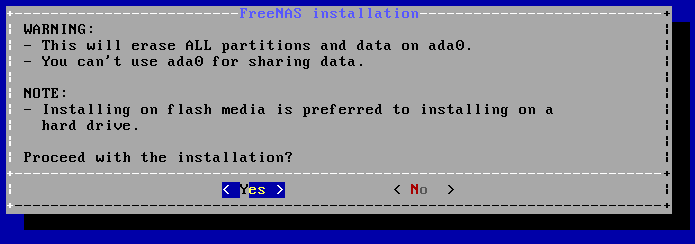
Confirm that you are aware that everything on that Hard Drive will be wiped.
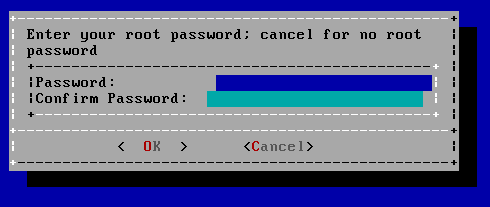
Choose a strong Root password.
Next, you have to choose if you want to install FreeNAS in BIOS or UEFI mode. If you are unsure what that means, choose boot via BIOS.
And finally, the installer will run through. Wait for it to finish.
Press OK to confirm that the installer has finished.
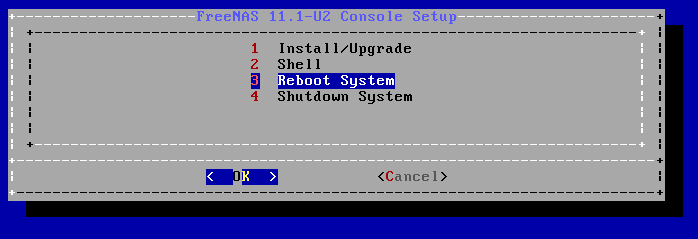
And finally, select Reboot System. Remove your USB Drive after the restart is done.
The installation is now done. Wait for the system to boot up.
Step 3 – Initial Configuration
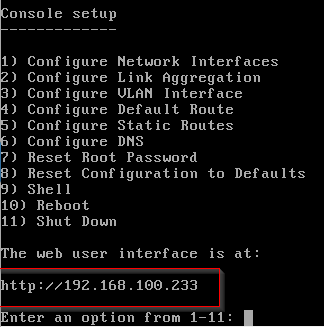
Alright, now when you look at the screen, you can already see that “The web interface is at http://ipaddress/”
If you use DHCP, you can already reach your NAS via this IP Address.
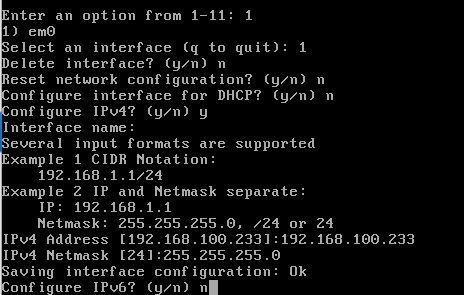
Now open a browser and enter this IP Address. If you don’t have DHCP, you need to configure your IP by pressing 1. (If you use DHCP, you can skip this next step.)
Follow the instructions in the next screenshot. Enter an IP Address and a Subnet mask.
Good. Time to use the Web GUI.
Step 4 – Initial Configuration continued in the Web GUI
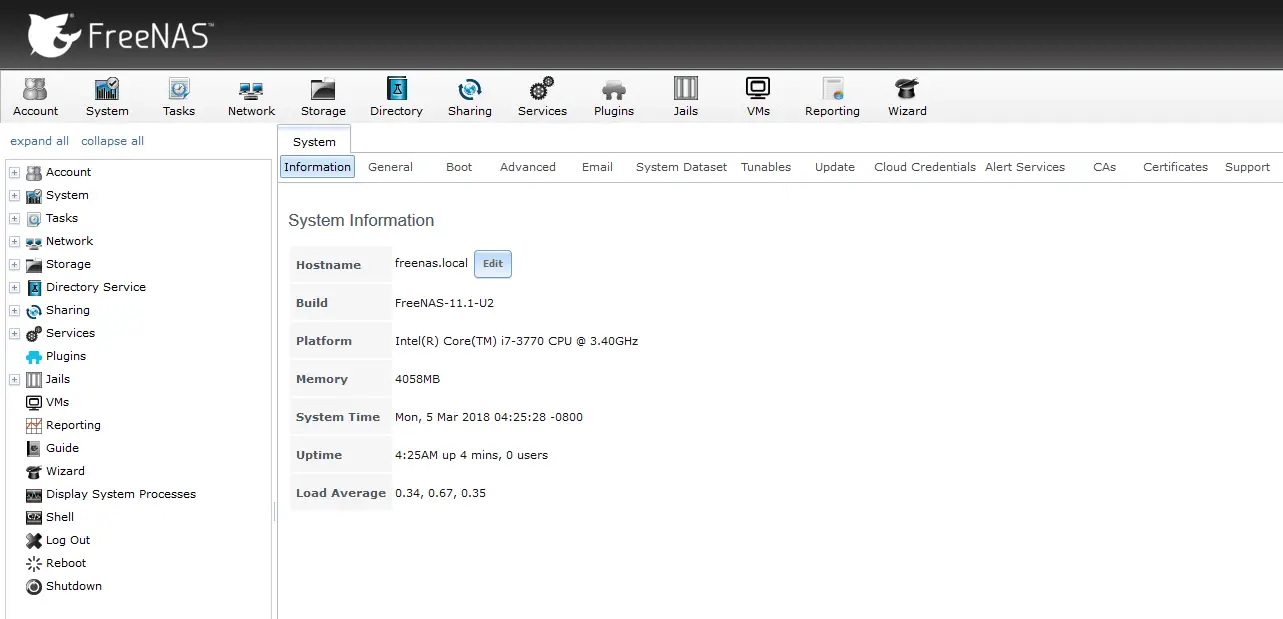
Open a browser and enter the IP Address of your NAS. Enter your Root password and exit the Configuration Wizard.
Congratulations. You successfully installed FreeNAS. Now we go through a couple of things to make sure everything is in place.
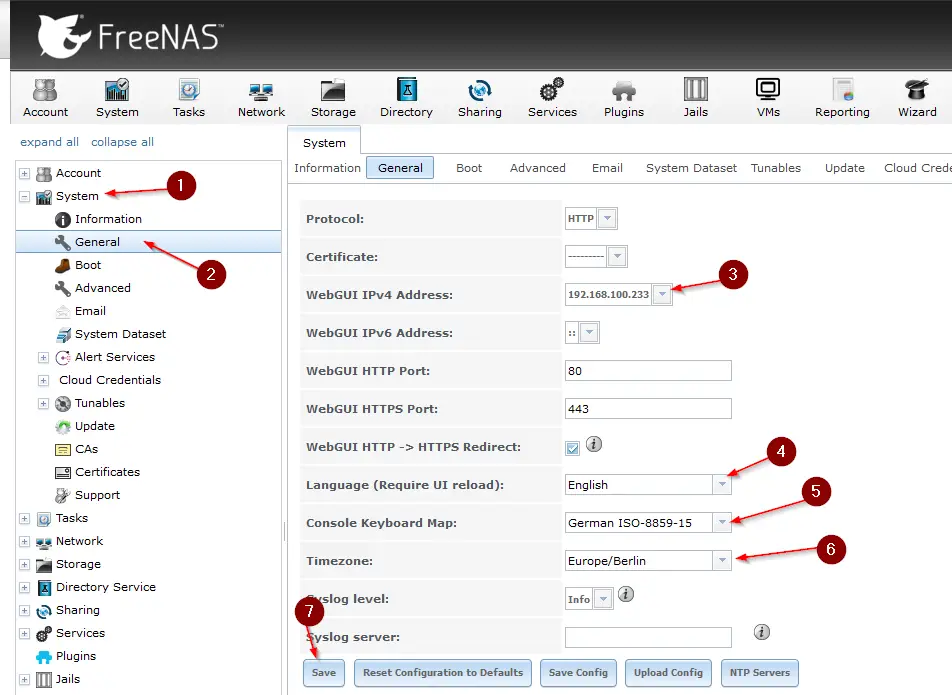
First, navigate to System -> General. Adjust the WebGUI IPv4 Address, the Language if needed, your Keyboard Map, and Timezone. Finally, hit Save.
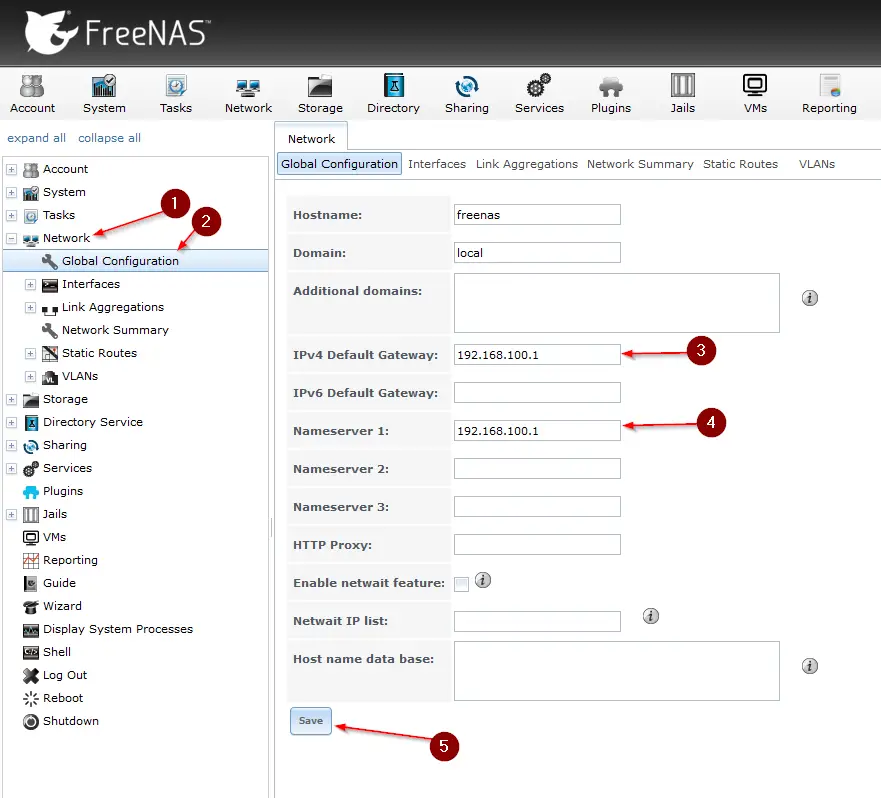
Next, navigate to Network -> Global Configuration. If you do not use DHCP, enter your Default Gateway and Nameserver here. Usually, the IP Address of your Router. Also, change the Hostname and Domain if applicable.
Step 5 – Creating a Volume
Alright, time to create our first Volume. Navigate to Storage -> Volumes -> Volume Manager.
Give your Volume a descriptive name. Next, use the slider and drag it to the right to adjust the desired amount of Hard Disks you want to include in this Volume. Alright, now we get to the little bit more complicated part – choosing a Raid Set.
Because I have just two Hard Drives in my Lab NAS, the only thing that makes any sense here for me is Mirror. For you, it will be different.
You will probably have the choice between RadZ1 and RaidZ2. Let me quickly try to elaborate. Gladly correct me if I am wrong.
- RaidZ1: You need at least 3 Hard Drives. RaidZ1 is the equivalent of Raid5
- It works with parity, if 1 Hard Drive fails, your Data is still there, and you can replace the broken Hard Drive
- If a second Hard Drive fails at the same time (not unlikely), your Data is lost.
- Usage case: If you want more storage at the cost of security, data loss is acceptable (If you run separate backups of your important data, for example)
- RaidZ2: You need at least 4 Hard Drives. RaidZ2 is the equivalent of Raid6
- It also works with parity, but 2 Hard Drives can fail before data loss occurs
- Usage case: Security over storage space. Takes up more storage than RaidZ1
- It also works with parity, but 2 Hard Drives can fail before data loss occurs
Which one suits you is entirely up to you. I choose RaidZ1 because I run regular backups of my Data anyways, so I prefer having more disk space available. Just take the above points into consideration. You can also see a preview of the estimated available disk space when changing between RaidZ1 and RaidZ2 in the Volume Manager Window.
Conclusion
And that’s it! You successfully installed FreeNAS and went through the basic configuration. Now you can continue with this article, which explains how to create your first Dataset and Windows Share. Stay tuned for more FreeNAS goodness in the near future. Also, check out my FreeNAS build here.
Don’t miss out on my YouTube Channel – if you liked this tutorial, you would like the content on YouTube too.
ℹ️ Related Articles
👉 My Popular DIY FreeNAS Build
👉 Use FreeNAS as an UniFi Controller
👉 FreeNAS Smart Tests & Scrubs
👉 How to install Plex Media Server on FreeNAS
👉 How to install FreeNAS
👉 How to create Windows Shares on FreeNAS
👉 Manually Update Plex Media Server on FreeNAS
👉 Upgrade FreeNAS to TrueNAS




Thanks for the guide. Step5, my install of FreeNAS 11 does not give me the option to create Volumes only Pools, Shapshots, VMware-Snapshots. Has FreeNAS-11.2-U2.1 changed the name of things?