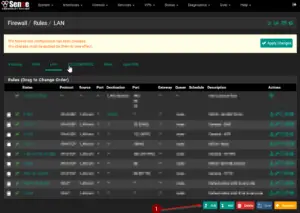
In this tutorial you will learn how to create an alias and a firewall rule with pfSense.
Why Aliases are useful
Think of DNS and IP Addresses, of which you should be familiar by now if you followed my blog and YouTube for a while now.
DNS translates IP Addresses to a Fully Qualified Domain Name, like for example www.google.de is translated to 216.58.209.35 by my DNS Server.
Basically the same thing happens with aliases, just that you can set one name, for example
Name: Microsoft
Now you have a ton of options what you want to store in that alias
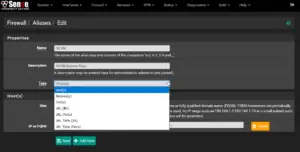
- Host(s)
- Network(s)
- Port(s)
- URL (IPs)
- URL (Ports)
- URL Table (IPs)
- URL Table (Ports)
Now you can say, assign the alias Microsoft to just one or a couple of Hosts, Networks, Ports or URL’s.
You can for example assign:
outlook.microsoft.com
exchange.microsoft.com
office365.microsoft.com
All to the one alias Microsoft.
Or the same with a couple of IP-Addresses or Networks.
So why is this useful you might wonder?
Let’s say, you are using VOIP, like in the following example that I will show you.
You need to allow certain ports from your firewall to the VOIP providers network. If the VOIP provider just has one network, you could, of course, just type in the network range like 216.58.209.35/21
In some cases, there are is more than one network that you need allow ports to, so you would need to create each firewall rule twice or even more often if you want to allow the ports to all of the provider’s networks.
That’s where aliases come in handy. I also use aliases for single networks, because I can remember a single Name better than an IP Address range, and you probably too except you are some kind of number-wiz.
So let me quickly run you through the steps that are necessary to create an alias and a firewall rule using the alias.
Creating an Alias
1 - Log in to your pfSense Web Interface and navigate to Firewall / Aliases and click on Add.

Now the choice is your’s, you can choose if you want to assign Networks, Hosts, URL’s or Ports.
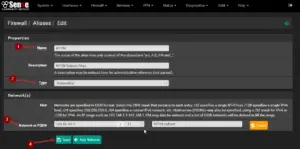
If you want to add more than one Network, just click on +Add Network.
The Name you set on Part 1 will be the Name that is used as the Alias Name in the Firewall Rule later.
2 - Choose a Name, Type and specifiy the values and click on Save
3 - Apply Changes
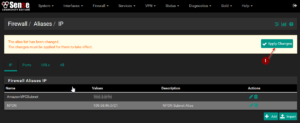
Now it’s time to create a Firewall Rule using our just created Alias.
Creating a Firewall Rule using the Alias
4 - Navigate to Firewall / Rules and choose your desired interface and click on Add.
5 - Choose the desired Address Family, Protocol and Source.
6 - On the Destination Tab choose Single host or alias on Step 4
7 - Start to type the name of the Alias you created on Step 5, it will auto complete
8 - Choose the desired Destination Port Range
9 - Add a description
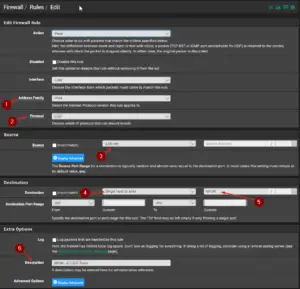
And that’s it. Now you created a Firewall Rule using your Alias. You should utilize this feature as it is very handy, especially in enterprise environments. You can also use it to block certain URL’s, but there are better options where we will look into later.
I hope this guide gives you a good idea on why using Aliases is useful and a real time-saver!
- Firewall Micro Appliance With 4x Gbe Intel Lan Ports for PFSense
- Firewall Micro Appliance with 2x Gbe Intel LAN Ports for PFSense Barebone
- Firewall micro appliance with 4x Gigabit Intel LAN Ports for pfSense with 4GB RAM / 16GB mSATA
- Firewall micro appliance with 2x Gigabit Intel LAN Ports for pfSense with 2GB RAM / 16GB mSATA


