If you want to enable HTTPS for Plex Media Server, you will probably experience that Plex can’t establish a secure connection and wants to use an insecure one instead when you try to connect to your server via the web interface.
⚠️ If you would like to learn more about pfSense, I highly recommend you check out my pfSense Fundamentals Bootcamp over at Udemy. This is the most up-to-date as well as the highest-rated pfSense course on Udemy.
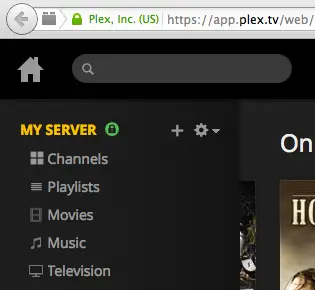
The little green lock next to your server name is what we want to achieve.

Of course, this is even more relevant if you want to use your Plex Media Server remotely.
Table of Contents
Step 1 – Plex Configuration
Let’s start with the Plex configuration.
- Open your Plex via the web browser
- Click on the settings tab in the right upper corner

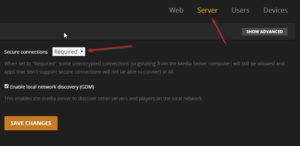
- Click on Server and on the Network tab on the left and set secure connections to required (I’d recommend leaving it on preferred until you setup your pfSense firewall correctly to see if you are able to establish a secure connection. If this is assured, change it to Required!)

- Click on SAVE CHANGES
That’s it for the Plex part now we continue to our pfSense firewall. This configuration is the same no matter if you use DNS Resolver or DNS Forwarder.
Step 2 – Enable HTTPS for Plex on pfSense
- Login to your pfSense firewall via the web interface
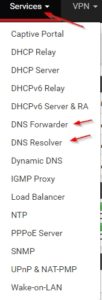
- Click on the DNS Service you have in use

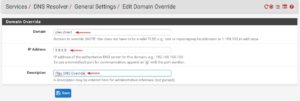
- Scroll all the way to the bottom until you find Domain Overrides and click on Add

- As Domain you enter: plex.direct
- For IP Adress you enter the Google Public DNS Server 8.8.8.8 or a DNS Server of your choice

Now you eventually have to delete your browser cache and try connecting to Plex again. Now you should be able to see an HTTPS connection and the shiny green lock. This is how you Enable HTTPS for Plex on pfSense.
For any questions leave a comment.

