It is tradition on this blog to have an updated guide on how to install Kali Linux in the easiest possible way. In this guide, I show you how to install Kali Linux on VirtualBox in a complete, beginner-friendly guide. We won’t skip any steps, and I make sure to take you through every step of the way.
Table of Contents
- Can I install Kali Linux on VirtualBox?
- How much RAM do I need for a Kali VM?
- Step 1 – Installing VirtualBox
- Step 2 – Install Kali Linux
- Step 5 – Starting Kali Linux
- Step 6 – Logging in to Kali Linux
- Next Steps
- Conclusion
Can I install Kali Linux on VirtualBox?
Yes, you can install Kali Linux on VirtualBox. VirtualBox is a powerful virtualization platform that allows you to run virtually any operating system within your main operating system. This makes it ideal for trying out new systems like Kali Linux without having to install them directly onto your computer.
There are two choices when it comes to installing Kali Linux on VirtualBox:
- Option 1: Using a pre-installed VirtualBox image provided from Kali.
- Option 2: Installing Kali Linux from scratch on VirtualBox.
There is not really an advantage or disadvantage in either of these options. We prefer to use the pre-installed version because it saves us some time!
How much RAM do I need for a Kali VM?
Kali Linux can be run with as little as 128MB of RAM if you choose to not use a graphical user interface. If you do want to use a GUI, you should dedicate at least 2GB of RAM and 20GB of disk space.
However, you also have to take your host system memory into consideration. If you run Windows 11 on a modern PC or laptop, you will probably have at least 8GB of RAM available.
In our opinion, 8GB is barely enough to run Kali Linux in a VM since your host system will require at least 6GB of RAM to work properly. That leaves your Kali VM with just 2GB of RAM, which can run out rather quickly if you plan on using RAM-hungry tools like Burp Suite, which recommends at least 8GB of RAM to begin with.
| RAM | Recommendation |
|---|---|
| From 128MB (512MB recommended) and 2GB disk space | Kali Linux without GUI can be run |
| From 2GB and 20GB disk space | The absolute minimum to run Kali with GUI |
Step 1 – Installing VirtualBox
VirtualBox is a free-to-use tool for creating virtual machines. It is also the top choice when it comes to installing Kali Linux. I personally have used VirtualBox for the past several years.
Head to the VirtualBox website and download the latest version of VirtualBox and also the VirtualBox Oracle VM VirtualBox Extension Pack.
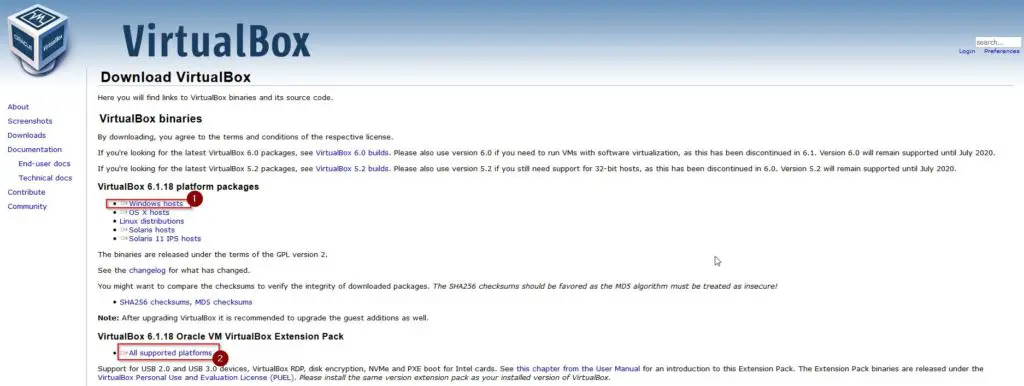
Once you are done with that, install VirtualBox, leaving everything as default. After that, install the VirtualBox Extension Pack. Now we are ready to install Kali Linux on VirtualBox.
Step 2 – Install Kali Linux
Before we can install Kali Linux, we have to download it.
Downloading Kali Linux
I have written a complete guide on how to download Kali Linux and check the downloaded file for legitimacy for those of you looking for 100% safety.
Head over to the Kali Linux website and download the Kali Linux 64-bit VirtualBox Image. The advantage of this pre-configured image is that we don’t have to run through the initial installation process of Kali Linux. It also comes pre-loaded with all the necessary drivers we need to run Kali Linux on VirtualBox.
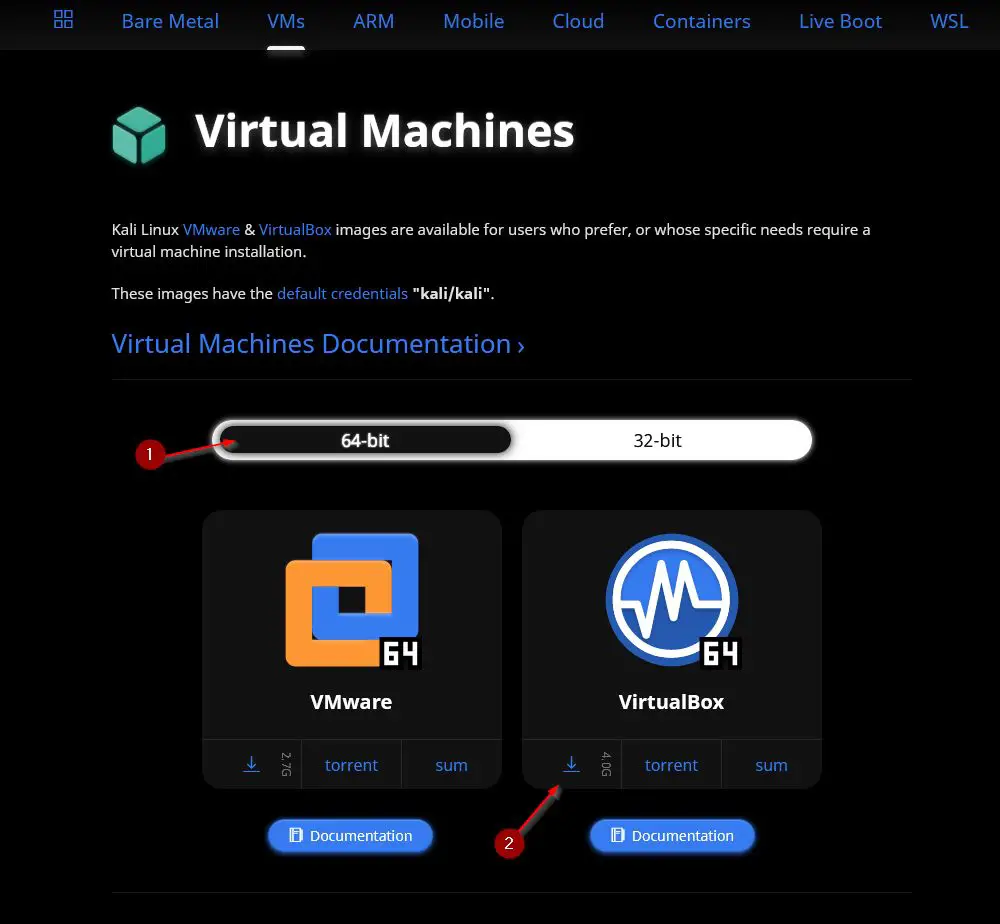
Once you have downloaded the virtual machine, you have to unzip it using 7-Zip. If you haven’t installed 7-Zip, download it here and install it. It’s free.
After unzipping the file, make sure to move it to a folder on your computer where you want to store the virtual hard disk since you can’t change that easily after importing the machine to VirtualBox.
Step 3 – Importing Kali Linux to VirtualBox
Now we have everything that we need to install Kali Linux.
In VirtualBox, click Machine -> +Add
From here, choose the downloaded and unzipped Kali-Linux-YourVersion-vbox-amd64 (the one with the blue icon) file from your folder and click on Next.
Step 4 – Fine Tuning Kali Linux
After the import is done, right-click your imported VM and select settings. Confirm any upcoming prompts from VirtualBox with yes. It might have to install some network drivers.
Changing the VM Name
In the General tab, you can change the name to something less generic.
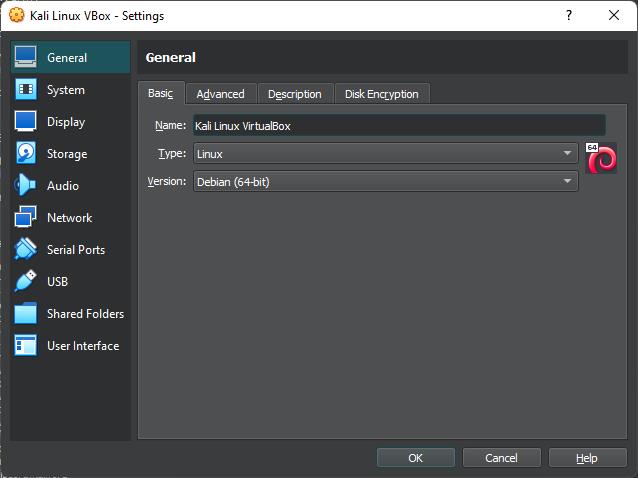
Adjusting Memory
Next, click on the System tab and adjust the Base Memory. As long as you stay within the green area of the adjustment bar, you are fine. As a general rule of thumb, try not to use more than half of your host computer’s memory. So if you have 8GB RAM in your computer, assign 4GB to Kali Linux.
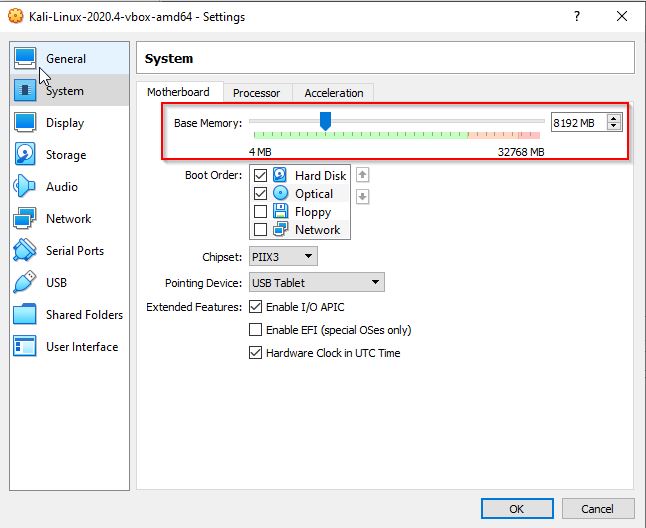
Adjusting Processors
Click on the Processor tab next. The same rule of thumb as with memory applies. Stay within the green area of the adjustment bar.
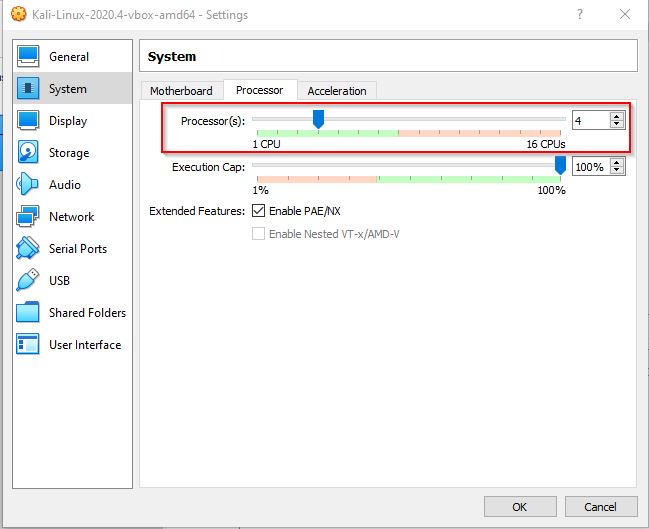
Everything else can stay as it is right now. Exit the Settings by pressing OK.
Step 5 – Starting Kali Linux
Time to start our freshly imported Kali Linux!
Right-click the Kali VM and click on Start → Normal Start.
When you start Kali Linux for the first time, it might take a while for the initial boot-up.
OPTIONAL: In case Kali Linux is stuck in boot mode at the Kali Logo
While writing this tutorial, I have encountered this problem myself. If Kali Linux is stuck at the Kali logo while booting, follow the steps below. This has to do with the Windows Hyper-V feature.
- Press Windows Key and type cmd
- Right-click Command Prompt and select → Run as Administrator
This has worked for me:
bcdedit /set hypervisorlaunchtype offCode language: JavaScript (javascript)Restart your computer afterward. Then Kali should boot.
Some users have reported they also needed to run this command to make it work:
DISM /Online /Disable-Feature:Microsoft-Hyper-VI suggest you try it by running the first one and rebooting. If that doesn’t work, try the second one and reboot again.
Step 6 – Logging in to Kali Linux
Now you are ready to log in! The default login credentials are:
Username: kali
Password: kali
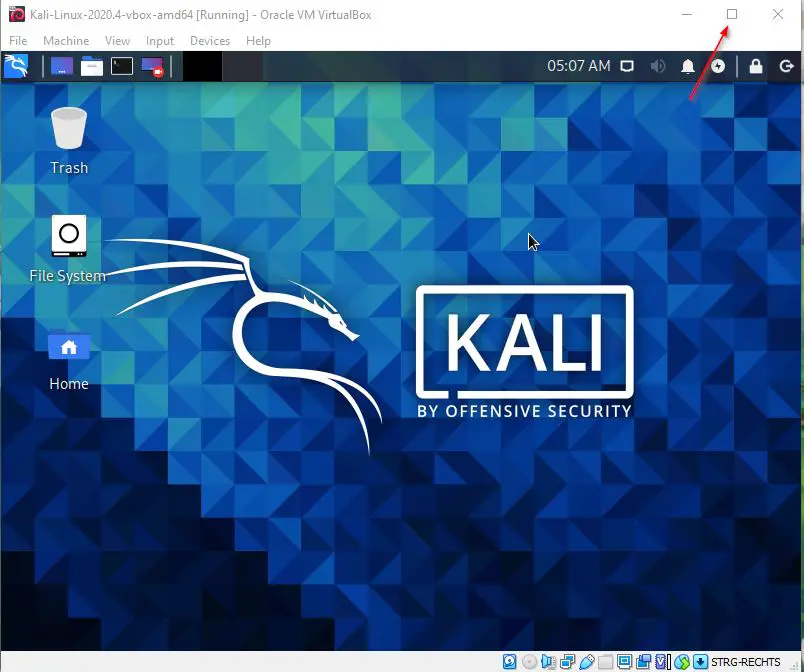
If you did everything right, you should be able to log in and also be able to maximize your screen, as Guest Additions are already installed in this pre-configured image.
Next Steps
I won’t go over the next steps in this article as I have a complete dedicated article for that: The Top Things to do after Installing Kali Linux in 2022.
I highly suggest you follow at least the initial steps in this article, as I cover things like changing the default password and user and also show you my favorite Kali Linux tweaks.
Conclusion
This is how easy it is to install Kali Linux on VirtualBox nowadays. If you want to learn more about Kali Linux and Ethical Hacking, check out some of the articles listed below. Also, if you want to try out Kali Linux on VMWare instead of VirtualBox, check out this article!
⚠️ Kali Linux Wiki
➡️ Download Kali Linux Safe & Easy
➡️ Install Kali Linux on VirtualBox
➡️ Install Kali Linux on VMWare Workstation
➡️ Dual Boot Kali Linux with Windows
➡️ Install Kali Linux on WSL 2
➡️ Install Kali Linux on a Laptop
➡️ Install VSCode on Kali Linux
➡️ Install OpenVAS on Kali Linux
➡️ Install Docker on Kali Linux
➡️ WiFi Adapter for Kali Linux

My installation get stuck on black screen
I have downloaded the .ova file kali linux for virtual box but in kali linux storage tab what i have to actually put in optical disk option
People say that it is important to insert an .iso file in optical disk
Where can i find updated guide for installing kali linux as main os?
i don’t know why he tell me out of memory