Now that you have a basic understanding of what Nmap is and its basic commands, we can dig a bit further and start to talk about Nmap Host Discovery options. When you start working for a client and you are presented with a new network, the first thing you want to do is to reduce the list of devices (or IPs) in the network into a list that only contains devices that are interesting for further investigation.
Gladly, we have Nmap Host Discovery to help us with this. In this article, we will go through all of the Nmap Host Discovery options and I explain what each option does.
Note: If you want to learn how to run Nmap on Windows using WSL 2, make sure to check out our complete WSL 2 tutorial series.
👀 This Tutorial has some related Articles!
👉 Part 1 – Nmap Basics
👉 Part 2 – Nmap Host Discovery
👉 Part 3 – Advanced Nmap Commands
👉 Part 4 – Nmap NSE Scripts
👉 Part 5 – Nmap on Windows
Table of Contents
Nmap Host Discovery Options
First, let’s take a brief look at all the available options:
| Command | Option |
|---|---|
| -sL | List scan |
| -sn | No port scan |
| -Pn | No ping |
| -PS | TCP SYN ping |
| -PA | TCP ACK ping |
| -PU | UDP ping |
| -PY | SCTP INIT ping |
| -PE; -PP; -PM | ICMP ping types |
| -P0 | IP Protocol ping |
| -PR | ARP ping |
| –disable-arp-ping | No ARP or ND ping |
| –traceroute | Trace path to host |
| -n | No DNS resolution |
| -R | DNS resolution for all targets |
| –resolve-all | Scan each resolved address |
| –system-dns | Use system DNS resolver |
| –dns-servers | Servers to use for DNS queries |
List Scan (-sL)
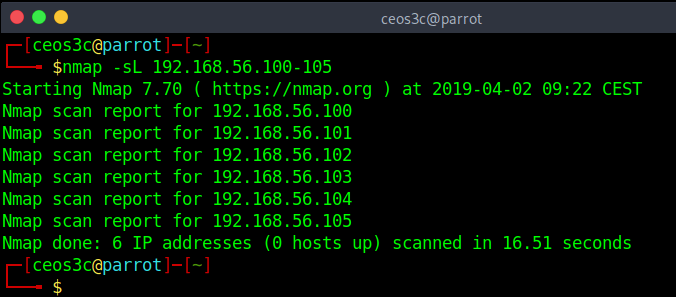
nmap -sL 192.168.56.100-105Code language: CSS (css)The list scan lists each host of the network without sending any packets to the hosts themselves. I found that this command does not work all the time, depending on what kind of setup you run it against.
No Port Scan (-sn)
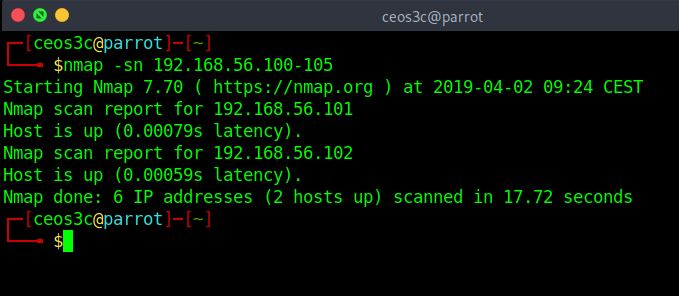
nmap -sn 192.168.56.100-105Code language: CSS (css)The no port scan option simply means that you don’t run a port scan after host discovery is done. It only prints out the available hosts that responded to the discovery probes. You can also call this a ping scan. According to Nmap.org, this is one step more intrusive than the previous list scan. It could be called light reconnaissance because it is not attracting too much attention.
No Ping Scan(-Pn)
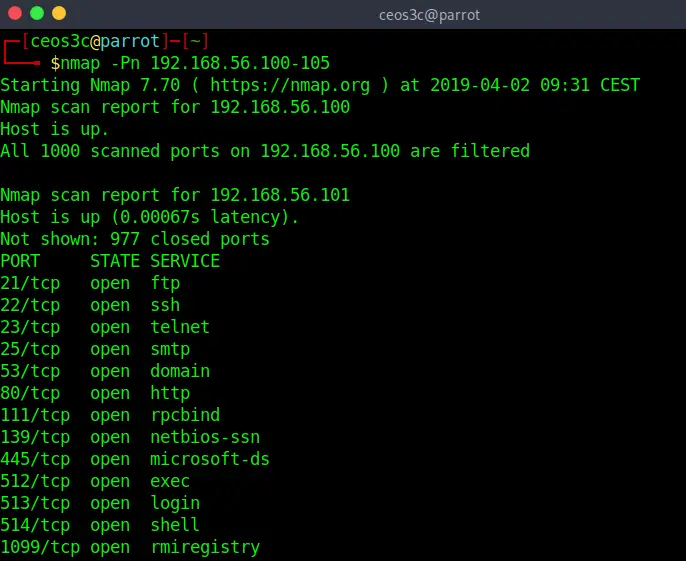
nmap -Pn 192.168.56.100-105Code language: CSS (css)The no ping scan skips the complete Nmap discovery process. Nmap directly starts to run it’s default port scans (1000 most used) if it finds the target IP is up.
TCP SYN Ping
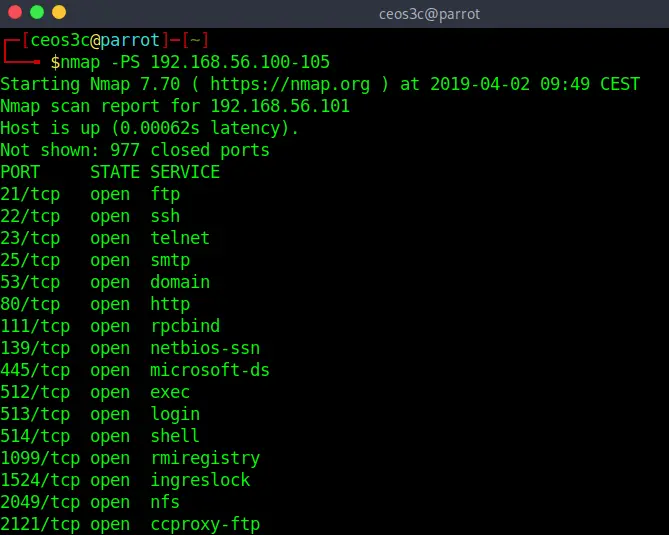
nmap -PS 192.168.56.100-105Code language: CSS (css)This scanning option sends an empty TCP packet with the SYN flag attached to it. It defaults to port 80. The SYN flag tells the remote system that you are attempting to connect to it. If the port appears to be open, the target host will start the second step of the three-way TCP handshake by responding with an SYN/ACK TCP package.
This is especially useful for certain systems that block ICMP ping requests.
You can also change the default port 80 to something like port 22, 25, 113, 443, and so on. To do that, you can run:
nmap -PS22 192.168.56.100-105Code language: CSS (css)TCP ACK Ping
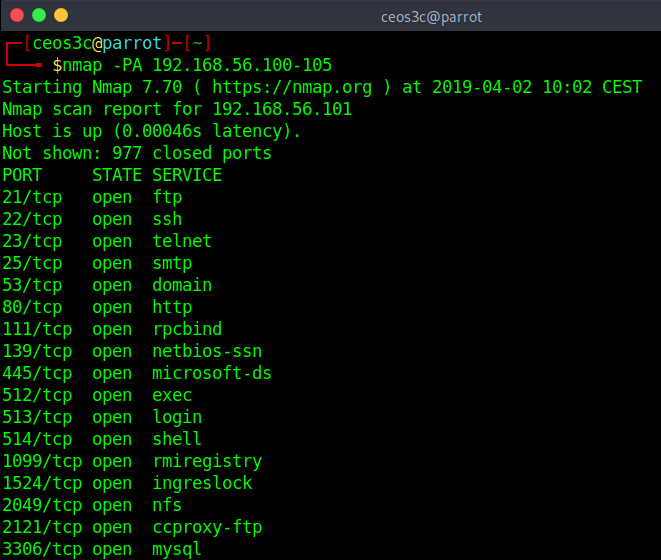
nmap -PA 192.168.56.100-105Code language: CSS (css)This method is also useful for networks that block ICMP requests. It discovers hosts by responding to nonexistent TCP connections to provoke a response from a target. If it founds a target to be up, it runs a default port scan against it.
UDP Ping
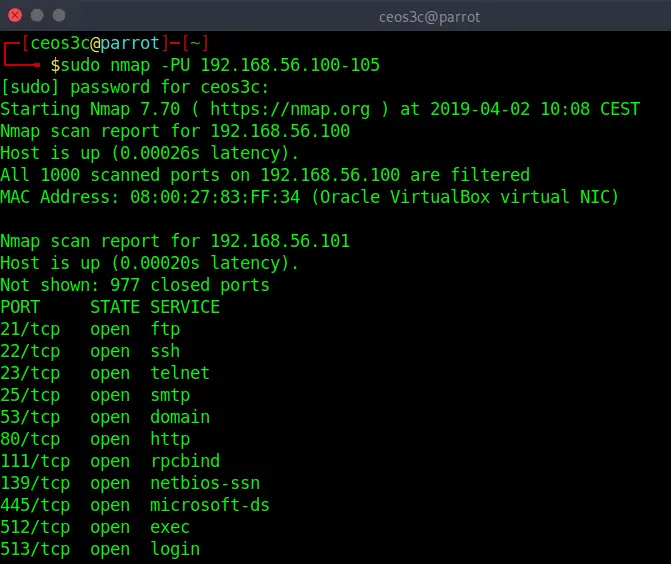
sudo nmap -PU 192.168.56.100-105Code language: CSS (css)The UDP ping sends UDP packets to get a response from a target. Most networks/firewalls will block UDP requests if they are properly configured, although it is worth a try to run it anyway. If you are not logged in as root, you need to add the sudo prefix to the command.
You are also able to change the default UDP port (80) by using nmap -PU22 or whatever port you like instead.
SCTP INIT Ping
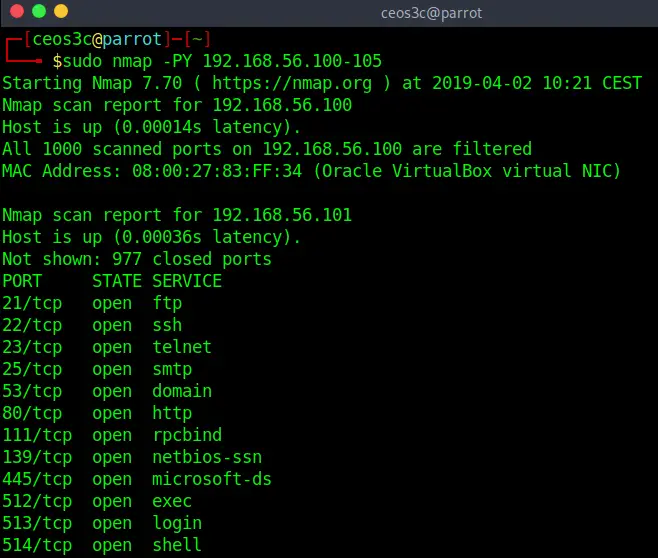
nmap -PY 192.168.56.100-105Code language: CSS (css)The SCTP (Stream Control Transmission Protocol) is mostly used to discover VOIP(Voice over IP, IP Telephony) based systems. You can also change the default port (80) by using nmap -PY22 or whatever port you like.
ICMP Echo Ping
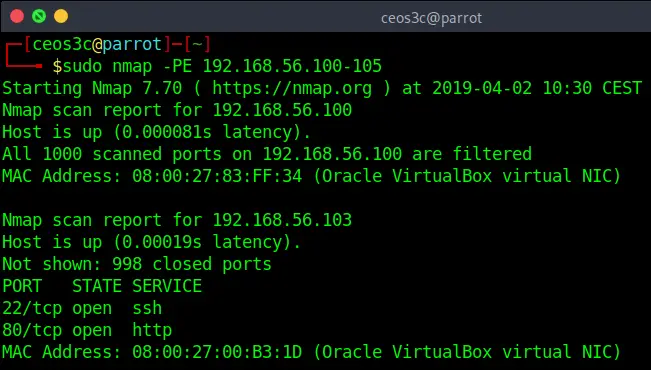
nmap -PE 192.168.56.100-105Code language: CSS (css)This sends a default ICMP ping to a target and checks if it replies. Usually, if a network is properly configured, devices are set up to not reply to ICMP requests.
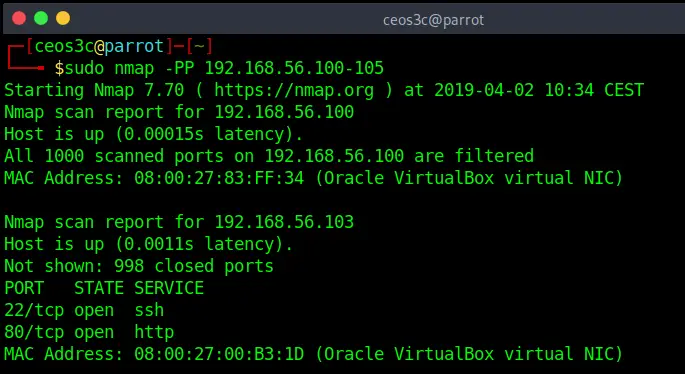
ICMP Timestamp Ping
nmap -PP 192.168.56.100-105Code language: CSS (css)As mentioned above, most systems are, or should be, configured to block ICMP Echo Pings. It is possible tho, that they still allow ICMP Timestamp pings. So this is always a good option to try.
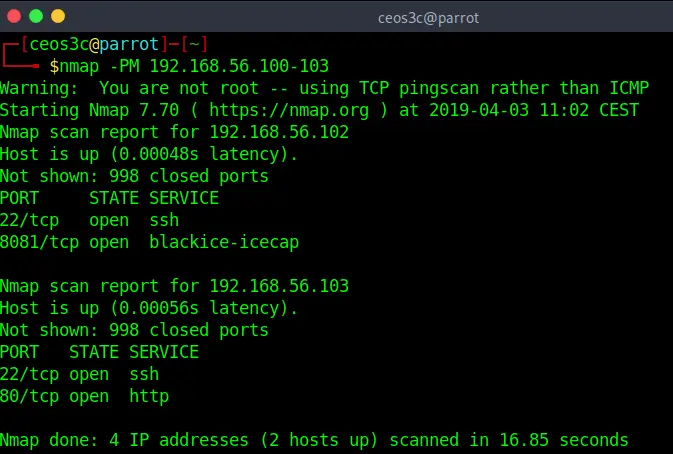
ICMP Address Mask Ping
nmap -PM 192.168.56.103Code language: CSS (css)This Address Mask Ping also uses an alternative ICMP request to provoke a response from a target. Another option to possibly bypass a firewall that is blocking default ICMP requests.
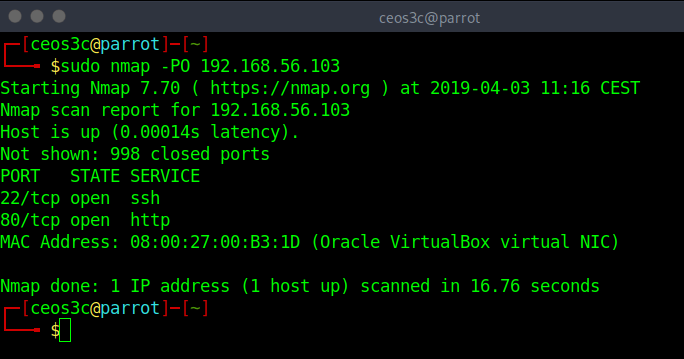
IP Protocol Ping
sudo nmap -PO 192.168.56.103Code language: CSS (css)The IP protocol ping allows you to send packets with specified protocol to the target. However, if you do not specify any particular protocol, the default protocols ICMP, IGMP, and IP-in-IP will be used. To specify a protocol use nmap -PO1,2,3,4 and so on. You find a list of all protocol numbers here.
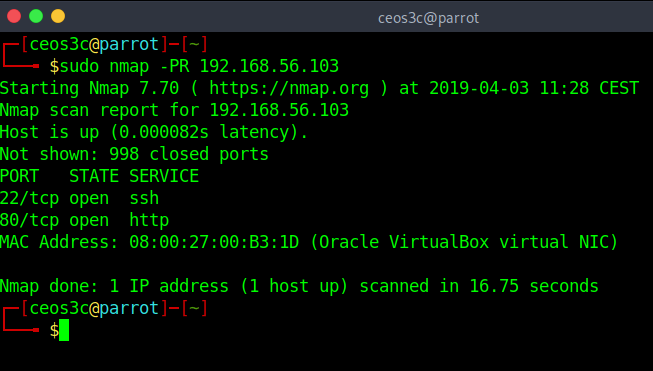
ARP Ping
sudo nmap -PR 192.168.56.103Code language: CSS (css)The Arp ping. This is the fastest method of discovering hosts on a network as of now. The biggest advantage is tho, that ARP requests can’t be blocked by hosts on a network, no matter if there is a firewall involved or not. You have to have access to the local network tho.
Traceroute
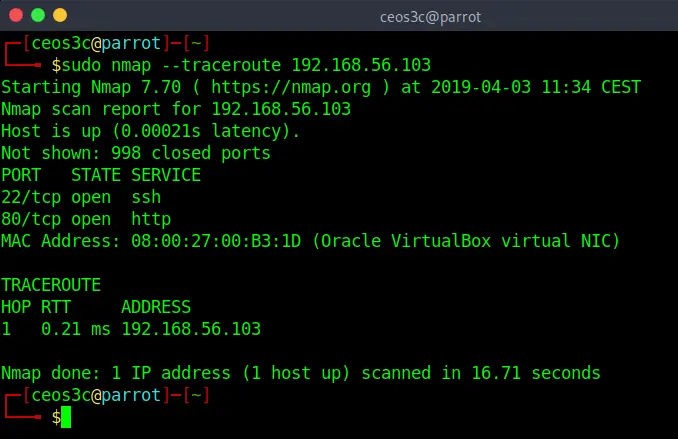
sudo nmap --traceroute 192.168.56.103Code language: CSS (css)If you have messed with networking before, you probably came across the traceroute (or tracert on Windows) command before. This is the same. It traces a route to the designated target. The image below is just an example of the command. If you’d run it against google.com or any domain, the TRACEROUTE output would be much longer. I won’t do that here to avoid exposing my own IP.
Force Reverse DNS Resolution
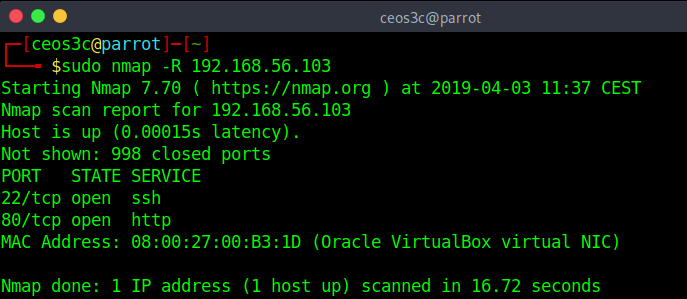
nmap -R 192.168.56.103Code language: CSS (css)Normally Nmap would only do reverse DNS lookups for hosts that are online. With the -R tag, you can enforce this and Nmap will try to resolve DNS names of all the specified IP addresses. Be aware tho, the -R option will decrease your scan performance tremendously.
Disable Reverse DNS Resolution
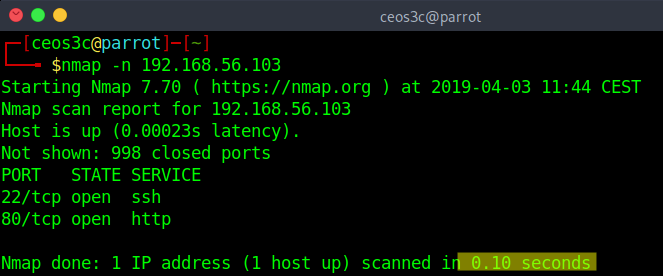
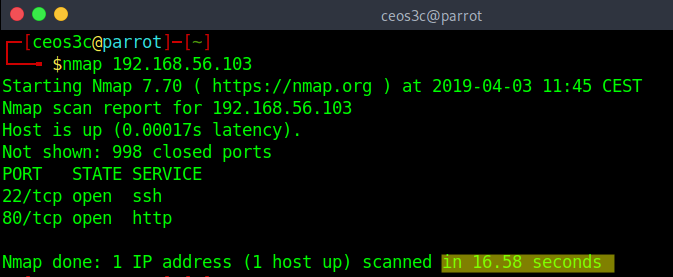
nmap -n 192.168.56.103Code language: CSS (css)As mentioned in the previous Force Reverse DNS Resolution command, per default DNS resolution is only used against hosts that appear online. You can disable DNS resolution altogether if you do not need it. This will increase your scan performance and decrease your scan time tremendously.
With -n option: 0.10 seconds
Without -n option: 16.58 second
I’ll leave the math to you.
Alternative DNS Lookup Method
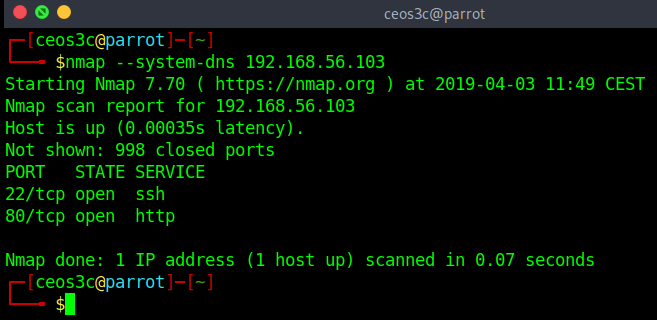
nmap --system-dns 192.168.56.103Code language: CSS (css)While not very often used in the field, this option allows you to tell Nmap to use the host systems DNS server for the DNS lookup. This scan slows down your scan time even more than the normal Reverse DNS Lookup. Just recognize the command exists.
In my example, the scan time appears fast because I run it on an isolated VirtualBox network. In reality, that is most likely not the case.
Manually Specify DNS Servers
nmap --dns-servers YourDnsServerAddress 192.168.56.103Code language: CSS (css)The last option we look at is used to manually specify a DNS server for your Nmap scan. This could be used if you want to avoid that your DNS request appears in the local DNS server.
Conclusion
This should give you a good idea of how Nmap Host Discovery works and what kind of commands you can work with. In the next part of the series, we will look at some more advanced scanning techniques. Make sure to also check out my YouTube channel, as there is a video to every article.
👀 This Tutorial has some related Articles!
👉 Part 1 – Nmap Basics
👉 Part 2 – Nmap Host Discovery
👉 Part 3 – Advanced Nmap Commands
👉 Part 4 – Nmap NSE Scripts
👉 Part 5 – Nmap on Windows


Great post! I found the explanations on different host discovery techniques really helpful. The examples you provided made it easy to understand how to effectively use Nmap for scanning. Looking forward to the next part of the series!
Thanks!