If you are using Amazon’s EC2 and you first want to connect to your Instance, you probably get in trouble when you want to use the .pem File that you have created on AWS to connect to your instance via PuTTY. PuTTY wants to have a .ppk file, hence, we need to convert a .pem File to a .ppk File before we can establish a connection. I show you how to do it.
Issue
Can’t connect to Amazon EC2 with PuTTY using the downloaded .pem File
Solution
Convert a .pem File to a .ppk File.
Windows 10
If you are using Windows 10, you have to go ahead and download and install PuTTYgen.
To convert a .pem File to a .ppk File, start PuTTYgen and select RSA on the Type of key to generate field.
Next, click on Load. You have to switch from PuTTY Private Key Files (*.ppk) to All Files (*.*) on the drop-down on the right side.
Select the downloaded .pem file and choose Open. Hit the OK button. Next, choose Save Private Key to save your key. PuTTYgen will represent you with a warning, select Yes. It is important that you give your new .ppk file the exact same name as the original .pem file that you have downloaded from AWS!
That’s it for Windows, you can now use this .ppk file to connect to your EC2 instance.
Linux
To convert a .pem File to a .ppk File on Linux is even easier than on Windows. If you haven’t already, go ahead and install PuTTY first.
RPM-Based Distros:
sudo yum install putty
DPKG Based Distros (Debian)
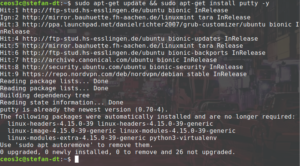
sudo apt-get update && sudo apt-get install putty -y
Finally, to convert a .pem File to a .ppk File type:
puttygen pemKey.pem -o ppkKey.ppk -O private
I specifically run this command without the sudo prefix, because if you do run it with sudo, only your root user is allowed to move the file around. Choose yourself how you want to handle this.
If you want, out of whatever reason, convert the .ppk file back to a .pem file, you can do that with:
puttygen ppkkey.ppk -O private-openssh -o pemkey.pem
Conclusion
And this is how you convert a .pem File to a .ppk File.


