This time I will show you how to install OsTicket on AWS. We are using Amazon’s Free Tier EC2 for this tutorial.
This installation is possible using the Free Tier on AWS, utilizing the Ubuntu Server 16.04 image.
Let’s dive right in.
1. Creating a new instance on Amazon’s EC2
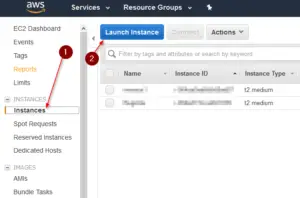
Log in to your AWS web console and navigate to EC2.
Once there, click on instances and click launch instance to create a new Instance.
Now we’ll run through the configuration real quick.
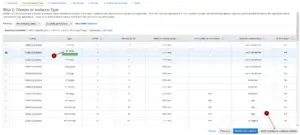
For the AMI choose Ubuntu Server 16.04 LTS.
Choose the Free Tier Eligible t2.micro instance. This should be sufficient for our Ticket System.
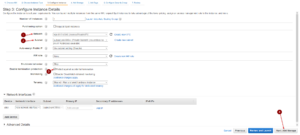
Now you need to choose your VPC and Subnet.
If you just created a VPC for that reason, you probably have just one Public VPC and Subnet available anyway.
I also like to check Protect Against Accidental Termination. You can leave Primary IP on Auto-Assign OR choose a Static IP of your Subnet.
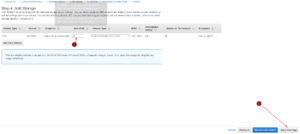
Next, you can choose which size the Storage should be. I go for 20 GB. The default 8 GB should be fine for most users.
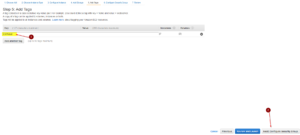
Now you can add a Tag to find your instance easier later on. This is optional.
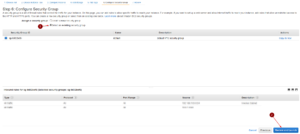
You can create a new security group or choose an existing one if you already got one in place.
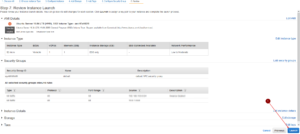
Review your settings and click on Launch once you are sure everything is fine.
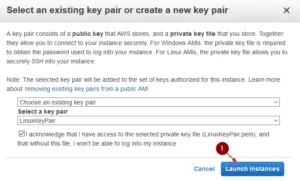
Now either create a new Key Pair or choose one that you created earlier.
Store the Key Pair somewhere safe. This is key-file is used instead of a password to access your server. If you lose it, there is no way to get it back.
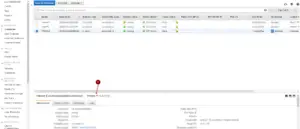
Head back to Instances now and click on the instance you just created. You can see it’s IP Address right there if you chose Auto-Assign. Copy the IP.
2. Initiating a connection with Putty
Download Putty here and start it.
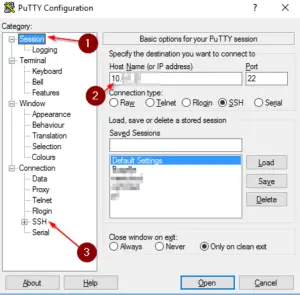
Enter the IP Address of your Instance and click on SSH and extend it.
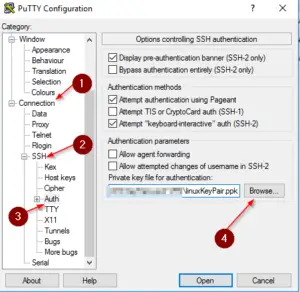
After extending SSH, click on Auth and on Browse. Choose the Key Pair you downloaded after creating your Instance.
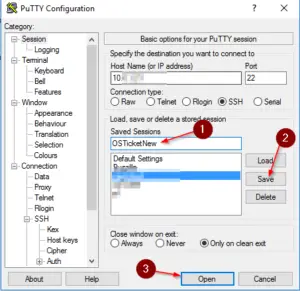
Navigate back to Session and enter a Name for your Session, click on Save and then on Open.
You can now log in with the Username: Ubuntu and no password thanks to your Key Pair.
3. Preparing Ubuntu for the OSTicket Installation
The first thing we do now is to update our Ubuntu Server.
sudo apt-get update -y
sudo apt-get upgrade -y
Leave everything in Default when you get asked questions during the installation.
Now we install Nginx and MySQL Server:
sudo apt-get install -y nginx mysql-server
Now we are going to install the LEMP Server which includes: Nginx, Mysql, PHP, PHP-FPM and all the other PHP Modules that are required to run OSTicket.
sudo apt-get install -y nginx mysql-server
During this step, you are required to set a MySQL root password. Make sure to write that down.
Now we need to start the Nginx and MySQL Services and add them to Auto-Start.
sudo systemctl start nginx
sudo systemctl start mysql
sudo systemctl enable nginx
sudo systemctl enable mysql
Let’s quickly check if our services are running by typing:
netstat -plntu
You can see the two lines highlighted in yellow, indicating our Web server and MySQL is up and running.
Now we install PHP-FPM 7 and all extensions that are necessary:
sudo apt-get install -y php7.0-cli php7.0-mysql php7.0-cgi php7.0-fpm php7.0-gd php7.0-imap php7.0-xml php7.0-mbstring php7.0-intl php-apcu
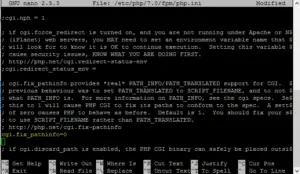
Once that is done, we need to change a line in our php.ini
sudo nano /etc/php/7.0/fpm/php.ini
Find the line cgi.fix_pathinfo by pressing CTRL+W to find it, un-comment it and change its value to 0.
cgi.fix_pathinfo=0
Save and close the File by pressing CTRL+O and CTRL+X.
Now we need to restart the php7-fpm service and add it to auto-start.
sudo systemctl restart php7.0-fpm
sudo systemctrl enable php7.0-fpm
Now we have to configure PHP 7 FPM to work with our Nginx Web Server.
cd /etc/nginx/sites-available/
sudo nano default
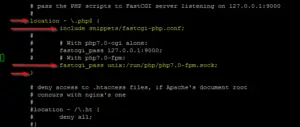
Now find the lines below, ALL THE LINES that are highlighted in yellow and got an arrow pointing to it MUST BE UNCOMMENTED. So remove the hashtag in front of them to look exactly like in the screenshot below the code box.
location ~ \.php$ {
        include snippets/fastcgi-php.conf;
#
#       # With php7.0-cgi alone:
#       fastcgi_pass 127.0.0.1:9000;
#       # With php7.0-fpm:
        fastcgi_pass unix:/run/php/php7.0-fpm.sock;
}
Save everything with CTRL + O and hit CTRL + X to leave the editor.
Restart Nginx after.
sudo systemctl restart nginx
Let’s quickly test our PHP 7 and Nginx:
cd /var/www/html/
sudo echo '<?php phpinfo(); ?>' > info.php
It should return a “Test successful”
If everything went well and you enter your server IP Into your Browser, you should be greeted by Nginx, telling you that everything was installed successfully.
Time to create our OSTicket database.
4. Configuring the OSTicket Database
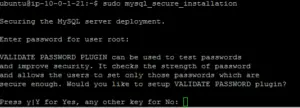
At first, we will run a little script that ensures that our MySQL installation os properly secured.
sudo mysql_secure_installation
Remember the password you set for root during Step 3? You need to enter it now.
We skip the first Question by typing N for No or any other key.
Following the other questions:
Change the password for root? -N
Remove anonymous Users? -Y
Disallow Root login remotely? -Y
Remove test database and access to it? -Y
Reload privilege tables now? -Y
Let’s connect to our MySQL shell now.
mysql -u root -p
We need to run a couple commands now to create our Database and User for OSTicket.
create database osticket_db;
create user osticket@localhost identified by 'osticketpw@';
grant all privileges on osticket_db.* to osticket@localhost identified by 'osticketpw@';
flush privileges;
exit
That’s it for MySQL so far.
5. Create OsTicket Virtual Host
Now we have to create the virtual host configuration for OsTicket
Let’s navigate to our Nginx virtual host directory and create a new file called “osticket”
cd /etc/nginx/sites-available/
sudo nano osticket
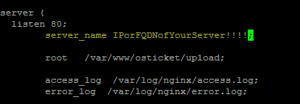
Now paste the following config into that file and replace “osticket.ceos3c.com;” next to server_name with either the IP or the FQDN of your OsTicket Server:
server {
  listen 80;
        server_name osticket.ceos3c.com;

        root   /var/www/osticket/upload;

        access_log  /var/log/nginx/access.log;
        error_log  /var/log/nginx/error.log;

        index index.php;
        client_max_body_size 2000M;
        client_body_buffer_size 100M;
        client_header_buffer_size 10M;
        large_client_header_buffers 2 10M;

        client_body_timeout 12;
        client_header_timeout 12;
        keepalive_timeout 15;
        send_timeout 10;

        gzip             on;
        gzip_comp_level  2;
        gzip_min_length  1000;
        gzip_proxied     expired no-cache no-store private auth;
        gzip_types       text/plain application/x-javascript text/xml text/css application/xml;

        set $path_info "";

        location ~ /include {
            deny all;
            return 403;
        }

        if ($request_uri ~ "^/api(/[^\?]+)") {
            set $path_info $1;
        }

        location ~ ^/api/(?:tickets|tasks).*$ {
            try_files $uri $uri/ /api/http.php?$query_string;
        }

        if ($request_uri ~ "^/scp/.*\.php(/[^\?]+)") {
            set $path_info $1;
        }

        location ~ ^/scp/ajax.php/.*$ {
            try_files $uri $uri/ /scp/ajax.php?$query_string;
        }

        location / {
            try_files $uri $uri/ index.php;
        }

        location ~ \.php$ {
            fastcgi_param  SCRIPT_FILENAME  $document_root$fastcgi_script_name;
            include        fastcgi_params;
        include snippets/fastcgi-php.conf;
        fastcgi_pass unix:/run/php/php7.0-fpm.sock;
            fastcgi_param  PATH_INFO    $path_info;
        }
}
Save with CTRL+O and exit with CTRL+X when done.
Now we just need to activate the host and test the configuration:
sudo ln -s /etc/nginx/sites-available/osticket /etc/nginx/sites-enabled/
sudo nginx -t
If everything went well, you should get a positive:
Alright, last but not least:
sudo systemctl restart nginx
Now on to the last step, Downloading and Installing OSTicket.
6. Downloading and Installing OSTicket
Alright, we are getting toward the end of the whole procedure.
At first, we need to create a directory for OSTicket:
sudo mkdir -p /var/www/osticket
After this we are going to go into this directory:
cd /var/www/osticket
Now we are going to Download OSTicket. To verify which is the latest version, head over to the OSTicket Website and have a look which one it is.
After that, you are going to run wget and REPLACE osTicket-v1.xx.zip with the newest version that you found on the Website! For now, the newest version is osTicket-v1.10.1.zip
sudo wget http://osticket.com/sites/default/files/download/osTicket-v1.10.1.zip
Now we need to extract the .zip file, for this, we first need to install unzip
sudo apt-get install unzip
Now we are going to extract it:
sudo unzip osTicket-v1.10.1.zip
That done, we are going to copy the sample config file to a different location.
cd upload/
sudo cp include/ost-sampleconfig.php include/ost-config.php
In this last step, we need to change the owner of all osticket files and directories to the www-data users and group.
cd /var/www/osticket/
sudo chown -R www-data:www-data upload/
7. Finalizing the OsTicket installation
Open your web browser and navigate to the IP or FQDN of your server.
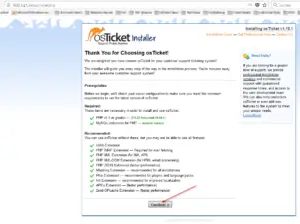
You should be greeted with a screen like this, eventually, everything being green:
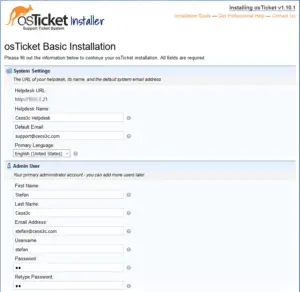
After clicking on continue, you can go ahead and fill everything out according to your company.
Mind that Default Email is the actual Service Desk’s email. The Admin Email is your Email.
So something like [email protected] should be good for Default Email.
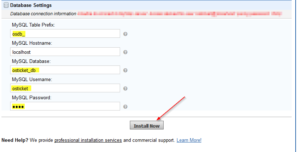
Make sure to fill out your Database settings exactly as we set it up in the earlier step.
The Password for the osticketuser is: osticketpw@
Change this password later on.
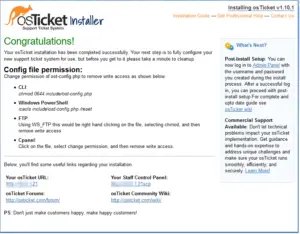
If all goes well, you end up on a screen like the one below:
8. Cleaning up
Now we just going to remove or rename our setup directory and change the permission of the osticket config file:
cd /var/www/osticket/upload/
And:
mv setup/ setup-sh/
chmod 0644 include/ost-config.php
Congratulations! You successfully installed OsTicket on AWS.
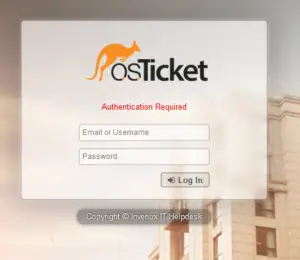
To test the Admin and Agent login head to either one of those:
http://yourserveraddress/scp/ for Admin
http://yourserveraddress/scp/index.php for Agent
And you are done!
I will not go through the OsTicket Configuration. There are tons of tutorials for that out there.





I am getting the following error
„Failed to load resource: the server responded with a status of 400 (Bad Request)“
I have configured as per the steps mentioned above.
So do let me know to resolve the issue.
Does AWS allow the outgoing emails from osTicket? Isn’t the 25 port blocked?