The next part of this series covers Synology NAS Domain Integration and Creating Shares – Read on! If you followed the Last Tutorial, you will now have a very basic installation of your Synology DS 716+ II and we can start to integrate it into our Domain and create our first Share.
Domain Integration
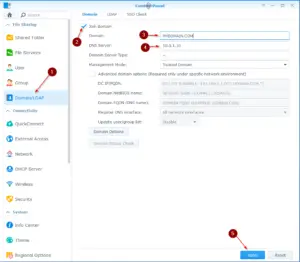
Log in to the Web Interface and Navigate to: Control Panel / Domain/LDAP and click on Domain.
Enter your Domain Details accordingly and hit Apply.
In the next prompt enter Domain Credentials with Administrative Rights in the format of:
yourdomain\Administrator
And enter your Password and hit next.
On the next prompt confirm with OK.
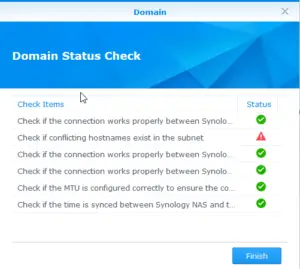
Now it will take a short while and if all went well, you end up in the Domain Status Check Window:
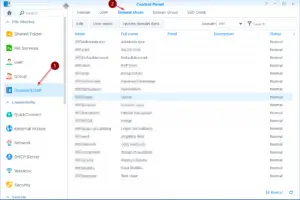
Now, wait a few minutes until the Domain Users were synchronized and then Navigate to Domain/LDAP / Domain Users and check if you can see your Domain User’s Accounts in the list.
Now that we have our NAS joined our Domain, we can almost start to create our first Share, but before that, we need to create a Volume.
Creating a Volume
Assuming you have followed just the previous tutorial, we still haven’t created a Volume. That’s what we will do now.
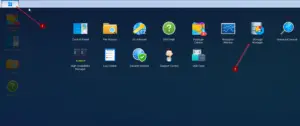
Inside of your Web Interface on the upper left corner click on the box thingy aka Main Menu and select Storage Manager.
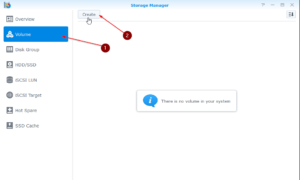
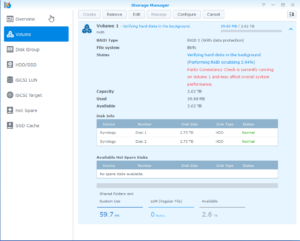
Next Click on Volume and on Create.
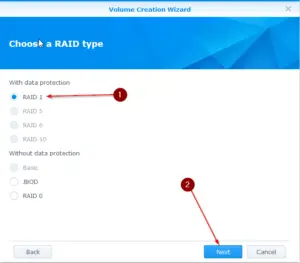
Now because we have a 2-Bay NAS a RAID 1 is the only option really. RAID 1 means, you have 2 Disks with 3GB each, meaning 6GB overall. In RAID1 the Data from DISK 1 will be mirrored to DISK 2, or replicated if you will, so you will end up with 3 GB of Storage.
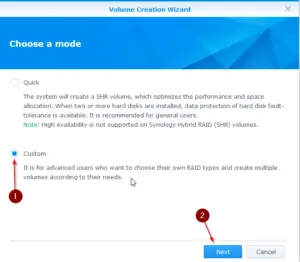
You can choose the “Quick” option if you want but I opt for Custom because I want to choose myself.
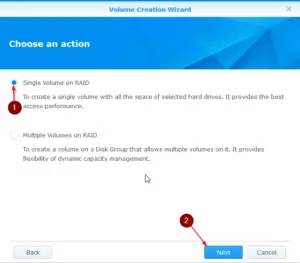
That done, I choose for Single Volume on RAID because I only need one Volume for my project.
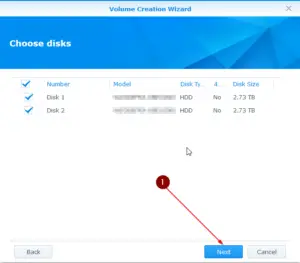
Select your disks next.
Now choose which RAID you want. You can also opt for RAID 0 if Data Security is not an issue, which means that you have full access to 6GB of Storage (Both of your disks). I choose for RAID 1.
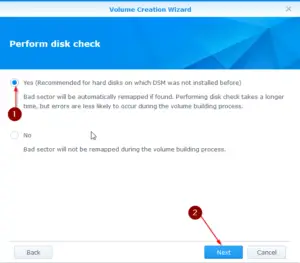
We do want to Perform a Disk Check.
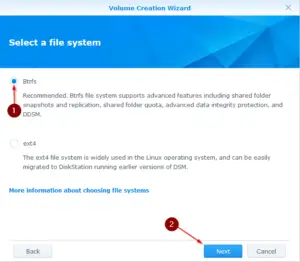
For File System choose what you will, I choose Synology’s BTRFS System.
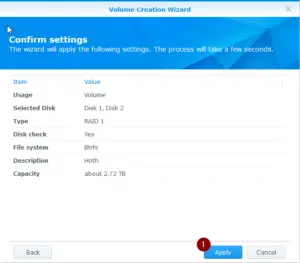
Enter a Description for your Volume’s Name and have a final look at the Settings before clicking on Apply.
Now the RAID is starting to build, I wait for it to completely finish.
After that is done, we can now go ahead and create our first Share.
Creating a Share
So now that we have created our Volume lets create our first Share.
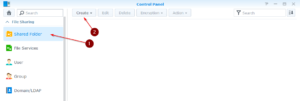
Navigate to Control Panel once again and click on Shared Folder and hit Create.
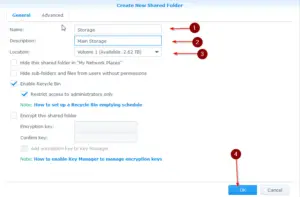
Enter a descriptive Name and Description and choose the Volume you want to create the Share on.
Select Options to your flavor, I enable the Recycle Bin for Administrators Only.
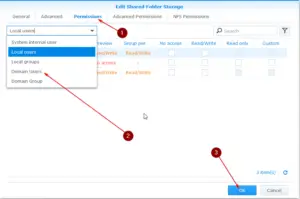
After you created your Folder, go to Shared Folder and select your Share, click on Edit.
Now click on Permissions and select Domain Users from the Dropdown Menu.
Now you should see a list of your Domain Users if you followed the previous steps for the Domain Integration. You can now set rights to each specific Users or Create Groups and assign rights to Groups, this will be covered in the next Tutorial.
And there you have it. You just integrated your NAS into your Domain, created your first Volume and Share just within a few minutes. It’s as easy as it gets.
Grab your DS 716+ II and your Hard Drives from the links below to help me keep them Articles coming!


