Today you will learn how to update FOG image.
In the previous tutorials, we learned How to install FOG Server on Ubuntu 16.04 and How to create a generalized Windows 10 Image.
We will learn how to update this previously create Image to have the newest patches installed on it. It’s really easy.
Let’s get started.
1. Reverting back to our Snapshot
If you remember Step 8 in the How to create a generalized Windows 10 Image tutorial, I told you to take a Snapshot that we can revert back to later on to update Windows. This is exactly what we are going to do now.
So if you followed the Guide thoroughly, you should have your “Before Running Sysprep” Snapshot in place. I recommend doing another Snapshot of the current state, just in case.
As you can see, I have a couple more Snapshots in place, I’ll like to be able to go back to certain states in case anything goes wrong.
Revert back to the pre-Sysprep snapshot now.
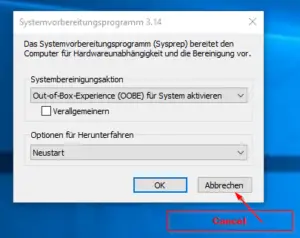
After booting up, cancel the pop-up dialog:
2. Running Windows Update
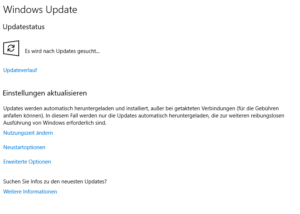
Now it’s time to run Windows Updates. Simply hit the Windows Key and type: Update.
Make sure you install all new updates.
Sorry for the language :p
3. Capturing the updated image
Once all updates run successfully, you can continue with Step 8 in the Previous Tutorial and run Sysprep. The steps are exactly the same.
Note that you can’t install the Creators Update (Version 1709) using this method. You would need to revert back further or completely re-install the whole image. I haven’t figured that out myself yet but I am working on it and will update this post soon as I found a solution.
This concludes this tutorial.


Future readers – if you have the same difficulty I did with updates, try the following:
Install Windows in your VM without network enabled, and once Windows is finished installing, capture a snapshot. Enable networking, install all the updates that are available, and on your host, go to catalog.update.microsoft.com and search for the update number for each update (ex: KB4506991).
There are often multiple results, so pay attention to the various columns of information to make sure you choose the correct one. Once you’ve downloaded all the updates manually, go back to your VM, reset to the snapshot, and install all the updates you downloaded. You’ll still need to restart, but this time it will actually apply the updates.
Please note, feature updates (ex: moving from 1809 to 1903) cannot be installed in Audit mode, and for each of those you will essentially need to build a new image.
Thanks for this tutorial. I’ll definitely be trying it out. Have you been using this with newer versions of Windows 10, like 1803? It would seem that audit mode doesn’t like applying updates. When I run updates (not feature or quality updates), it downloads and installs them, and of course says a restart is required. I restart, get back into audit mode, and it’s still asking me to restart to apply the updates. Thoughts?