Today, developers have so many CSS frameworks to choose from. CSS frameworks simplify the work needed to create stylish user interfaces. The downside of most of these frameworks like Bootstrap is that they come with pre-existing UI components which makes them difficult to customize. Tailwind however is a utility-first CSS framework that lets you create dynamic components easily. In this tutorial, you will understand what Tailwind CSS is, its benefits, and when you should use it. You will also learn how to set up React and Tailwind CSS.
Table of Contents
- What is Tailwind CSS?
- Setting Up React and Tailwind CSS
- Install Dependencies
- Inject Tailwind CSS to your React Application
- Building a Simple Profile Card Using Tailwind CSS
- Conclusion
What is Tailwind CSS?
Tailwind CSS is a CSS framework with utility classes that enables you to style your applications with less code. These utility classes make it easy for you to design a consistent UI by having standard design choices like colors, font sizes, and spacing. Another advantage of using Tailwind is that it automatically strips all the unused CSS during build time.
Your application’s CSS bundle, therefore, remains small. While Tailwind boasts all these benefits, you don’t need to use it for all your projects. For instance, in small projects, you can always use custom CSS.
Setting Up React and Tailwind CSS
To get started, scaffold a new React application using create-react-app.
npx create-react-app project_name
cd project_name
Make sure to replace the project_name with a name of your choice.
Install Dependencies
Next, you need to install Tailwind CSS, PostCSS, and Autoprefixer. PostCSS is a tool used to transform CSS with JS plugins. Autoprefixer on the other hand utilizes information from caniuse.com to determine which CSS properties need prefixing.
Initialize tailwind to create the default configuration file. On your terminal, navigate to the folder containing your react application and run the following commands.
npm install -D tailwindcss postcss autoprefixer
npx tailwindcss init -p
The above code should create tailwind.config.js and postcss.config.js file

Inject Tailwind CSS to your React Application
Next we need to set up React and Tailwind CSS config files.
Tailwind.config.js
We need to add all the paths of our template files to our tailwind.config.js file, so make sure it looks like below.
module.exports = {
  content: ["./src/**/*.{js,jsx,ts,tsx}"],
  theme: {
    extend: {},
  },
  plugins: [],
}Code language: JavaScript (javascript)
Index.css
Now we need to add all of the Tailwind CSS directives to our index.css file that is located in the /src/ folder. If it’s a new app, you can delete everything inside of index.css and add the following code.
@tailwind base;
@tailwind components;
@tailwind utilities;Code language: CSS (css)
Building a Simple Profile Card Using Tailwind CSS
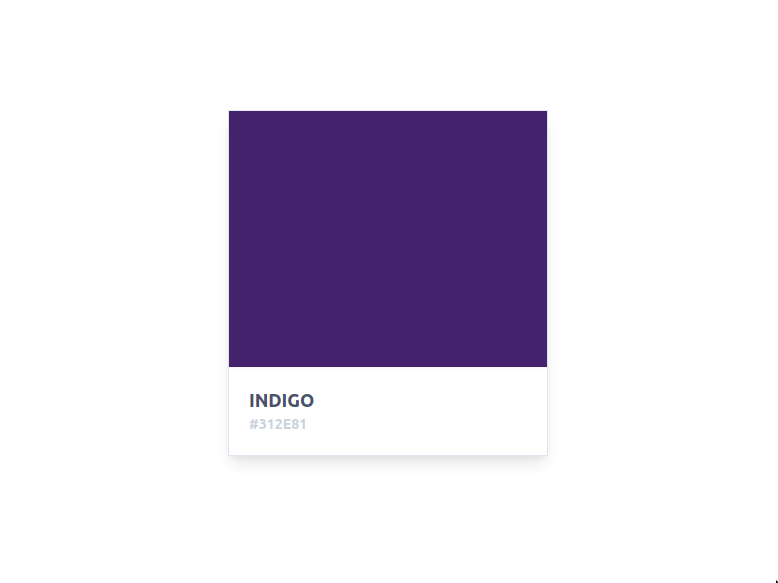
To illustrate how you can use Tailwind CSS in React, you will build the simple color card below.

Start with adding the following code to your app.js file. Remember to import your output.css file to the index.js file so that you can see all the changes you will be making using Tailwind CSS
import React from "react";

function App() {
  return (
    <div>

    </div>
  );
}

export default App;
Code language: JavaScript (javascript)
Next, create your color card and add Tailwind CSS class names to style it. In the code below, you can see that you are first creating a flex container and aligning it to the center of the page. Next, you are creating the card itself. The color card is what contains the upper section that has the Indigo color and the lower section with the text. As you can see, Tailwind CSS enables you to create style components without explicitly writing CSS.
<div className="flex items-center justify-center h-screen	">
      <div className="bg-white font-semibold text-center rounded-3xl border shadow-lg max-w-xs w-1/2">
        <div className=" w-100 h-64 shadow-sm bg-indigo-900"></div>
        <h2 className="text-lg text-left text-gray-700 pl-5 pt-5"> INDIGO </h2>
        <h3 className="text-sm text-left text-gray-400 pl-5 pb-5"> #312E81 </h3>
      </div>
 </div>Code language: HTML, XML (xml)
Conclusion
If you are looking for a lightweight and highly customizable CSS framework for your React application then Tailwind CSS is a good choice.
In this tutorial, you learned what Tailwind CSS is and how it differs from other frameworks. You then set up Tailwind CSS in your React application which was later used to create a simple profile card. This tutorial used create-react-app to set up React. If you are using Next JS, learn how to set up Tailwind and Next JS from this article.

