If you need to build a React Hooks Form to collect user input, the best way is to build a reusable React Hooks Input Form that you can use throughout your application.
Table of Contents
- Why we use React Hooks?
- React Hooks Advantages
- React Hooks Form with Input Example
- Creating a Reusable React Hooks Form with Input Component
- Importing the Component to App.js
- Re-usability
- Conclusion
ℹ️ This article has a corresponding Replit repository that you can copy and play around with. Create a free Replit account and click on the Fork Repl button below. This is the best way to practice programming!
Why we use React Hooks?
Since React Hooks were introduced in React 16.8, they’ve been widely adopted as a way to improve code readability and reusability. React Hooks allow us to use state as well as other React features without the need of writing a class.
Hooks are functions which allow you to “hook into” React state and lifecycle features from function components; React Reducer with Hooks; React memo with Hooks, etc. Even though the benefits of React Hooks are significant, some developers might still be hesitant to adopt them because they’re not familiar with the concept of hooks.
In this article, we’ll look at why React Hooks are important and how they can help make your code more readable and reusable. We’ll also examine some of the most popular React Hooks so that you can get started using them in your own projects.
React Hooks Advantages
React Hooks offer a number of advantages over traditional React components. First and foremost, React Hooks allow you to use state and other React features without having to write a class component. This makes your code more concise and easy to read. In addition, React Hooks make it easier to share logic between components.
Finally, React Hooks can improve performance by only re-rendering the parts of your component that have changed. As a result, React Hooks offer a number of benefits over traditional React components, making them an essential tool for modern React development.
- No need to write a class.
- Makes code more concise and easy to read.
- Makes it easier to share logic between components.
- Improves performance by only re-rendering parts of the component that have changed.
- Clearer code structure.
React Hooks Form with Input Example
To better understand what I’m talking about, let’s look at a React Hooks Form with Input Example to make things more clear. We create this component right inside of our App.jsx.
If you deal with input and you are familiar with React Hooks, the simplest way of building one is this:

import React from 'react';
import {useState} from 'react'
import './App.css';

function App() {

  const [inputValue, setInputValue] = useState("")

  const handleInputChange = (e) => {
    setInputValue(e.target.value)
  }

  return (
    <main>
      <h2>Input: </h2>
      <h3>{inputValue}</h3>
      <input type="text" onChange={handleInputChange} value={inputValue} placeholder="Input" />
      <button onClick={() => setInputValue("")}>Clear</button>
    </main>
  );
}

export default App;Code language: JavaScript (javascript)
While this is pretty easy to read compared to using Class-Based Components, you would still have to write a ton of repetitive code if you need to create multiple input fields throughout your application.
Now we can go ahead and create a reusable input component with React Hooks that we can use anywhere we want.
As always, there is also a Repl for you to fork and play around with!
Creating a Reusable React Hooks Form with Input Component
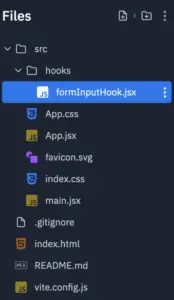
First, let’s make sure everything has its place. Create a new folder called hooks inside of your src folder.
Inside of /hooks create a file called formInputHook.jsx

Inside of that, we create a new component called initialValue (or whatever you want, it doesn’t matter).
import { useState } from "react";

export default initialVal => {
  const [value, setValue] = useState(initialVal);
  const handleChange = e => {
    setValue(e.target.value);
  };
  const reset = () => {
    setValue("");
  };
  return [value, handleChange, reset];
};Code language: JavaScript (javascript)
Let’s break this down a bit. What are we doing here? Well, the same as in the previous component, just more generalized.
First up, we import our dependencies with import {useState} from 'react'
Then we basically do the same as we did before. We create a state variable and set it to initialValue: const [value, setValue] = useState(initialVal)
Next up we create our handleChange function: const handleChange = e => { setValue(e.target.value) }
And then, we create a function called reset that sets the state of our value to an empty string: const reset = () => { setValue("") }
Finally, we return the whole set of values: return [value, handleChange, reset]
Importing the Component to App.js
Now we have to go ahead and import this component to our App.js file. After that, we simply modify our code a little bit.
import React from 'react';
import {useState} from 'react'
import formInputHook from './hooks/formInputHook'
import './App.css';

function App() {
const [inputValue, updateInputValue, reset] = formInputHook("")

  return (
    <main>
      <h2>Input: </h2>
      <h3>{inputValue}</h3>
      <input type="text" onChange={updateInputValue} value={inputValue} placeholder="Input" />
      <button onClick={reset}>Clear</button>
    </main>
  );
}

export default App;Code language: JavaScript (javascript)
So, what changes here? We import our formInputHook with: import {formInputHook} from './hooks/formInputHook'
Then, we create a state variable using the three values we export from our formInputHook component: inputValue, updateInputValue and reset as formInputHook("")
The whole state variable looks like this: const [inputValue, updateInputValue, reset] = formInputHook("")
We might as well import this as const [curryFlavor, updateCurryFlavor, reset] – it does not matter since it’s only placeholder names. The actual action is going to happen in our formInputHook.jsx file.
Finally, we go ahead, and add our reset function to the onClick listener of our button with:<button onClick={reset}>Clear</button>
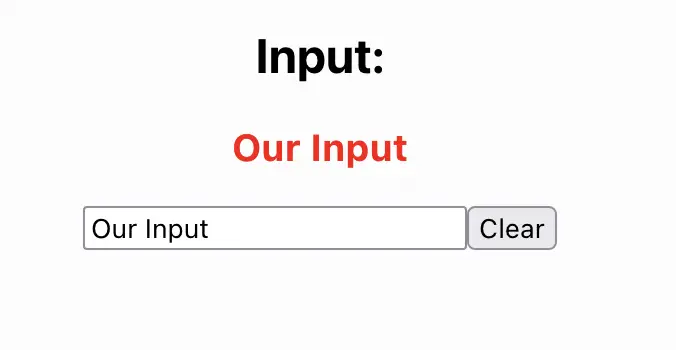
Now, we have exactly the same functionality as we had before.
So, why is this useful?
Because we now can use this as many times as we want, without the need of creating a hundred different states, change handlers, etc.
Re-usability
Now we can simply import this same component into any number of different components and re-use it as we like.
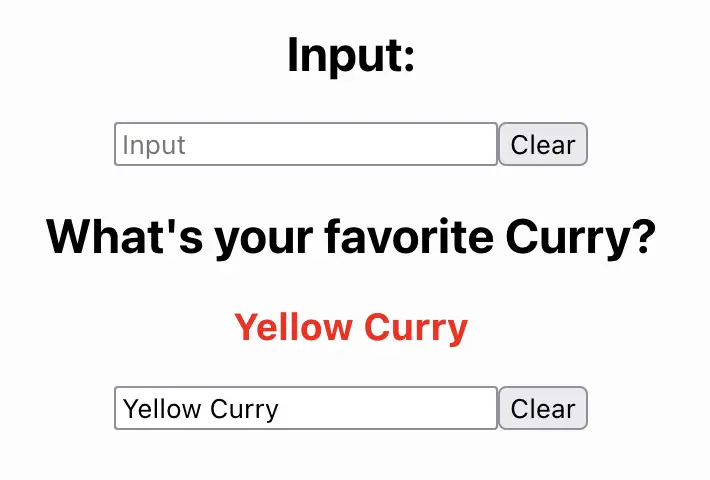
Let’s say we want to add a little questionnaire about what our favorite flavor of curry is. Even though we all know there is only one answer to that, let’s use this example. I think this brings my point across.

So what does the code look like for this one? We only added a bit of code to our App.jsx
import React from 'react';
import {useState} from 'react'
import formInputHook from './hooks/formInputHook'
import './App.css';

function App() {
const [inputValue, updateInputValue, reset] = formInputHook("")
const [curryFlavor, updateCurryFlavor, resetFlavor] = formInputHook("")

  return (
    <main>
      <h2>Input: </h2>
      <h3>{inputValue}</h3>
      <input type="text" onChange={updateInputValue} value={inputValue} placeholder="Input" />
      <button onClick={reset}>Clear</button>

      <h2>What's your favorite Curry?</h2>
      <h3>{curryFlavor}</h3>
      <input type="text" onChange={updateCurryFlavor} value={curryFlavor} placeholder="Enter flavor" />
      <button onClick={resetFlavor}>Clear</button>
    </main>
  );
}

export default App;Code language: JavaScript (javascript)
You can see that the only thing we change regarding the state variable is adding another state variable with slightly modified names: const [curryFlavor, updateCurryFlavor, resetFlavor] = formInputHook("")
This is why it is a great idea to use a separate component instead of writing many repetitive code.
Conclusion
I think this should bring my point across and demonstrates how useful reusable input components with a React Hooks Form really are.
🧑💻 Learn Web Development
👉 Top Programming Languages in 2022
👉 The Fresh JavaScript Framework
🚀 NextJS
👉 NextJS and Tailwind CSS – Complete Beginner Guide
⚛️ React
👉 Build an Input Form with React Hooks
👉 React Styled Components – The Complete Guide

