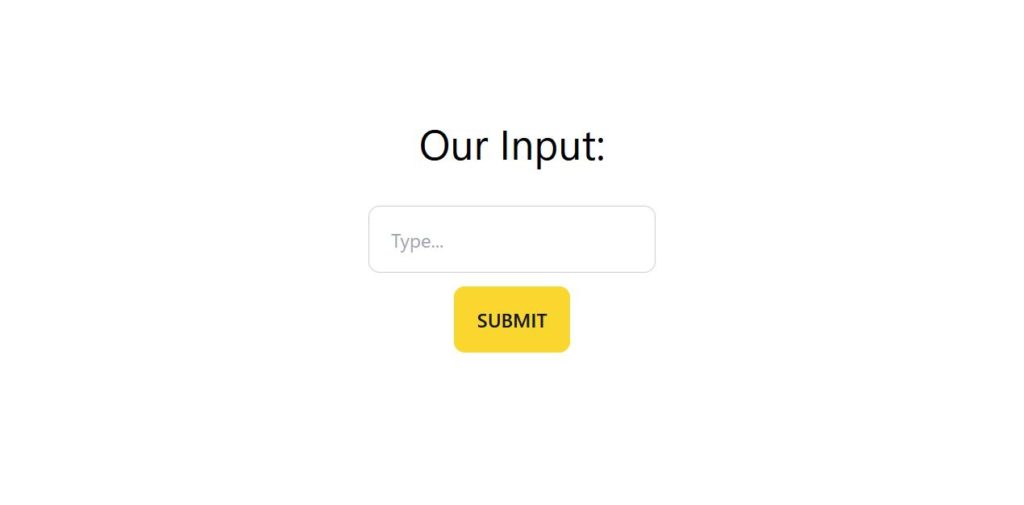
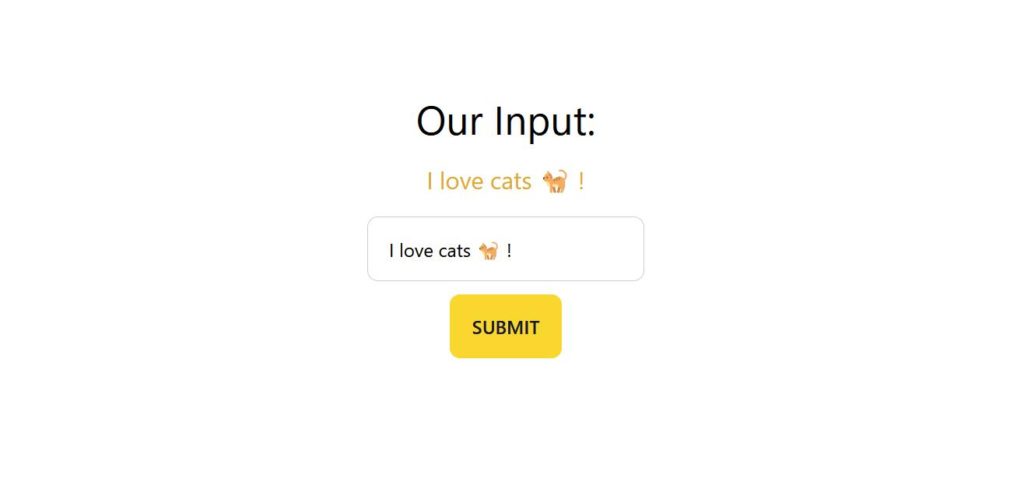
A lot of beginners struggle with the concept of state management when it comes to React. In this quick guide, I show you how to get values from input in React using React Hooks 🪝.
Grabbing that sweet input from an input field is easier than you might think. As always, I keep it as simple as possible. My mission is not to solve your problem by copying my code, but to understand the underlying concept (It’s a give a man a 🐠 kind of thing…)
Enough of the dad jokes, let’s dive into how to get values from input in React using hooks. By the way, I will always provide an accompanying Replit that you can fork and play around with yourself to those tutorials! Definitely go do that, that’s the way you’ll learn!
Table of Contents
- Our App
- Step 1 – Import Hooks
- Step 2 – Creating a State Variable
- Step 3 – Displaying our Data
- Step 4 – Get Values from Input in React
- Conclusion
Our App
Keeping it simple is the name of the game here.
import React from 'react';
import './App.css';

function App() {
  return (
    <main>
      <h1>Our Input: </h1>
      <input placeholder="Type..." type="text" />
    </main>
  );
}

export default App;Code language: JavaScript (javascript)
Step 1 – Import Hooks
First, we need to import the React state hook at the top of our code.
import { useState } from 'react'Code language: JavaScript (javascript)This lets us create state variables.
import React from 'react';
import { useState } from 'react'
import './App.css';

function App() {
  return (
    <main>
      <h1>Our Input: </h1>
      <input placeholder="Type..." type="text" />
    </main>
  );
}

export default App;Code language: JavaScript (javascript)
Step 2 – Creating a State Variable
Next up, we create ourselves a state variable.
const [inputValue, setInputValue] = useState("")Code language: JavaScript (javascript)Currently, the state variable inputValue contains an empty string. We are going to change that in a second.
import React from 'react';
import { useState } from 'react'
import './App.css';

function App() {

  const [inputValue, setInputValue] = useState("")

  return (
    <main>
      <h1>Our Input: </h1>
      <input placeholder="Type..." type="text" />
    </main>
  );
}

export default App;Code language: JavaScript (javascript)
Step 3 – Displaying our Data
Let’s quickly add that data display so we are able to see what we actually do. The only thing I do here is pass the yet to be filled inputValue into our <h1> tag.
<h1>Our Input: {inputValue}</h1>Code language: HTML, XML (xml)import React from 'react';
import { useState } from 'react'
import './App.css';
function App() {
const [inputValue, setInputValue] = useState("")
return (
<main>
<h1>Our Input: {inputValue}</h1>
<input placeholder="Type..." type="text" />
</main>
);
}
export default App;Code language: JavaScript (javascript)Step 4 – Get Values from Input in React
Time to get to the point.
To get the value out of our input field, we need to first know where we find this value.
We have two options to do that: using an anonymous function, or, by creating a handler function.
Since the latter makes more sense for beginners (at least I think), we shall start with that.
Creating a Handler Function
const handleInputChange = (event) => {
    setInputValue(event.target.value)
  }Code language: JavaScript (javascript)
And then we need to create a onChange listener as an HTML attribute on our input field.
I also create the value HTML attribute for good practice, and in case we later want to clear the input field by a click on the submit button.
<input value={inputValue} onChange={handleInputChange} placeholder="Type..." type="text" />Code language: HTML, XML (xml)import React from 'react';
import { useState } from 'react'
import './App.css';
function App() {
const [inputValue, setInputValue] = useState("")
const handleInputChange = (event) => {
setInputValue(event.target.value)
}
return (
<main>
<h1>Our Input: {inputValue}</h1>
<input value={inputValue} onChange={handleInputChange} placeholder="Type..." type="text" />
</main>
);
}
export default App;Code language: JavaScript (javascript)So what do we do here?
- Create
handleInputChangefunction to utilizesetInputValueto set ourinputValuestate to whatever we type. - We add the
valueand theonChangeattributes to our input field. Then we call thehandleInputChangefunction every time the input changes. We also set thevalueof the input field to be the string stored in ourinputValuestate variable. - Since we call the function in our
onChangeHTML attribute, we have access to theeventinside of ourhandleInputChangefunction. - Now we set the
inputValuestate toevent.target.value(As you would using plain DOM JavaScript)
That was quite a mouth-full, wasn’t it?
Don’t fret if you don’t get it the first time, I did not get it either 🤦♂️.
Important is you are able to trace the chain of events (pun intended). You can go ahead and try it out now, whatever you type shall be reflected in our DOM.

Sweet!
Using a Anonymous Function
Of course, as always when coding in JavaScript, there is a shorthand for everything…
The same thing, but much shorter.
<input value={inputValue} onChange={(event) => setInputValue(event.target.value)} placeholder="Type..." type="text" />Code language: HTML, XML (xml)import React from 'react';
import { useState } from 'react'
import './App.css';
function App() {
const [inputValue, setInputValue] = useState("")
return (
<main>
<h1>Our Input: {inputValue}</h1>
<input value={inputValue} onChange={(event) => setInputValue(event.target.value)} placeholder="Type..." type="text" />
</main>
);
}
export default App;Code language: JavaScript (javascript)As you can see, we removed the entire handleInputChange function and did the same thing directly inside of the onChange attribute, using an anonymous function.
Conclusion
This is it. This is how to get values from input in React. I hope I was able to explain it in an easy-to-understand way. Let me know in the comments below!

